Mini Skillet Strawberry Shortcakes
Recipe by Sarah Phillips and Kelly Hong; Food styling and photos by Kelly Hong © 5-25-2013 Sarah Phillips CraftyBaking.com
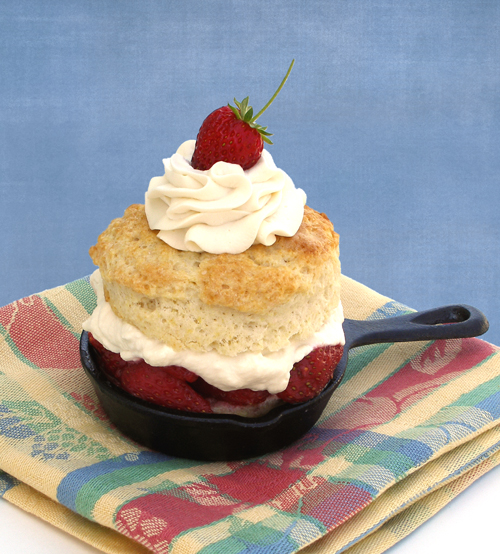
There's something undeniably comforting, and American, about strawberry shortcake. It puts me in the mood for any celebration. Popularized in the United States during the mid-1800s, it is traditionally made with a split baking powder biscuit filled with plenty of sweet and juicy sliced strawberries and a generous dollop of whipped cream. It is then topped with more whipped cream and strawberries and served right away.
This is our favorite recipe for this all-American classic, with the biscuits baked right in mini cast iron skillets, and then filled and topped for a delightful presentation. See below to learn how to bake "mile-high," flaky biscuits. Alternatively, you can bake the biscuits on a baking sheet if you don't have mini skillets.
QUICK-BREAD RECIPE HELP
KELLY SAYS: "Prettiest and flakiest biscuit I ever made."
Secrets
Think cold and hot when making biscuits!
Cold butter (or other fats) and the flakiness of the pastry are intricately connected. Because butter has such a low melting point, it must be well-chilled to ensure that it can withstand being rolled and handled without melting to produce flakiness.
On the other hand, make sure your oven is preheated and hot well in advance of baking so the biscuits can rise quickly and set. I found that preheating the oven to a high heat, then lowering it after they go into the oven causes the biscuit dough to rise quickly from the initial blast of heat, then bake more slowly so they are tender and moist and don't harden.
INGREDIENTS
You will need:
Six 3 1/2-inch Lodge Logic LMS3 Miniature Skillets
Vegetable oil, for brushing the skillets with
1 recipe Strawberry Compote, below
1 recipe Tender and Flaky Sweet Biscuits, below
1 recipe Whipped Cream, below
STEP I: MAKE THE STRAWBERRY COMPOTE
STRAWBERRY COMPOTE
INGREDIENTS
1 pound fresh strawberries, quartered or 4 cups thawed frozen strawberries
1/3 cup sugar
1 teaspoon freshly squeezed lemon juice
INSTRUCTIONS
1. Into a large bowl, slice the strawberries.
2. Toss the strawberries with sugar and lemon juice.

3. Cover and refrigerate until the strawberries give off some juices, at least 2 hours or overnight. Stir before using.

STORAGE
The berries will keep, refrigerated, for about a day or two. Stir before using.
STEP II: MAKE THE TENDER AND FLAKY SWEET BISCUITS
TENDER AND FLAKY SWEET BISCUITS / Recipe alone
Makes 6 Skillet Biscuits for Strawberry Shortcake
NOTE: You can bake the biscuits on an UNGREASED baking sheet, if desired. See Recipe for instructions.
INGREDIENTS
1/2 cup (1 stick) unsalted butter, cold or vegetable shortening, room temperature; cut butter into small pieces and chill, see NOTE*, below
2 cups unbleached all-purpose flour; spoon into dry measuring cup and level to rim
3 tablespoons granulated sugar, plus extra for sprinkling on the tops of the biscuits
4 teaspoons baking powder
1/2 teaspoon salt
1/2 cup (or more if needed) heavy cream, cream, half and half or whole milk, cold, plus extra for brushing the tops of the biscuits for a golden brown color.
NOTE: Brushing instead with a thin coat of melted butter promotes darker browning.
*NOTE:
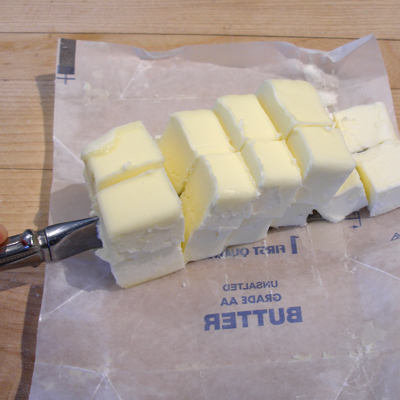
Cut cold stick butter into small, evenly sized pieces and refrigerate it for 30 minutes or freeze it for 10 minutes until cold.
SARAH SAYS: To cut butter into small pieces, equal in size, cut a cold, unwrapped stick of butter in half horizontally and then in half vertically. Stack the butter strips in its original shape. Cut butter along the one tablespoon mark as indicated on the wrapper.
If using shortening, use tablespoon size amounts. There's no need to chill it beforehand.
INSTRUCTIONS
1. Position the oven rack in the center of the oven and preheat the oven to 425 degrees F.
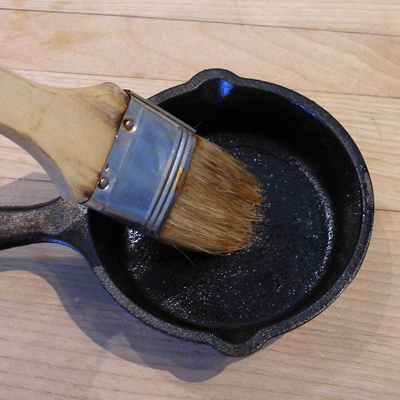
2. Prepare the mini skillets by brushing them LIGHTLY with vegetable oil.
NOTE: This is just an insurance policy. The biscuits should not stick in a well-seasoned skillet.
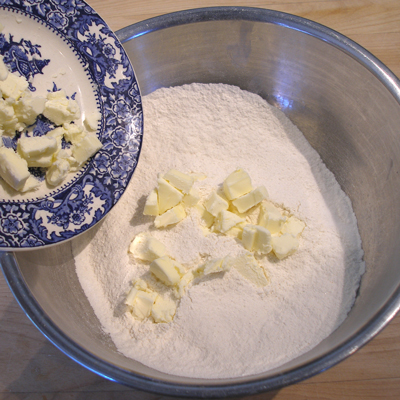
3. In a medium bowl, combine the flour, sugar, baking powder and salt. Set aside.


4. Sprinkle the chilled butter pieces over the flour and toss with a fork.
5. Cut the butter into the dry ingredients with a fork, Bench Scraper, two knifes (in a scissor motion) or a pastry blender until the butter pieces are the size of small peas.

6. With your fingertips press the butter into the flour so it forms large flakes. Continue until the flour looks shaggy and the butter pieces are evenly distributed throughout.
You should have pea size and small size lumps of fat.
SARAH SAYS: If the butter starts to get greasy, it is melting and getting too soft, chill the mixture for 15 to 20 minutes before proceeding.


7. Drizzle a small amount of the heavy cream over the dry ingredients while at the same time tossing with a fork.
SARAH SAYS: Make sure the cream is cold.

Make sure you reach down into the bottom of the bowl with the fork to work in the heavy cream before adding more.

8. Repeat adding heavy cream until the dough starts to look clumped together and sticky.
9. Stop mixing when the dough reaches this look. You may need more or less heavy cream. It's ok if you do.

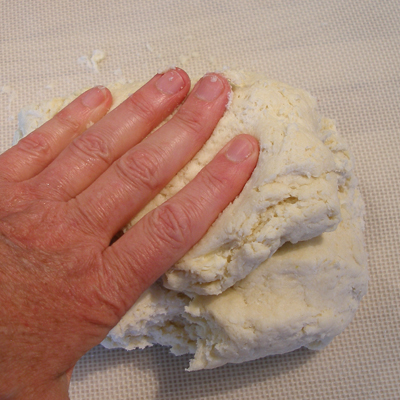
10. Turn the dough out onto an unfloured work surface or silpat mat. Gently press the dough together with your fingertips.
When you gather the dough together, it will barely stick together. Knead the dough so it comes together better, but not so much that the dough becomes too damp.

11. Knead the dough 30 times, no more: kneading or manipulation of the dough, which involves mixing, kneading and folding into layers of fat and flour, gives a layered and flaky crumb.
The dough must be kneaded sufficiently to develop enough gluten to obtain the desired flaky texture.
To knead: Do not add any flour to the kneading surface.
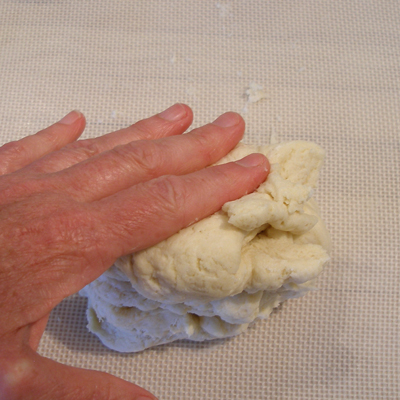
First, bring the dough together with both hands by lightly pressing it together.
Then, fold dough in half and lightly press.

Then turn the dough a quarter turn and lightly press the dough and fold, again. Repeat this until you have kneaded 30 times.
The resulting dough will be cohesive and soft, slightly elastic and bumpy, but not sticky or dry.
Be careful -- over-kneading toughens the biscuits.
12. Lightly pat the dough into a rough ball.
SARAH SAYS: If I cut a cross section of the ball, it would have flaky layers inside.

13. Gently pat or roll the dough to about a 3/4-inch thickness.

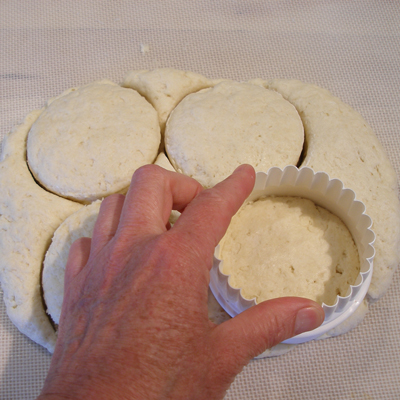
14. Cut dough with a 3-inch cutter: Use one with a sharp edge to make a clean cut.
Start at one edge of the dough and keep the cuts close to each other to prevent a lot of scraps. (Scraps do not rise as high as the original dough does).
Cut straight through the dough, don't twist. This helps to make a high rising biscuit because it doesn't seal the edges of the biscuit from the twisting action, allowing it to rise freely.
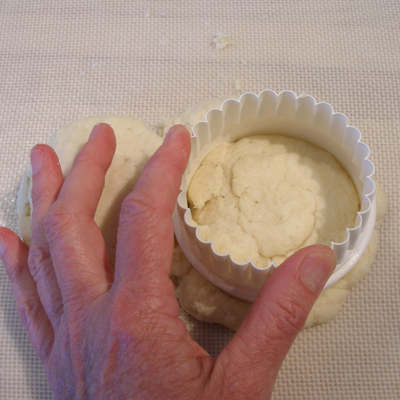
15. Remove the dough scraps.
Stack scraps on top of each other and press to 3/4-inch thick rectangle. Cut out two additional shortcakes from these scraps.
They will not rise as high as the original biscuits, but they will still be flaky.

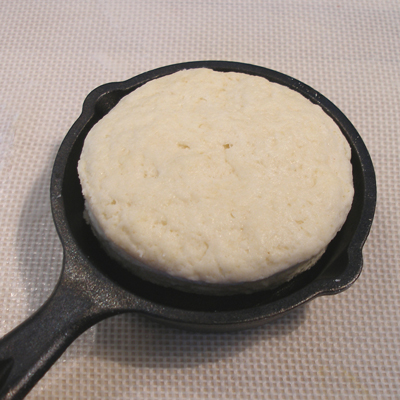
16. Lift cut-out biscuit dough gently with your fingertips, trying not to distort the circle and place them in the prepared mini skillets.
Place the skillets on a baking sheet. This makes putting them in the oven, and taking them out, much easier.


17. Brush the tops with heavy cream (promotes a golden brown color) and sprinkle with sugar. (Brushing instead with a thin coat of melted butter promotes darker browning.)

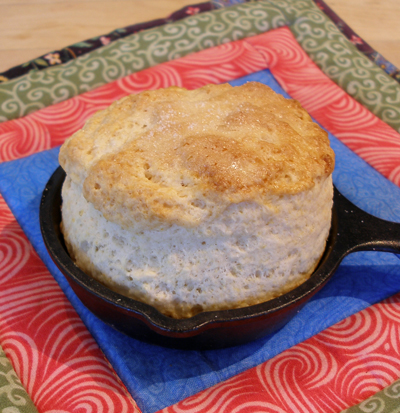
18. Place biscuits in oven and immediately reduce the oven heat to 350 degrees F. Bake for 15 - 20 minutes.
Bake until the tops are just lightly browned and the bottoms are a slightly darker color. The biscuits should triple in height.

19. Remove from the oven and let cool in skillets for a few minutes, then remove the biscuits from the skillets and let them cool completely on a wire rack.
NOTE: Set the empty skillets aside to cool on a wire cake rack because you will need them later for serving the strawberry shortcakes in.


STORAGE
Biscuits stale quickly, so store any leftovers as soon as they cool in an airtight container at room temperature for up to 1 day. They will be harder than the day before. Reheat by placing them on an ungreased cookie sheet in a 350 degree oven for about 10 minutes; watch carefully so they don't burn.
Biscuits can be frozen, either partially or fully baked for no longer than 2 months. To freeze fully baked biscuits, cool them to room temperature and immediately place in plastic freezer bags, pushing out as much air as possible. To thaw, let biscuits sit at room temperature about one hour, unwrap and reheat in an oven.
To freeze partially baked biscuits, make the dough and bake only until the biscuit has risen but isn't beginning to color. Remove from the oven and cool, then wrap and freeze. When you're ready to bake, preheat the oven to 375 degrees F and finish baking the biscuits until the tops are golden.
To freeze biscuit dough, prepare and cut the biscuits according to the recipe directions. However, be aware that they won't rise as high when baked because the leaveners become weaker the longer they are stored. Freeze uncovered on a cookie sheet for about 1 to 2 hours, then place in freezer bags or stack in an airtight container with a piece of waxed paper between each biscuit. Cover and freeze for up to four weeks. Thaw biscuits unwrapped at room temperature, about an hour. Bake in a preheated 425 degrees F oven for about 20 to 25 minutes.
STEP III: MAKE THE WHIPPED CREAM
While the biscuits cool.
WHIPPED CREAM
INGREDIENTS
2 cups whipping or heavy cream 36 to 40% butterfat(read carton label), well chilled
2 to 3 tablespoons confectioners' sugar, superfine or regular sugar
2 teaspoons vanilla extract
INSTRUCTIONS
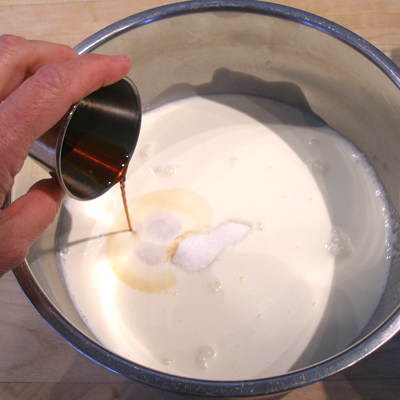
1. In a mixing bowl, add the cream, sugar and vanilla extract.

2. Using a hand-held electric or stand mixer, beat on low-speed until small bubbles form, about 30 seconds, and then increase the speed to medium and then to high.
NOTE: Move the beaters up and down and around the side of the bowl while whipping if using a hand-held mixer.
With a rubber spatula, scrape down the side of the bowl often.

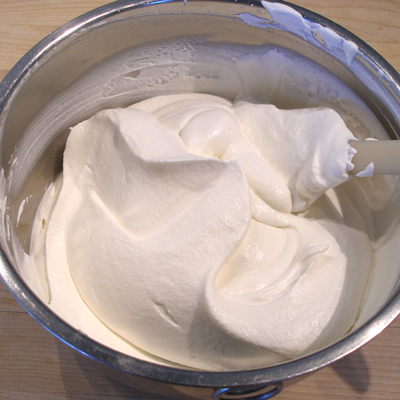
3. Stop whipping when the cream has doubled in volume, is smooth, thick and is billowy when the beaters are raised. In this picture I have scraped together the whipped cream into the center of the bowl.
4. Whipped cream is best made the day of use.
STORAGE
If storing, cover and refrigerate for up to 24 to 36 hours. If the cream separates in the refrigerator, whisk the cream together again with a large wire balloon whisk until it has come back together (do not rebeat with an electric mixer).
For longer storage, whipped cream can be frozen by teaspoonful on a wax paper lined cookie sheet. When frozen, remove to a resealable plastic bag and place back in the freezer.
STEP IV: ASSEMBLE THE STRAWBERRY SHORTCAKES AND SERVE
1. Cut the cooled biscuits in half with a sharp serrated knife.

2. Place the bottom half of the biscuit in a cooled skillet.
NOTE: If the skillet is slightly warm, it's ok.

3. Place about 1/2 cup of the Strawberry Compote on top of the biscuit bottom, being sure to include some of the accumulated juices in the bottom of the bowl.

4. Spoon a generous dollop of whipped cream on top of the berries.

5. Gently place the top half of the biscuit in place. Do not press too hard or the whipped cream may squish out too much.

6. Spoon or pipe on another dollop of whipped cream, then top with more strawberry compote or a small, perfect strawberry, it you want to be fancy. ![]()
Serve immediately.
NOTE: I used a Wilton 1M piping tip here.


STORAGE
Fully assembled Strawberry Shortcakes are meant to be served immediately and do not store well -- the whipped cream breaks down, the strawberries become mushy and the biscuits stale. If you do, because the whipped cream is perishable, they must be stored in the refrigerator until serving time.