

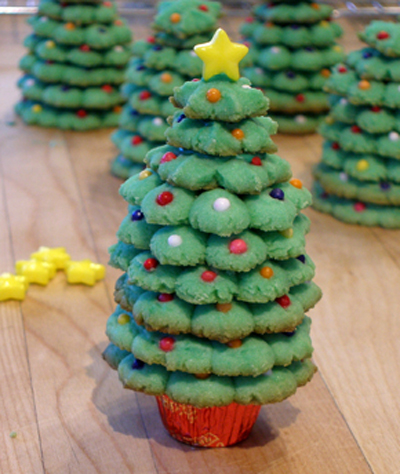
I wanted to do something a little different with spritz cookies for the holidays so I made these delightful miniature Christmas trees. They stand 3 1/2 to 4 inches tall, are completely edible, and make great gifts. I'll show you, step-by-step, how to make them below!
COOKIE RECIPE HELP
INGREDIENTS
You will need:
1 recipe Spritz Cookie dough, tinted green; I added about 4 drops of AmeriColor green gel paste food coloring to color these cookies.
1 box Wilton Brand Gingerbread House Holiday Candies Assortment – for the Candy star tree toppers

1 tube Wilton Brand Jumbo Nonpareils – for the ornaments on the trees.

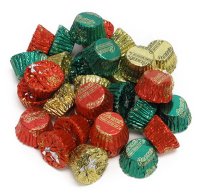
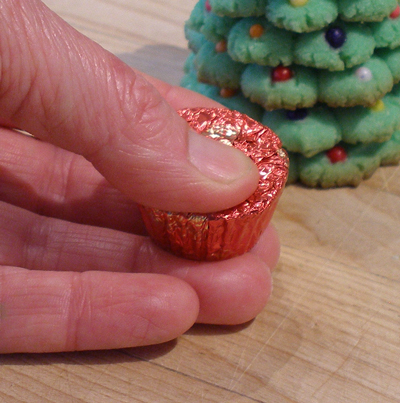
1 bag Reese's Brand Peanut Butter Cups Miniatures or Miniatures Holiday Foils (pictured below) – keep wrapped for the tree stands.

1 (12oz) bag Green Wilton Candy Melts
Equipment:
One disposable plastic piping bag
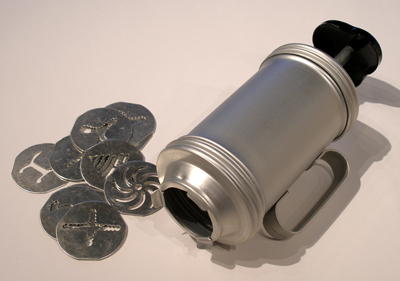
One Cookie Press that uses a screw mechanism and has dies similar to the ones pictured below.
One microplane
One set tweezers
INSTRUCTIONS
STEP I: PRESS THE COOKIES WITH THE COOKIE PRESS
1. You will use UNGREASED cookie sheets. Make sure they are NOT covered with parchment paper or nonstick mats.
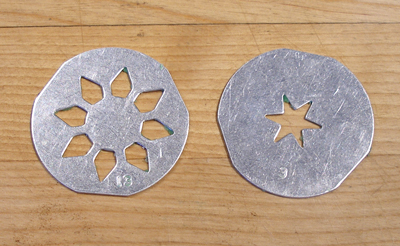
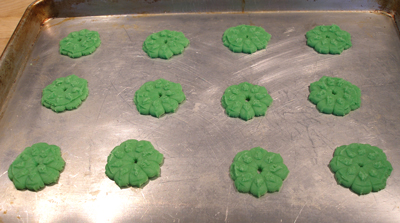
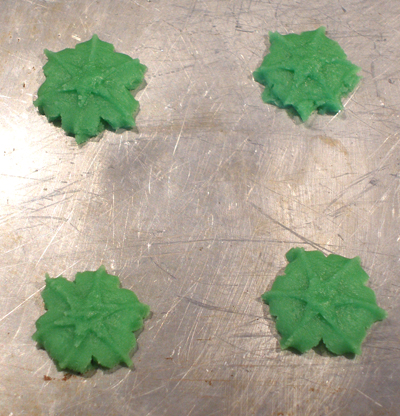
2. Fill your cookie press, with the dough and put the wreath-like die(the one pictured on the left, above) in place.
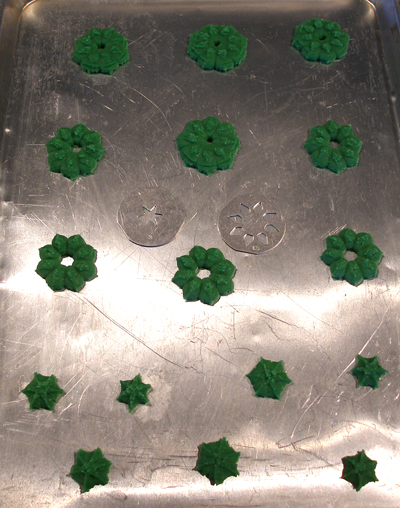
This cookie sheet is just to show you the various sizes you will need to make the cookie trees.
The top three layers of cookie shown on the sheet below were made with the wreath die.
For the top layer, I turned the handle 1 1/2 turns.
The second layer was 1 turn.
The bottom two rows were made with the star die.
The larger one was made by turning the handle 1 1/4 turns.
The smaller ones were with one turn.
2. To make the bottom two layers of the cookie trees, you will need the largest cookies pictured above.
Turn your cookie press until you can see the dough just peaking out of the sides of your press.
With my press, that was 1 1/2 turns of the handle.
Make one full sheet(12 cookies) of this size. There will be slight variations in size. Don't worry, that's what we want for this project.

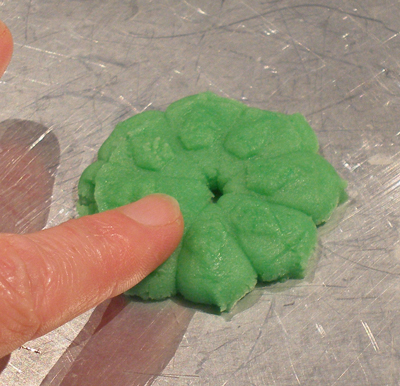
3. Gently tap down any really high spots on the cookies, so they are all even on top.
Place tray with cookies in the refrigerator while you press out the rest of the cookies.
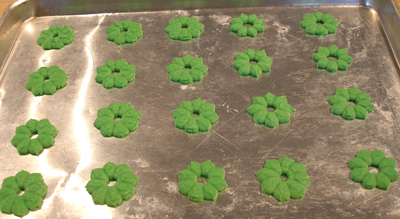
4. Next, press out a sheet of the mid-sized cookie.
With my press, and I think with MOST presses, this will be one turn of the handle.
Tap down any high spots, as you did with the larger cookies.
As you can see, there are slight variations in size. Again, this is GOOD.
Press out TWO sheets of cookies of this size, and make sure to make some that are slightly smaller than others. This will help when you go to stack up your trees.
Place trays of cookies in the fridge while you press out the last tray of cookies.
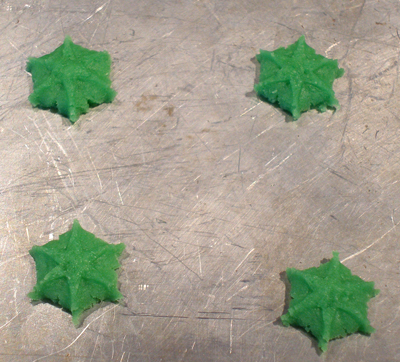
5. Change die on your cookie press to the star die.
Pipe out three rows of cookies that are larger. With my press, it was about 1 1/4 turns.
Pipe out three rows of smaller cookies. With my press, it was 1 turn. You want to try to make some of these very small, because they will be the very top layer of the trees.
Tap down the centers of all the star cookies so they don't have any really high spots.
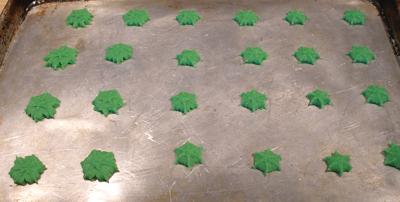
-Larger size:
-Smaller size:
6. Remove one tray of cookies from the refrigerator, and place the star cookie tray in the refrigerator.
Pour some Wilton Brand Jumbo Nonpareils in a small bowl and, using tweezers, place the sprinkles on the very tips of the cookies, all the way around, and gently press them into place. Try to place the colors randomly, so the color distribution is balanced.
When one sheet is done, place it back in the refrigerator, and do another one, until all the cookies are done.


STEP III: BAKE THE COOKIES. ASSEMBLE THE COOKIE TREES.
Bake:
Because the cookies vary in size, you will need to bake the larger cookies longer, and the smaller cookies for a shorter time.
1. Position and oven shelf to the middle of the oven. Heat the oven to 350 degrees F for 20 to 30 minutes before baking the cookies.
2. The larger cookies will take about 10 minutes.The medium cookies, 8-9 minutes and the small cookies about 6 minutes. Keep an eye on them, because they can go from perfect to “DARN!” very quickly.
3. Cool the cookies on the pans for a few minutes, then carefully remove them, with a metal spatula, to a rack, to cool completely.
Assemble:
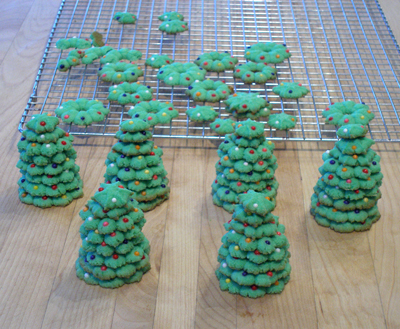
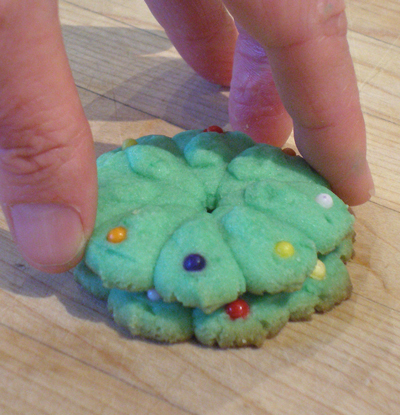
1. When the cookies are cool, sort them into similar sizes and begin to stack up your trees. Be careful because the cookies are fragile.
Most trees will end up with 8 layers, and some will have 9. It just depends on the variety of sizes you end up with.
Use the largest possible cookies for the very bottom row, then add a slightly smaller one for the second row.
The 3-6 layers will be made from the medium-sized cookies. Use the largest ones from the 3rd layers on your trees, and use the smallest ones for the 6th layer.
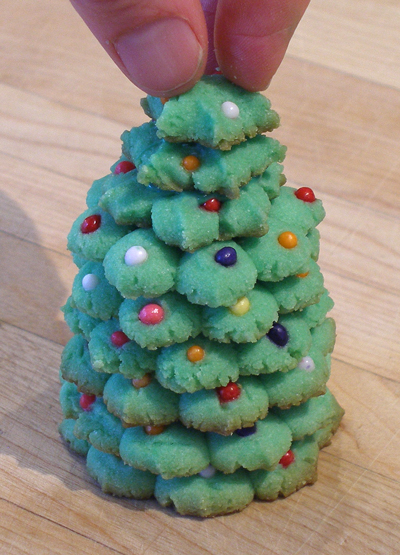
The top two layers of the trees were made with the star cookies. Save the smallest of all for the very top layers of your trees.
I was able to make 6 trees, but had a few cookies left over, as you can see in the picture below.
2. Melt about 1 cup of green Wilton Candy Melts, according to the package directions, and place it in a disposable piping bag.
If your Candy melts start to get too thick at any point in the process, just pop the bag into the microwave and warm it for about 20 seconds to get things moving again.
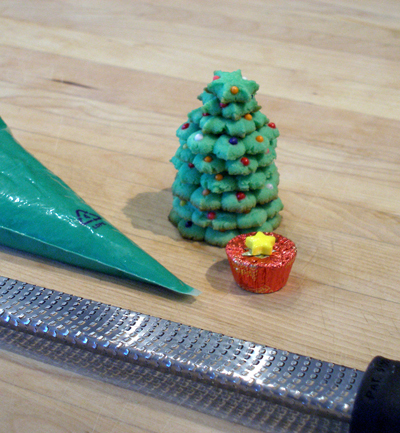
3. Take one cookie tree stack, one candy star from the Wilton Brand Gingerbread House Holiday Candies Assortment, and one WRAPPED Reese's Brand Peanut Butter Cups Miniature.
You will need a microplane, too. Begin assembly.
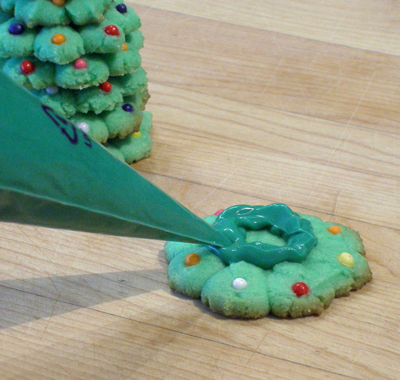
4. Take the bottom cookie from the tree stack and pipe a bead of candy melts near the center of the cookie, then place the next cookie in the stack on top, pressing gently to adhere.
When placing the cookies, make sure to stagger the points on the ends of the cookies so that the points on the top cookie do not line up with the points on the cookie beneath it.
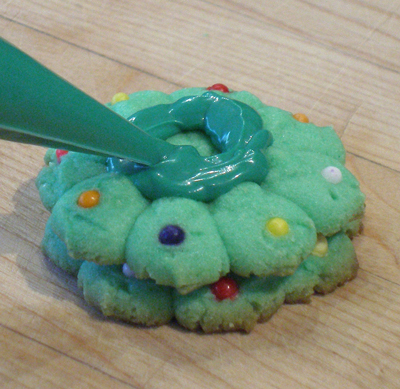
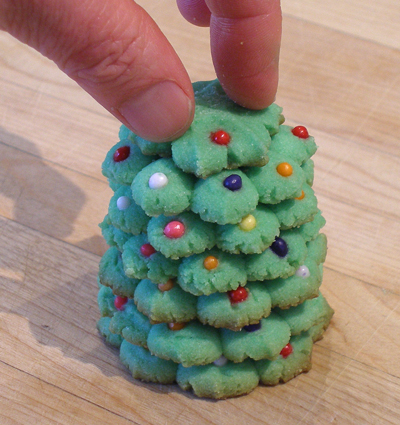
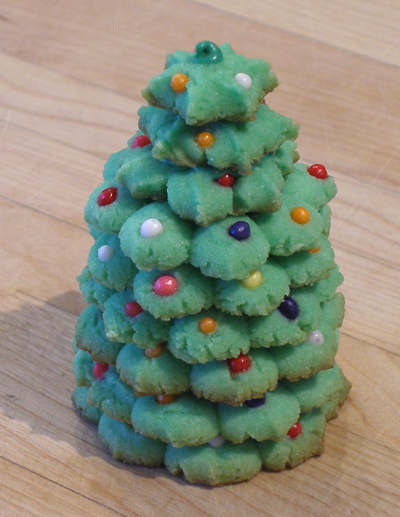
5. Keep piping and stacking until all of the wreath cookies in the cookie stack are assembled.
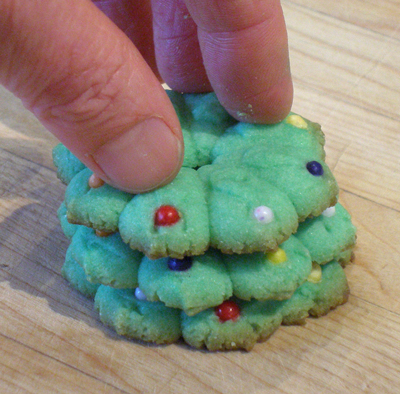

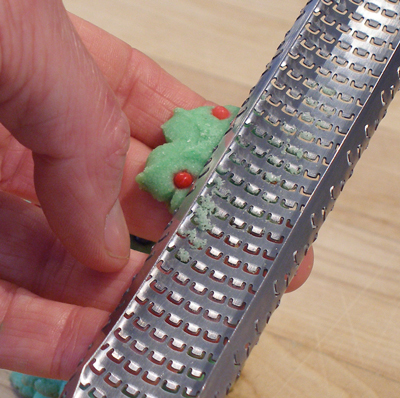
6. When you place the star cookies on the tops of the trees, you may have to remove a little bit from the center of the cookie with a microplane so the cookie on top will stack evenly.
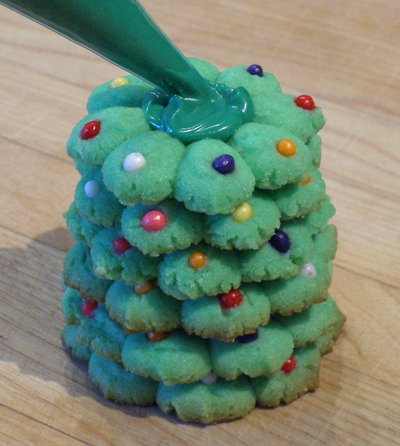
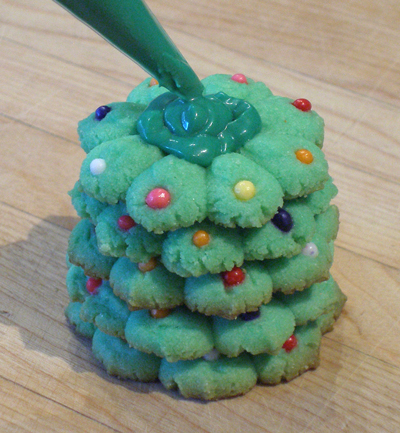
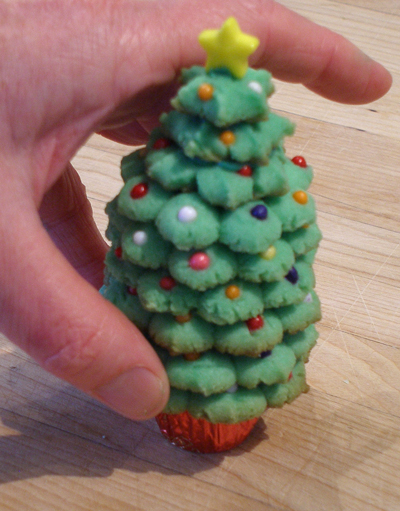
7. For the very top cookie, pipe a very small bead of candy melts on top, then place the cookie.
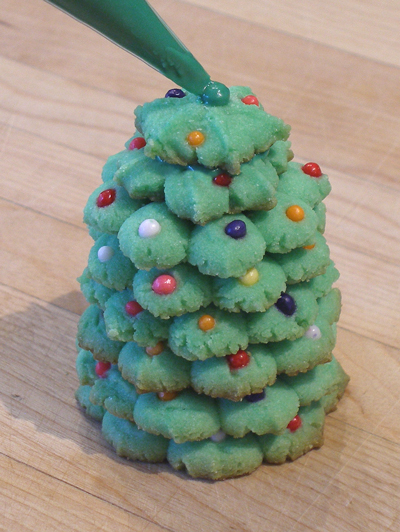
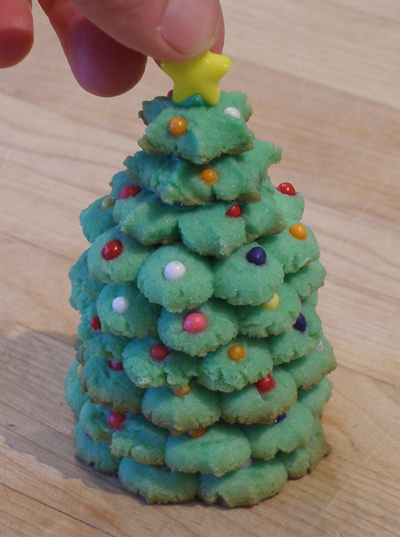
8. Pipe a tiny dot of candy melts on the top of the cookie and gently press the candy star in place.
9. Set tree aside, and repeat the steps above until all of the trees are assembled.
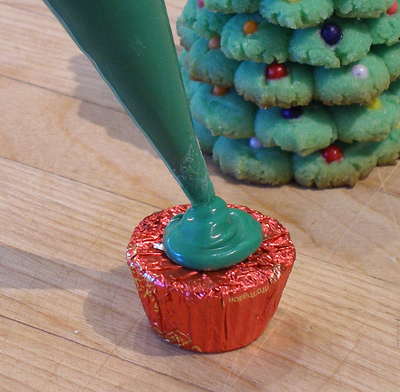
10. When you are all done, take the first tree you made(to make sure the candy melts have set), and 'glue' it to the Reese's Peanut Butter Cup Christmas tree stand.
Gently press down the foil on the top of the Reese's Peanut Butter Cup to make sure the surface is nice and flat.
Pipe some melts in the center of the Reese's Peanut Butter Cup and set the cookie tree in place, making sure it is centered.
STORAGE
Store in an airtight container for up to 2 weeks at room temperature. Wrap carefully because the trees are fragile.