
Variation: Whole Wheat No-Knead (Really, Automatic Knead ) Bread
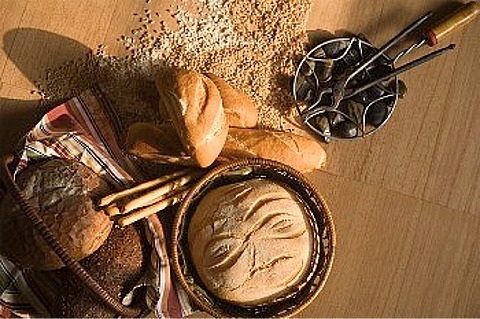
stock photo
QUESTION: What are No-Knead Breads?
SARAH SAYS: It’'s where you let the fermentation process, in a sense, knead the bread dough for you, although hand-kneading does it faster. I think the recipe's should be called Automatically Kneaded Breads, instead or No Knead because they are, in fact kneaded! Very moist dough, made from a simple mixture of bread (or all-purpose) flour, yeast, water and salt, is left alone to ferment, some 12 to 18 hours at room temperature (preferably 70 degrees F), and then folded one or two times, rather than go through a lengthy kneading process. It is rested and then, shaped, and allowed to rise another two hours. It is baked in a very hot oven. There are lots of variations, of course.
The bread dough has to be well-hydrated for this to work. The carbon dioxide bubbles produced by fermentation raise the dough and also cause it to have a holey, sponge-like appearance. The bubbles also bounce around the wheat flour’s hydrated protein molecules called gliadin and glutenin, whereby they hook up and form long elastic gluten strands.
There are several advantages to No-Knead Breads: Certain flavorful carotenoid compounds in unbleached flour that are normally lost through oxidation during vigorous kneading are preserved. Long, slow fermentation actually boosts the digestibility of grains and seeds, as well as enhancing flavor and resulting in more irregular air holes and crustier crusts, depending on the type of ingredients used.
BREAD RECIPE HELP
INGREDIENTS
3 cups bread flour, more for dusting; preferably Harvest King bread flour (Gold Medal). You can substitute with unbleached all-purpose, if necessary.
1/4 teaspoon instant active dry yeast
1 teaspoons salt
1 1/2 cups lukewarm tap water
Cornmeal or wheat bran as needed.
NOTES:
Time: About 1½ hours plus 14 to 20 hours rising
INSTRUCTIONS
1. In a large bowl combine flour, yeast and salt. Add water, and stir until blended; dough will be shaggy and sticky. Grease the top of the bread with vegetable oil spray.
Cover bowl with plastic wrap. Let dough rest at least 12 hours, preferably about 18, at warm room temperature, about 70 degrees F.
SARAH SAYS: it's the high ratio of water to flour that creates the huge air holes in the bread.
2. Dough is ready when its surface is dotted all over with tiny air bubbles.
Lightly flour a work surface and place dough on it; sprinkle it with a little more flour and fold it over on itself once or twice.
Cover loosely with greased-side-down plastic wrap and let rest about 15 minutes.
SARAH SAYS: Folding the dough is akin to kneading the bread dough. It helps incorporate air bubbles in the recipe and aligns the gluten strand network. This is typically done with very moist and fully-hydrated dough.
3. Wet your hands and then, gently and quickly shape the dough into a ball / blob. To do, grab the dough and fold over all ends towards the middle. Turn dough ball over so that you get a nice, smooth, tight surface. Tuck the dough ends under to get that taut surface.
SARAH SAYS: A small amount of water will prevent the very sticky dough from sticking to your hands. Wet hands again, when necessary, but don't make them dripping wet. Do not use flour on your hands when shaping the dough.
Generously coat a cotton towel (not terry cloth) with wheat bran or cornmeal; put dough seam side down on towel and dust with more flour, bran or cornmeal.
SARAH SAYS: I like to dust the cotton towel with coarse wheat bran or a mixture of oat bran and ground corn meal.
4. Gently move dough onto a floured towel. Cover and let rise for about 2 hours.
When it is ready, dough will be more than double in size and will NOT readily spring back when poked with a finger.
5. At least a half-hour before dough is ready, position an oven shelf in the lower third of the oven and preheat oven to 450 degrees F.
6. Put a 6- to 8-quart heavy covered pot (cast iron, enamel, Pyrex or ceramic) in oven as it preheats.
SARAH SAYS: The pot should be at least 4-inches tall. I use my 5- or 6-quart Le Creuset enameled cast-iron pot.
If you aren't using a well-seasoned cast iron pan, place a piece of parchment paper in the bottom of it so that the bread won't stick to the bottom.
When dough is ready, carefully remove pot from oven. Slide your hand under towel and turn dough over into pot, seam side up, if possible (it does not really matter how it lands); it may look like a mess, but that is O.K.
Using potholders. shake the pan once or twice if dough is unevenly distributed; it will straighten out as it bakes.
7. Cover with lid and bake 30 minutes, then remove lid and bake another 15 to 30 minutes, until loaf is beautifully browned and sounds hollow when thumped.
If you're uncertain whether the bread is done, carefully turn the loaf out of the pan and measure its internal bread temperature with an Instant Read Thermometer, placed through the bottom of the loaf to its middle. It should reach about 205 – 210 degrees F when done.
SARAH SAYS: Covering the wet bread with a lid for the first 30 minutes of baking inhibits crust formation and allows the bread to expand uninhibited. When the cover is removed, the crust dries out during the last part of baking, so it has time to harden and brown, still in the pot, and the bread is done.
8. Cool bread on a wire cake rack.
STORAGE
The bread will keep at room temperature for 3 days, and may be frozen, airtight, for up to 2 months.
SARAH SAYS: The bread has such high water content, so the crust will need re-crisping – reheat in a 350 degree F oven for 10 minutes.
VARIATION
Whole Wheat No-Knead (Really, Automatic Knead ) Bread: use 75% bread flour and 25% whole wheat flour
Adapted from Jim Lahey, The Minimalist: The Secret of Great Bread: Let Time Do the Work, New York Times (November 8, 2006)