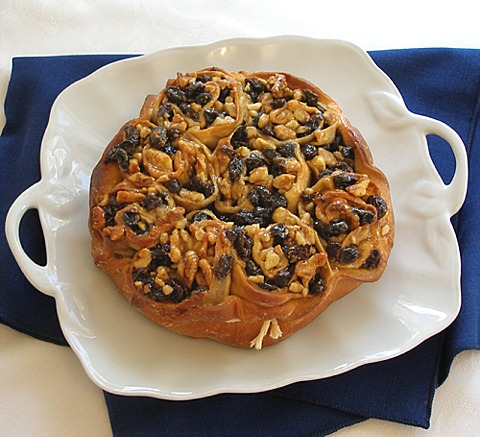
Gluten-Free Pittenguise or Calabrian Christmas Cakes
Recipe by Sarah Phillips and Kelly Hong; Food styling and photos by Kelly Hong © 2010 Sarah Phillips CraftyBaking.com
This delicious Italian pastry made from a gluten free yeast dough, using Sarah's Gluten-Free Mixing Methods, and filled with a delicious mélange of walnuts, raisins, cinnamon and honey, has many names, ranging from pittenguise, Torta Natale della Calabria, and pitta 'mpigliata. It contains no butter, and very little refined sugar, so, as far as desserts go, it's fairly healthful. It is also lactose free!
BREAD RECIPE HELP / GLUTEN-FREE RECIPE HELP
KELLY SAYS: "My grandfather's sister used to give this wonderful pastry to everyone for Christmas; they are traditionally given as Christmas gifts, presented in decorative tins, but they are delicious any time of the year. When she died, unfortunately, the recipe went with her.
Since it was my mother's favorite dessert, I set out to research and rediscover the recipe. I tested and tweaked, and came up with something that my mom said is even better than the original. My brother is Celiac, so I decided to create a gluten-free version of this wonderful recipe. I used Sarah's Gluten-free Mixing Methods and the result was a successful pastry. Gluten-free yeast dough has a different "feel" than ones made with wheat flour; they are not as smooth and cohesive. But, the recipe turns out beautifully if the directions are followed closely and is an easy dough to work with, and not hugely different that regular dough. Taste-wise, there isn't a huge difference, of course, the filling is the star in this recipe, so that's probably a big part of it."
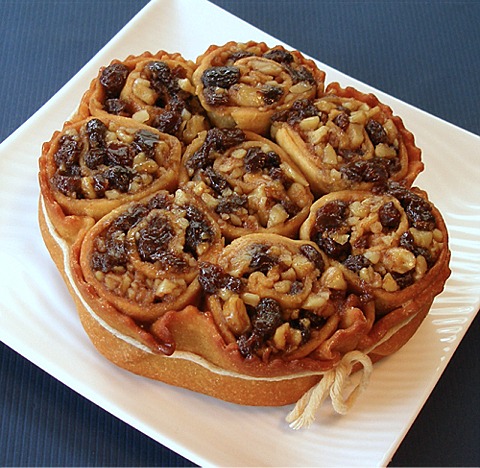
Conventional Recipe - made with wheat flour:
 Pittenguise or Calabrian Christmas Cakes
Secrets
We have tested the recipe using Bob's Red Mill All-Purpose Gluten-Free Flour, which is our preferred blend. We find that we get great results when baking gluten-free recipes with it. You can order it online or find it in your grocery or natural foods stores.
INGREDIENTS
Dough:
2 large eggs, at room temperature
1/2 teaspoon salt
1/4 cup white wine
1/4 cup olive or vegetable oil
1/4 cup sugar
1 teaspoon active dry yeast
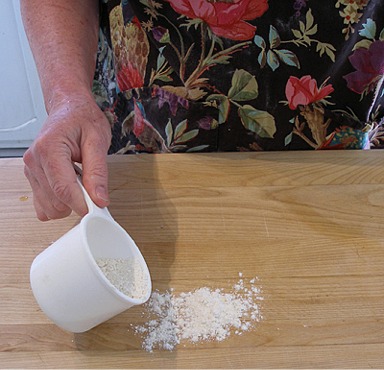
2 1/4 to 2 1/2 cups Bob's Red Mill All-Purpose Gluten-Free Baking Flour, sifted; measure and then, sift - or any Gluten-free flour blend
2 1/2 teaspoons xanthan gum
Filling:
2 1/4 cups raisins
1 3/4 walnuts
1/2 cup honey
1 teaspoon cinnamon
Finish:
1 tablespoon vegetable oil
2 tablespoons sugar
1/4 cup honey
INSTRUCTIONS
STEP I: MIX THE YEAST DOUGH
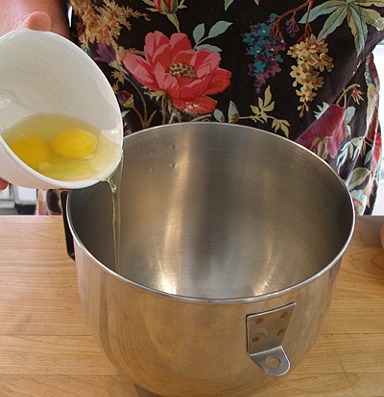
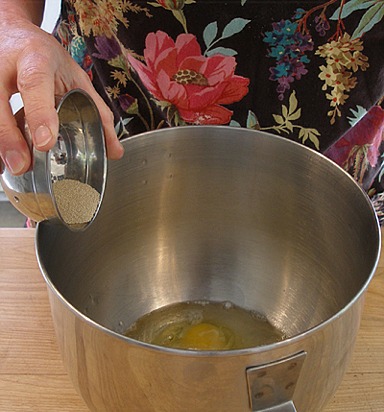
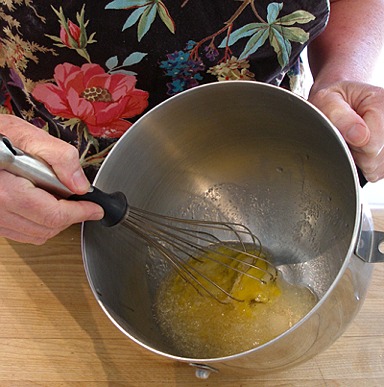
1. In the bowl of a stand mixer, add the eggs, salt, wine, oil, sugar and yeast. Whisk to combine and set aside for 10 minutes, to proof.
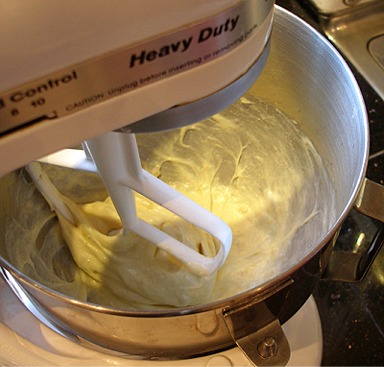
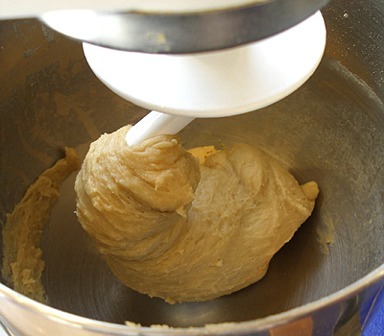
2. With the paddle attachment in place, add two cups of flour, and mix, on low, until smooth, then add the xanthan gum and beat, on high speed for 1 minute. This activates the xantham gum and after one minute, the dough should have strands forming in it, as it is beaten.
SARAH SAYS: I developed this new gluten-free mixing method.
Gluten-free Pittenguise dough:
Versus what Pittenguise dough looks like when using wheat flour:
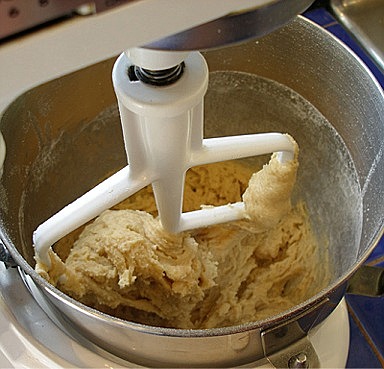
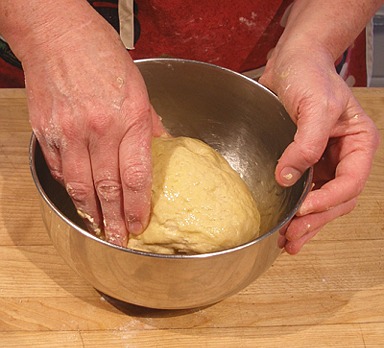
3. Change to the dough hook attachment. With the mixer on low, add 1/4 cup more flour, a tablespoon at a time. Continue mixing for about 3 minutes or until the dough starts
to pull away from the side of the bowl. The gluten-free dough will not wrap itself around the dough hook.
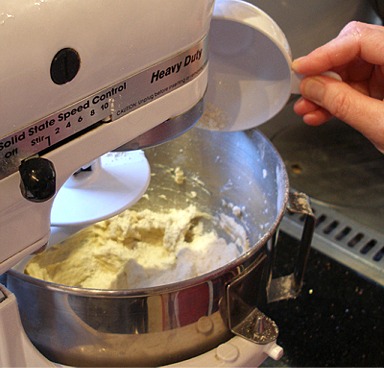
KELLY SAYS: Most likely you will not use the entire 2 1/2 cups flour called for in the recipe.
Gluten-free Pittenguise dough:
Versus what Pittenguise dough looks like when using wheat flour:
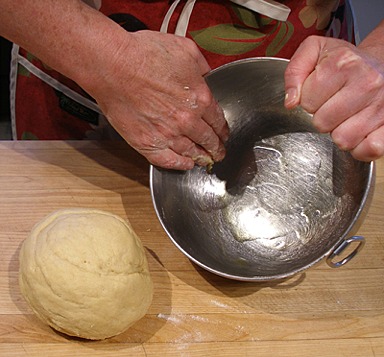
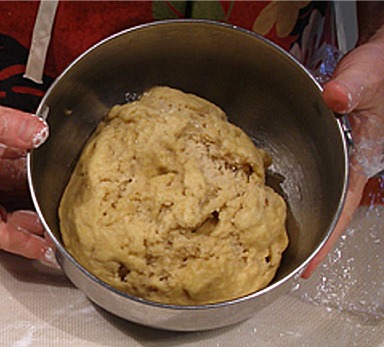
4. Remove the dough to a lightly gluten-free floured surface until dough is not sticky, adding only enough of the remaining flour, so it does not stick to your hands.
The dough will not get as smooth as dough using wheat flour.
Gluten-free Pittenguise dough:
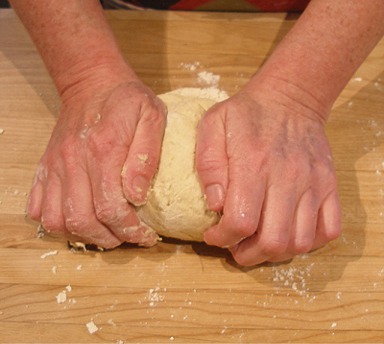
Versus what Pittenguise dough looks like when using wheat flour:
STEP II: LET THE DOUGH RISE, MAKE THE FILLING, AND DEFLATE THE DOUGH
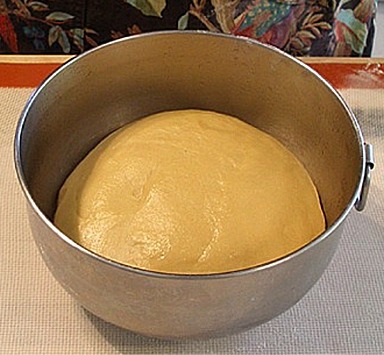
1. Place the dough in an oiled bowl, and turn dough over so the top is covered with the oil.
Cover bowl with plastic wrap and set the bowl aside, in a warm place, to rise slightly - it will not double in size the way yeasted dough made with wheat flour will.
This will take about two hours, due to the small amount of yeast in the recipe.
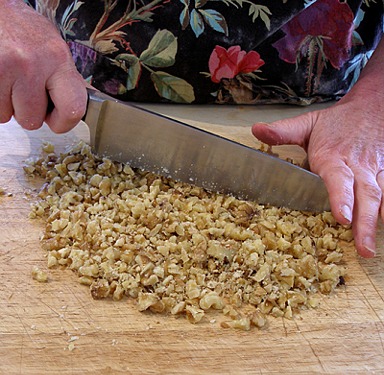
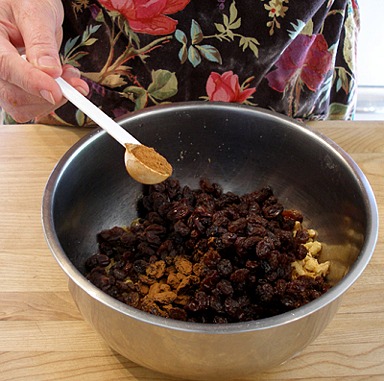
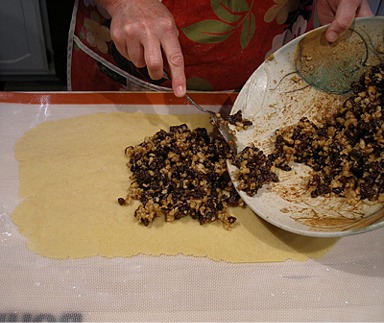
2. While the dough rises, make the filling.
Chop the nuts with a large chef's knife. Do not use a food processor, because you want them to be fairly fine, but not pulverized.
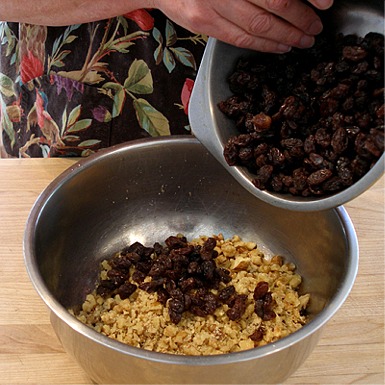
Place the chopped nuts in a large bowl and then add the raisins, cinnamon and the 1/2 cup of honey. Stir to combine.
Place plastic wrap on the bowl, while you wait for the dough to finish proofing.

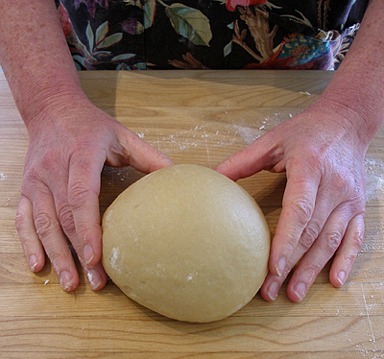
3. When it rises, the dough forms cracks in the surface, rather than looking like a smooth ball of dough.
KELLY SAYS: It's like the dough is rising from the inside out, rather than as a unit. You can see the comparison below:
Gluten-free Pittenguise dough:
Versus what Pittenguise dough looks like when using wheat flour:
STEP IV: SHAPE THE DOUGH
Divide the dough and shape the base:
1. Cut the dough in half with a bench scraper and place 1/2 of the dough under the bowl, while you work with the other half.
Gluten-free Pittenguise dough:
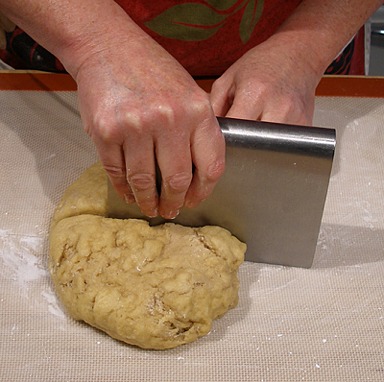
Versus what Pittenguise dough looks like when using wheat flour:
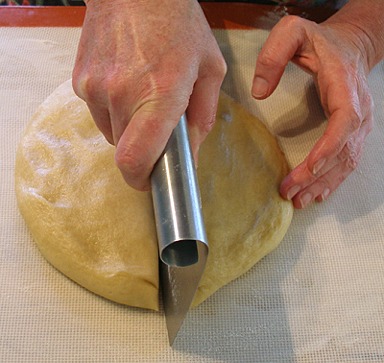
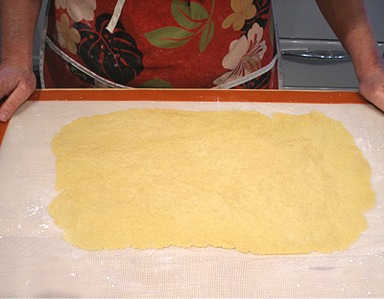
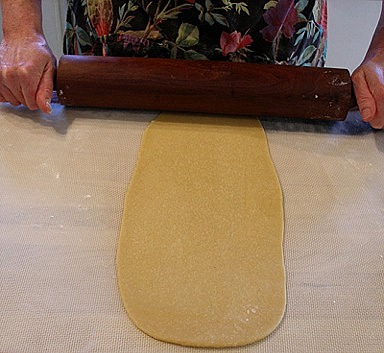
2. Working with 1/2 of the dough, cut it in 1/2 again with the bench scraper.
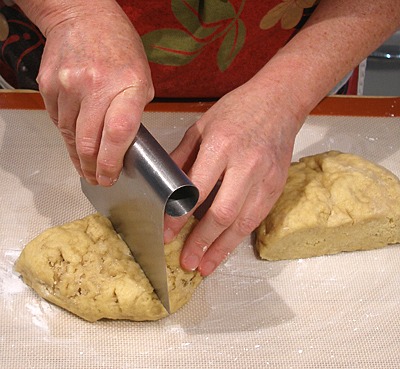
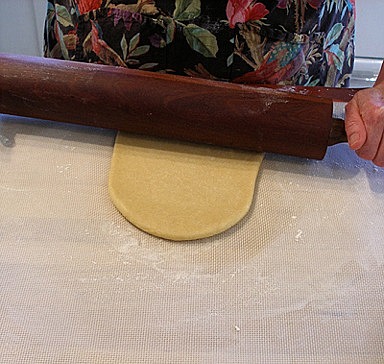
Roll it out, on a lightly gluten-free floured surface, to a 9 inch circle.
KELLY SAYS: When you roll it out, it is not as elastic as the dough made with wheat flour, but it does roll out nicely. It is also not as smooth.
Gluten-free Pittenguise dough:
Versus what Pittenguise dough looks like when using wheat flour:
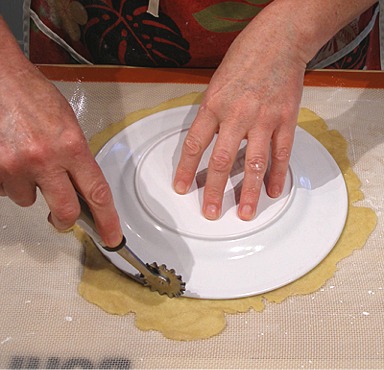
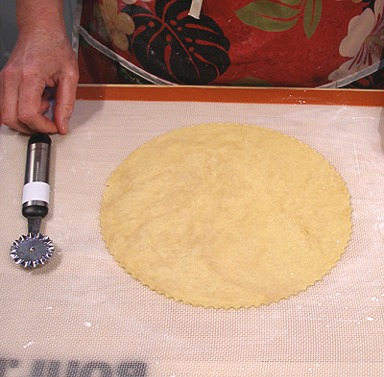
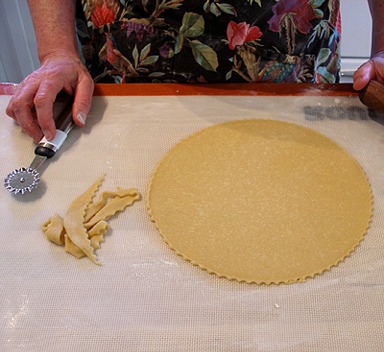
Using a 9-inch plate as a guide, cut out the circle with a pizza cutter or a fluted pastry wheel.
Gluten-free Pittenguise dough:
Versus what Pittenguise dough looks like when using wheat flour:
3. Transfer the circle to a parchment or silpat lined baking sheet, by gently folding it in quarters.
KELLY SAYS: It is not as stretchy as the conventional dough, as you would expect, that is why I chose to fold it in quarters to move it, rather than roll it around the pin.
Gluten-free Pittenguise dough:
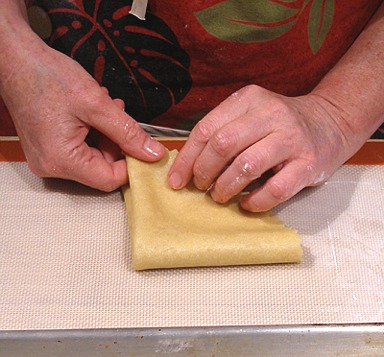
Versus what Pittenguise dough looks like when using wheat flour:
You can transfer the circle to a parchment or silpat lined baking sheet, by lightly wrapping it around your rolling pin. The dough will stretch a little, so the circle will be a bit distorted after you transfer it. Just stretch it with your hands, as best you can, back into a uniform circle.
Try to place the dough to one side of the baking sheet, so you will be able to fit the other pastry on the same baking sheet.
If you are using a small baking sheet, you will have to use two sheets; one for each dough circle.
Unfold the dough. The circle will be a bit distorted after you transfer it. Just shape it with your hands, as best you can, back into a uniform circle.

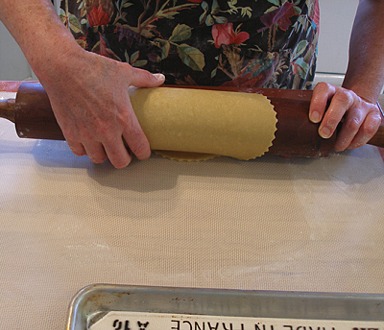
Shape and fill the rolled inside pieces:
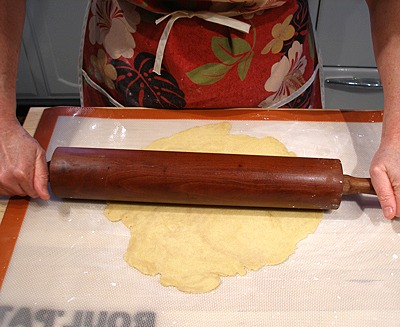
1. Roll out the other piece of dough, on a lightly floured surface, to an 18- x 8-inch rectangle.
The dough will be thin.
Gluten-free Pittenguise dough:
Versus what Pittenguise dough looks like when using wheat flour:
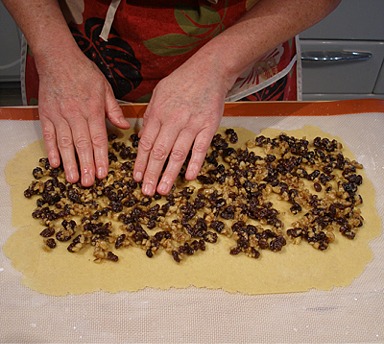
2. Take 1/2 of the filling mixture and spread it evenly over the surface of the dough, leaving about an inch, on the far side, free of filling.
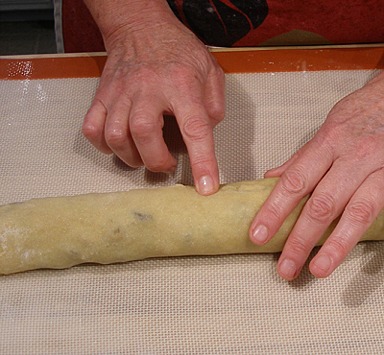
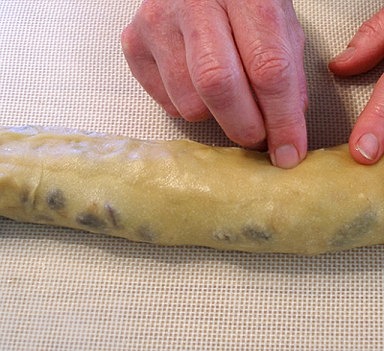
3. Roll up the dough, starting on the long side, into a tight cylinder.
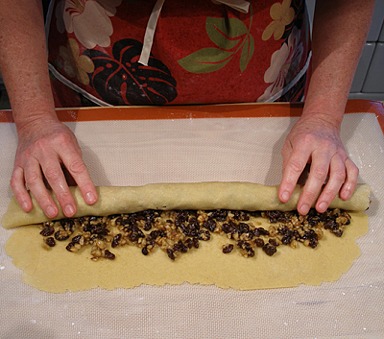
4. Pinch the seam to seal, turn the roll seam side down.
Gluten-free Pittenguise dough:
Versus what Pittenguise dough looks like when using wheat flour:
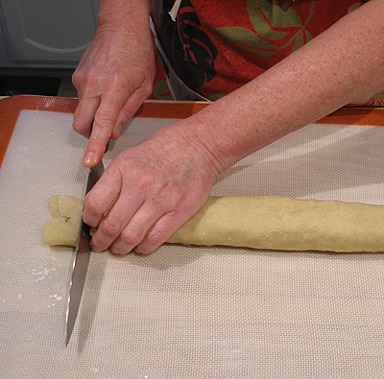
Then, slice it into 8 equal pieces.

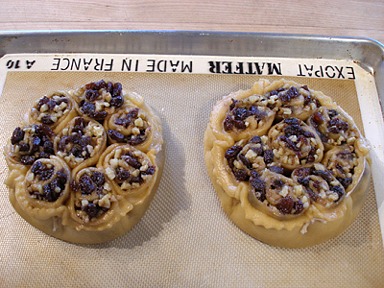
Place the rolled pieces in the middle of the dough disk and fold up the sides:
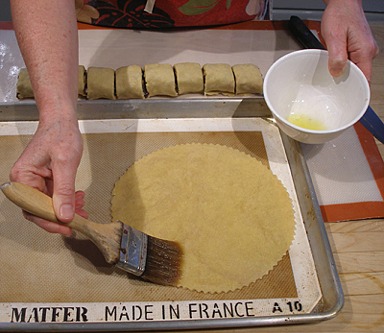
1. Brush the circle with some of the oil and sprinkle with about a 1/2 tablespoon of sugar.
Spread the sugar evenly over the surface of the dough, with your hand.
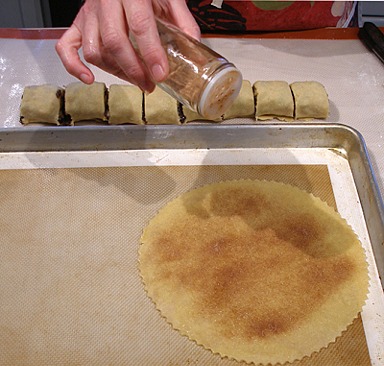
2. Place one of the eight slices in the center of the circle, then place the other 7 evenly around it.
If one of your slices is a little larger than the others, use this one for the center.
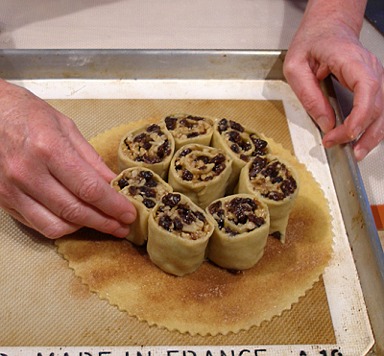
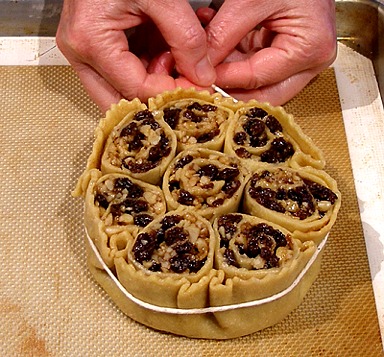
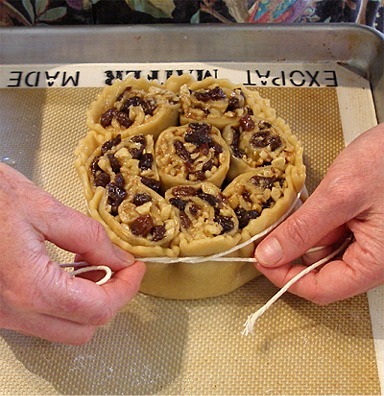
3. Brush the outer edge of the dough with water, and bring the sides up and lightly press them into the slices to adhere.
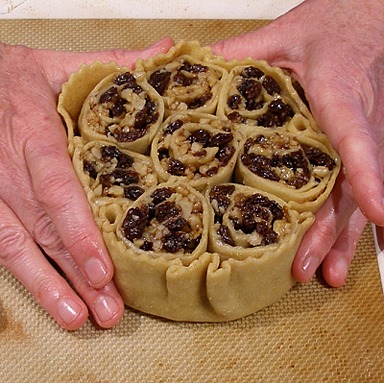
Tie the cake loosely with kitchen string, to insure that the sides will stay put.
Gluten-free Pittenguise dough:
Versus what Pittenguise dough looks like when using wheat flour:
4. Tightly cover and set aside in a cool place.
5. Repeat STEP IV: SHAPE THE DOUGH, with the other half of the dough.
STEP V: LET THE SHAPED BREAD RISE
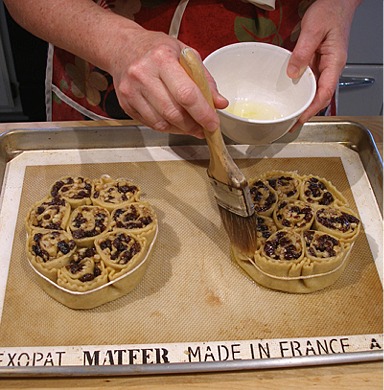
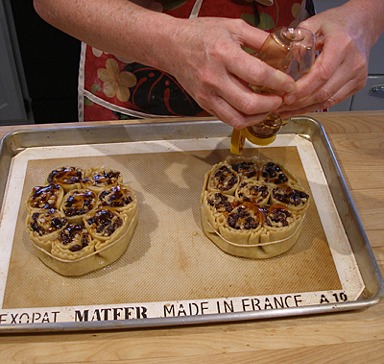
1. Brush the tops and sides of each cake with a little vegetable oil and drizzle 2 tablespoons of honey over each cake.
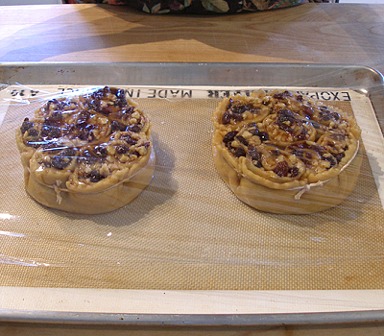
2. Then, cover the pan with plastic wrap and set the cakes aside in the refrigerator to rise overnight.
They will rise only slightly.
NOTE: Make sure the pan is sealed tightly because you do not want the dough to dry out.
STEP VI: PREHEAT THE OVEN, BAKE AND COOL THE SHAPED RECIPE (PITTENGUISE). LET AGE BEFORE SERVING
Preheat the oven, bake and cool the cakes:
1. Take the cakes from the refrigerator about 30 minutes before baking.
2. Immediately, position an oven shelf in the middle of the oven and preheat oven to 275 degrees F.
3. Unwrap the cakes and bake for about 45 minutes, or until they are golden brown.
If any of the honey oozes out onto the baking sheet, spoon it back over the cakes, while they are baking.
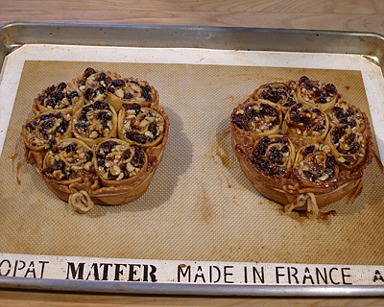
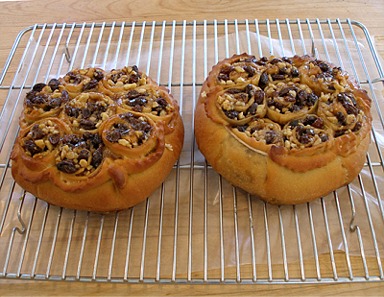
2. When the cakes are golden brown, remove the cakes from the pan and set them on a cooling rack, with waxed paper underneath, to capture any drips.
Cool completely.
3. When cakes are cool, wrap them tightly in plastic wrap, and then in foil, sealing tightly. Place each cake in an airtight plastic container, or tin.
Age the cakes for about a week, proceeding as follows:
1. Let the containers/tins sit for three days, then turn them over to redistribute the honey that has collected on the bottoms of the cakes.
2. After three more days, flip the container right side up again.
The honey will be almost completely absorbed by the pastry in about a week.
SERVE
Serve at room temperature.
STORAGE
The cakes keep nicely in a container, in the refrigerator, for a couple of weeks. They can be frozen for well over a month.
Let thaw in its container in the refrigerator.
Gluten-free Pittenguise dough:
Versus what Pittenguise dough looks like when using wheat flour: