Buche de Noel or Christmas Yule Log Cake
Recipe by Sarah Phillips © 2000 Sarah Phillips CraftyBaking.com
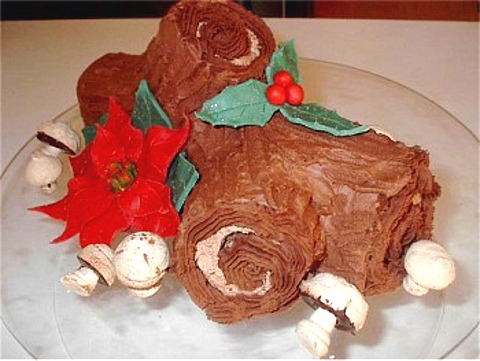
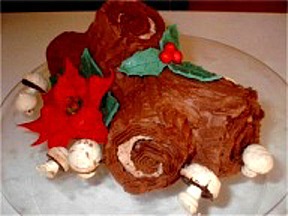
Photo and decorated cake by Sarah Phillips © Sarah Phillips
Learn how to make cake rolls and a Bûche de Noël- that's the French Christmas Yule Log Cake to you and me, is a classic holiday rolled cake that is decorated to look like a log or branch, that has fallen to the floor of the forest. After midnight Mass, the French eat the cake for dessert. It is appropriate to serve the cake from Christmas Eve to New Year's Day.
Bûche de Noël can be made from a jelly roll cake, also known as a biscuit roulade, that is filled, frosted and decorated to look like a log. This one is filled with chocolate whipped cream and garnished with candy clay leaves and berries and meringue mushrooms. You can even use marzipan, a mixture of almond paste and sugar, to form the decorations from.
CAKE RECIPE HELP

This tutorial includes all of the recipes and detailed information on how to make this sensational dessert!
INGREDIENTS
 FILLED Chocolate Cake Roll or Biscuit Roulade; Complete recipe through Step III
 Chocolate Ganache Icing, Step-by-Step
 French Meringue Mushrooms and Shapes
INSTRUCTIONS
STEP I SHAPE THE BUCHE DE NOEL
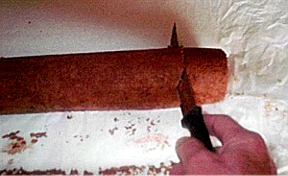
1. Cut the cake while still cold. Remember, this cake has a whipped cream filling, which is perishable, so the cake should only remain out out the refrigerator for 2 hours.
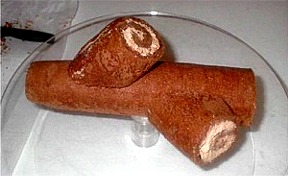
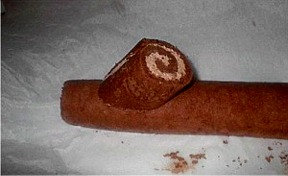
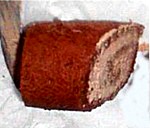
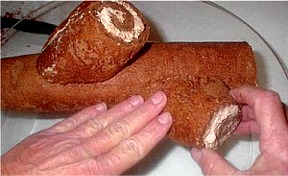
A. Take the FILLED Chocolate Cake Roll Recipe (Biscuit Roulade) from the refrigerator and unwrap.
B. Unwrap cake roll. Make sure you have a sharp serrated knife. Place the cake roll seam-side down.
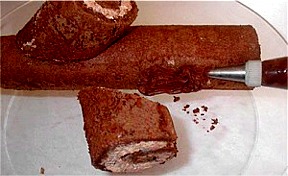
2. Cut one "branch" wedge off end of cake at a 45° angle.
A. Make the first cut about 2-inches from the end at a 45 degree angle relative to the countertop. Cut all the way through.
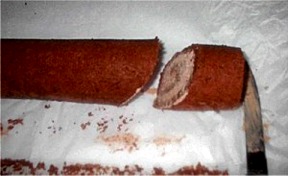
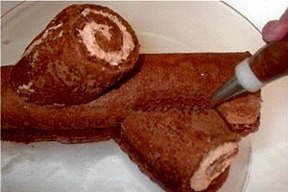
3. Place the just-cut branch stub on the main cake log and secure.
A. Don't rotate the main cake log after cutting off the branch stub from it. Insert a couple of toothpicks from the other end of the log, to help secure the branch stub. (Don't forget to remove them when cutting and
serving the cake.)
B. Pipe or spread ganache to the areas where the branch stub will be placed.
C. Place branch stub on top of toothpicks and gently press to secure it to the main cake log.
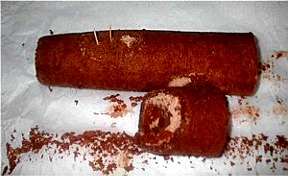
4. Cut the second branch stub:
A. On the same end where you made the first cut, make the second one on the main cake log. This time, cut straight down.
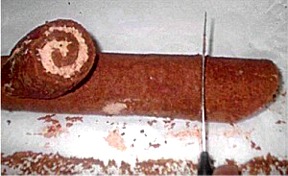
B. When turned on its side, the second branch stub will have one straight side that you just cut, with the other side showing a 45 degree angle. Both ends of the main cake log should be straight.
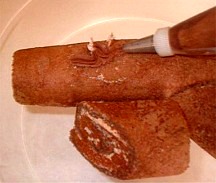
5. Place the main cake log on a cake platter and attach the second branch stub to the cake:
A. Pipe or spread ganache to the area where the branch stub will be placed from the other end of the log. (You don't need toothpicks this time because the cake wedge will be resting on its side.)
B. Gently press the branch stub to secure it to the main cake log.
C. Take a step back to see that the Bûche de Noël is starting to take shape.
STEP II FROST THE BUNCHE DE NOEL
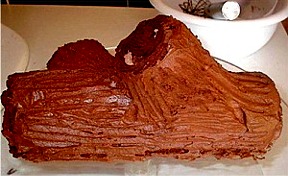
1. Pipe or spread the Chocolate Ganache Icing on the Bûche de Noël shape
A. Pipe or spread ganache around base and joints of branch stubs.
B. Pipe or spread ganache onto the cake portion of the log and wedges, leaving the filling exposed at the ends, to create the illusion of tree rings.

C. Apply a second layer, and using a small serrated knife or cake decorating comb, form bark-like ridges in the ganache. Refrigerate any leftover ganache for later use.

D. You can also pipe the ends on top of the cake, leaving the filling exposed.
E. Chill cake uncovered, until ganache is firm, about 30 minutes, before decorating.
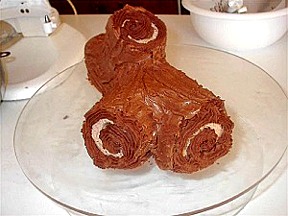
STEP III DECORATE THE BUCHE DE NOEL
Arrange the French Meringue Mushrooms around the cake.