
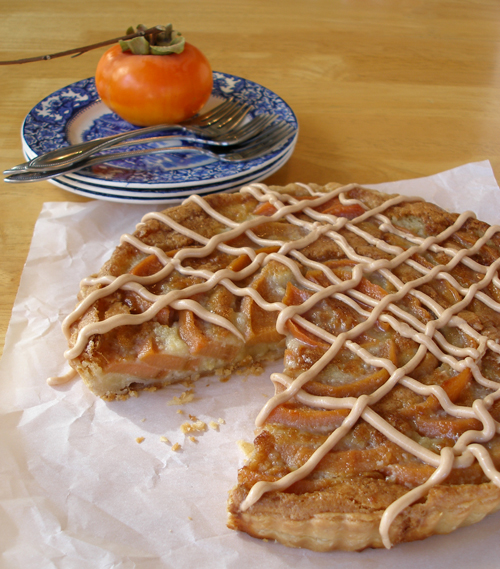
Fragrant persimmons have a short season, so I like to eat as many of the naturally sweet fruits as possible when they are available. And I particularly love them in this almond frangipane custard tart. The buttery and flaky crust encases the tasty filling, and a scrumptious salted caramel drizzle finishes it off beautifully. Kelly, who lives in California, has a tree brimming with the beautiful orange fruits, so we used those when we first came up with the recipe. It was a huge hit with the entire family! Learn more about persimmons below.
PIE RECIPE HELP
INGREDIENTS
1 recipe Kelly's Perfect Food Processor Pie Dough – Single Crust, or 1 9- to 10-inch pie crust recipe of your choice, chilled
For the Persimmon and Persimmon Glaze:
6 large ripe Fuyu Persimmons
4 cups water
1 1/2 cups sugar
1 cinnamon stick
For Frangipane / Almond Cream:
1/2 cup unsalted butter
1 cup sugar
2 large eggs
1 teaspoon almond extract
1 teaspoon vanilla extract
2/3 cup almond flour
For the Salted Caramel Drizzle: recipe alone
1 cup granulated sugar
1/4 cup water
2 tablespoons corn syrup
1 cup heavy cream, warmed
2 teaspoons vanilla extract
3/4 to 1 teaspoon fleur de sel, or sea salt
1 stick(1/4 pound) unsalted butter, cold, and cut in cubes
Equipment:
9- to 10-inch tart pan with a removable bottom
Disposable piping bag
1 plastic squeeze bottle with tip covers CLICK or CLICK or disposable piping bags, with a coupler
Wilton #3 tip.
INSTRUCTIONS
STEP I: PREPARE THE PERSIMMONS. MAKE THE THICKENED PERSIMMON POACHING LIQUID FOR THE TART GLAZE.
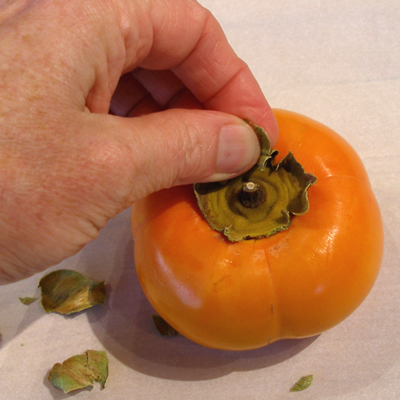
1. Pull off the tough leaves on the blossom-end of the Fuyu Persimmons. Then peel the persimmons with a vegetable peeler.
NOTE: We found that it is better to peel the persimmons before cutting off the top and the bottom because they can become quite slippery if you cut the top and bottom off first.
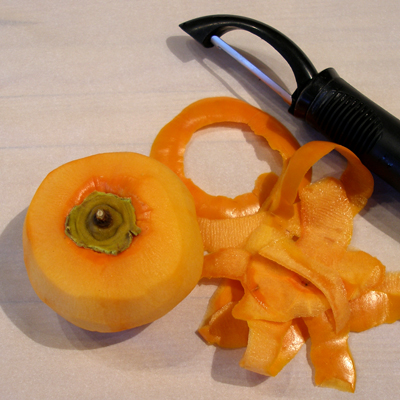
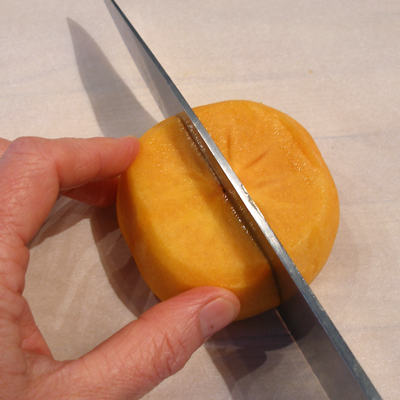
2. Cut the stem end off and a small slice off the bottom, so it can rest flat on the counter.
Cut the persimmons in half.
Remove the cores with a small paring knife.

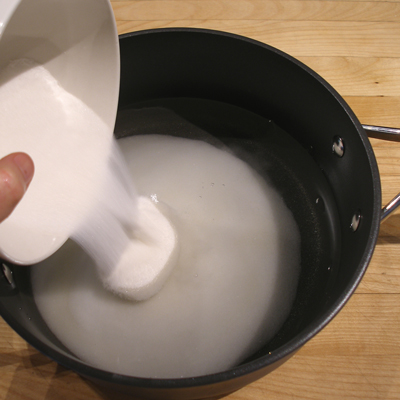
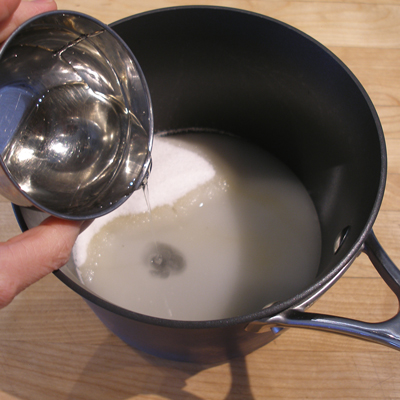
3. Place the water, the sugar and the cinnamon stick in a large saucepan and put it on the stove, over medium high heat.
Stir until the sugar is dissolved, and bring to a boil.
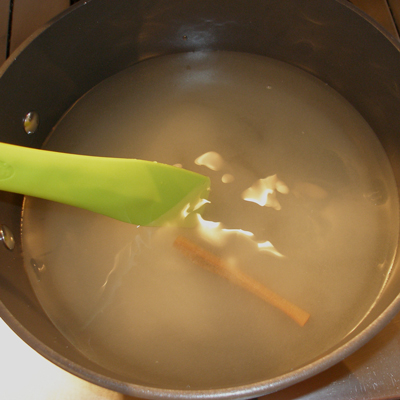
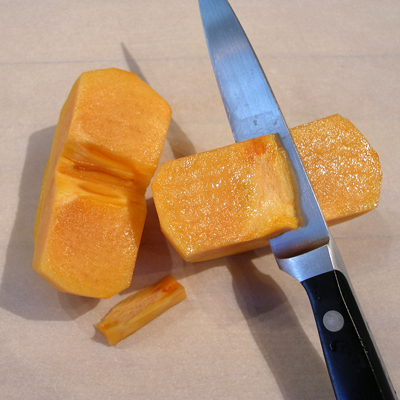
4. When the poaching liquid boils, reduce the heat to a simmer, then carefully add the persimmon halves.
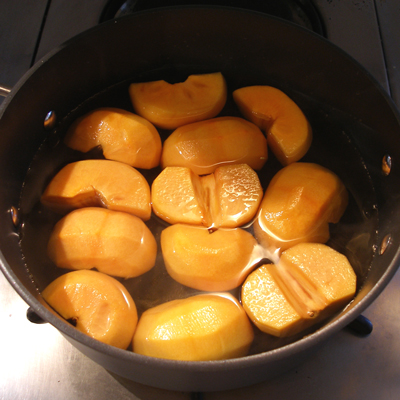
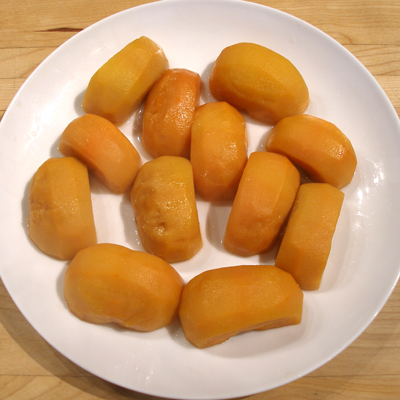
5. Let the persimmons simmer for 15 minutes, then remove them from the poaching liquid with a slotted spoon.
Let them cool on a plate, until needed.
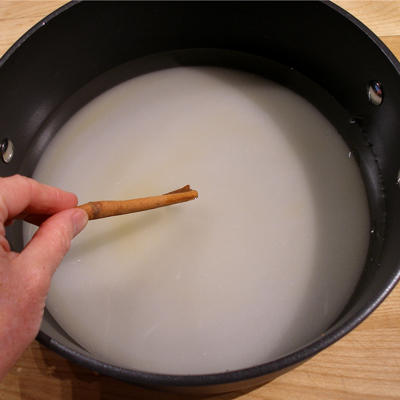
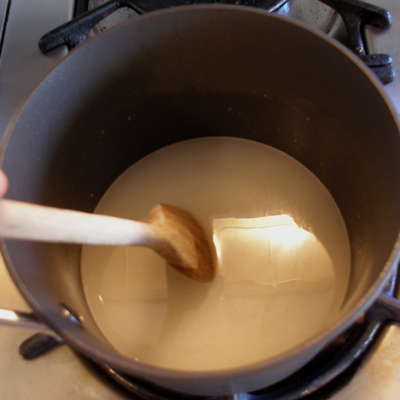
6. While the persimmons cool, continue to simmer the poaching liquid, until has thickened and is syrupy, approximately 20-25 minutes. Then pour it into a small bowl and cover with plastic wrap. Set aside.
We will be using this Thickened Persimmon Poaching Liquid to glaze the top of the tart, Step IV.

STEP II: PREPARE THE TART CRUST
Roll the pastry dough and fit it into the tart pan:
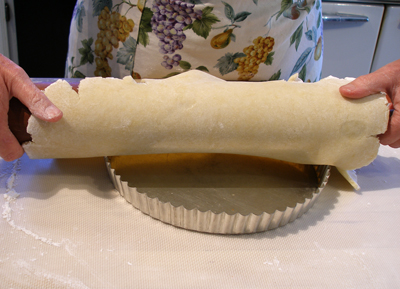
1. Remove the dough to a lightly floured surface and roll it out until it is about 11- to 12-inches in diameter.
Fit the dough into the tart pan with a removable bottom.
SARAH SAYS: You can use a tart pan that varies in size between 9- to 10-inches. Make sure you roll the dough about 2-inches larger than the diameter of your pan size.

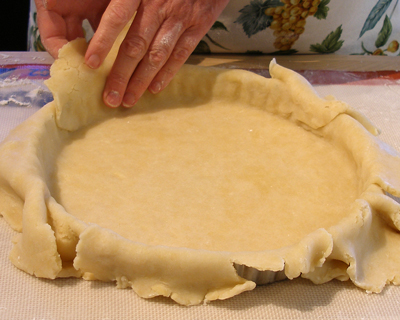
2. Wrap the dough around your rolling pin. Ease the pastry down into your pan, being careful to not stretch it, which can cause shrinkage.
3. Patch and piece together the tart dough as necessary.
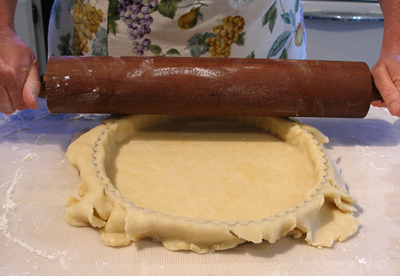
4. Trim the dough so it is flat with the top of the tart pan by moving the rolling pin evenly over the top of the pan.
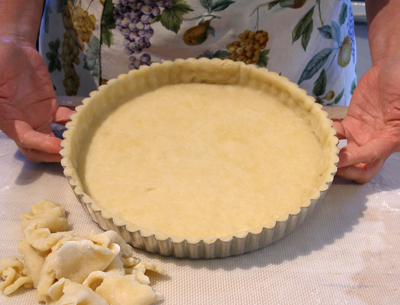
5. Remove the scraps, and save in the refrigerator in case the tart shell cracks when blind-baked.
After that, bake them sprinkled with a mixture of cinnamon and sugar or save in the freezer for another time.
6. Let the formed pie dough rest in the fridge for about 30 minutes or longer.
Blind bake the pastry crust:
1. Position an oven shelf in the middle of the oven and preheat oven to 375 degrees F, 30 minutes before baking.
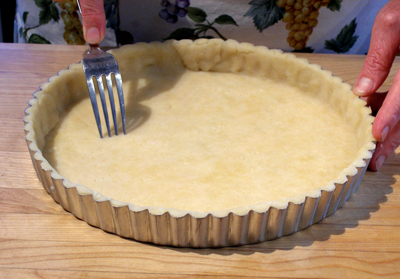
2. When ready to blind-bake, prick the tart crust all over with a fork. This will help insure that the pastry does not bubble up when baking.
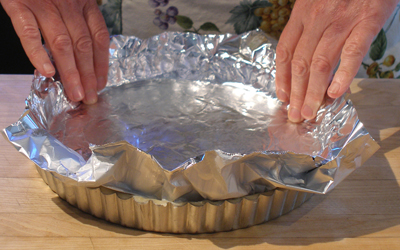
3. Butter or spray one side of a piece of tin foil with non-stick spray, then carefully fit it down into the tart pan.
Make sure to gently press the foil to the sides of the tart, to keep them from collapsing when baking. You do not need pie weights.
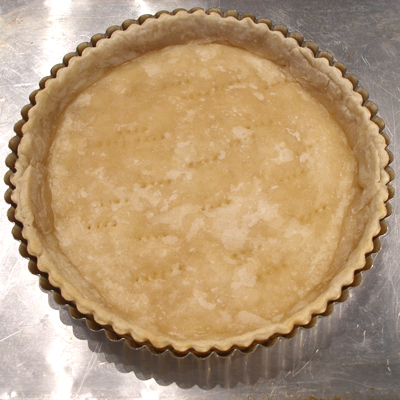
4. Place the tart pan on a rimmed baking sheet and bake the crust for about 20 minutes, or until it JUST starts to color on the edges.
We will be baking the crust again, when the filling is added, so it does not need to be fully cooked.
Remove the tart pan from the oven, and let the pastry cool, while you make the frangipane filling.
NOTE: LEAVE THE OVEN ON but reduce the heat to 350 degrees F while you prepare the Frangipane tart filling.
5. Let cool on a rack until room temperature. Do not unmold from its pan.
STORAGE
The unbaked pastry dough can be stored in the refrigerator for a few days. It can be frozen for about a month. The blind baked tart shell can be stored at room temperature for a day or two, or frozen for a month or more. Thaw at room temperature before using.
STEP III: MAKE THE FRANGIPANE / ALMOND CREAM FILLING
NOTE: If you use a 9-inch tart pan, you may have a little frangipane mixture left over. Refrigerate or freeze extra.
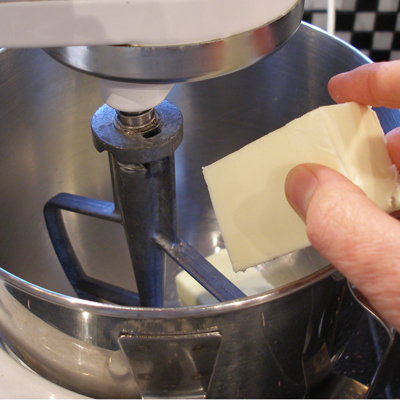
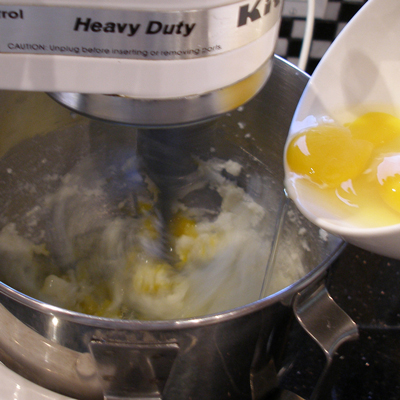
1. Add the butter to the bowl of a stand mixer fitted with a paddle attachment, and mix on low until softened.
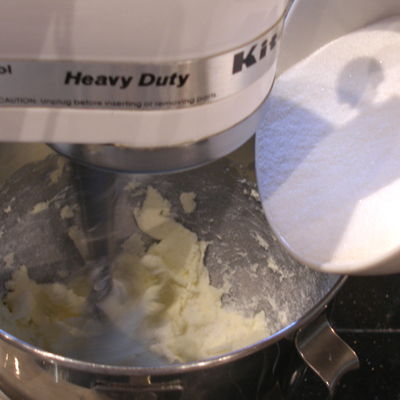
2. Add the sugar in a steady stream at the side of the bowl and beat until light and fluffy, scraping down the sides of the bowl to make sure all the butter is incorporated.
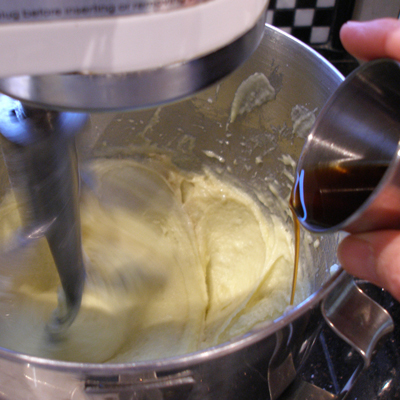
3. Add the eggs and the extracts, and mix to combine.
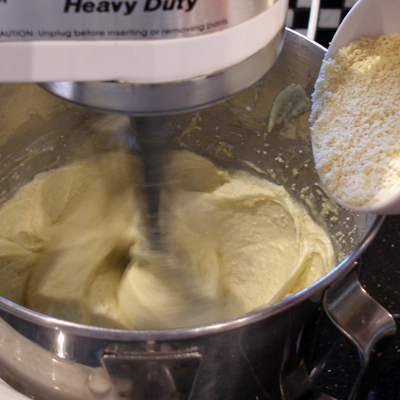
4. Add the almond flour and beat on low until combined.
Scrape down the sides of the bowl, and let the mixer run on low for 30 seconds to make sure all the ingredients are incorporated.
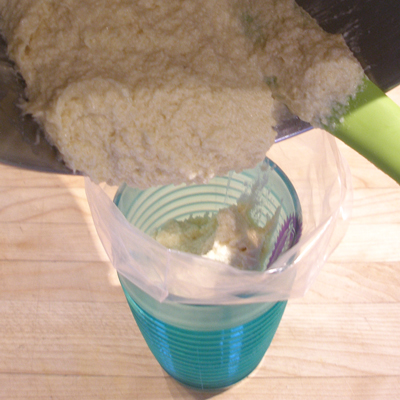
5. Put the frangipane in a disposable piping bag (leave the end uncut), and set aside until needed.
STORAGE
For long term storage, do not place the frangipane in a piping bag. Instead press a piece of plastic wrap on the top of the frangipane in a bowl, and refrigerate for up to three days. It can be frozen for up to a month; thaw in the refrigerator.
Stir before using.
STEP IV: ASSEMBLE THE TART.
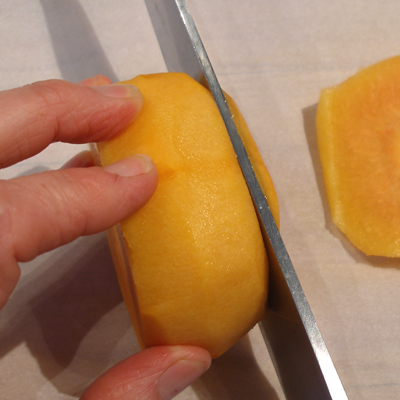
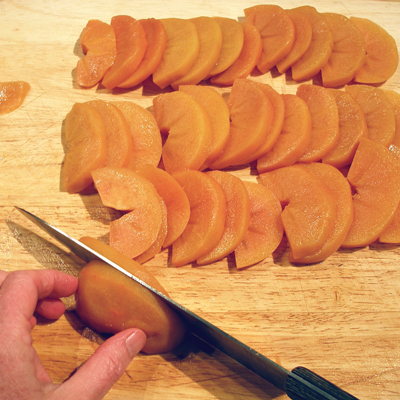
1. Slice the cooled persimmon halves, horizontally, into thin slices, approximately 3/16-inch.
Set aside the imperfect slices…you can eat those later.
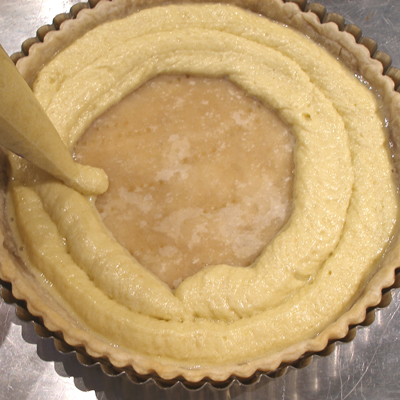
2. Cut a medium sized opening in the bottom of the piping bag and pipe the frangipane into the partially bake tart crust.
Pipe in a circular motion, starting from the outside edge of the tart, going inward.
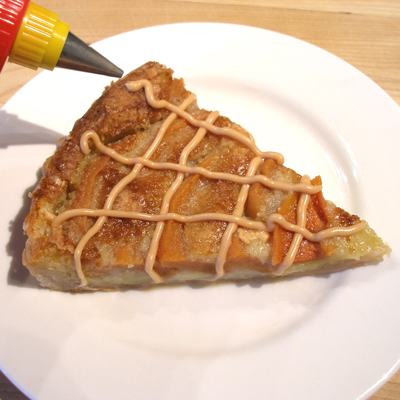
There should still be at least a 1/4-inch of crust above the filling, as seen in the pic below. Be careful to not overfill the tart.
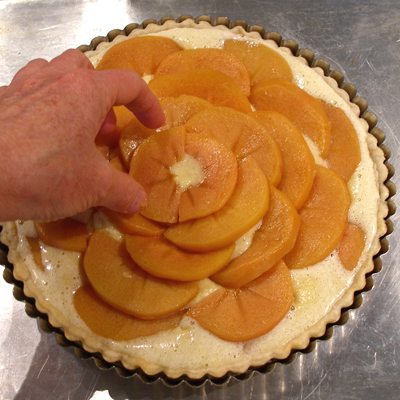
3. Start at the edge of the tart and add the persimmon slices in overlapping concentric circles.
Save two of the prettiest slices for the center of the tart.
NOTE: The slices at the very edge of the tart will sink into the frangipane layer a bit. That is OK.
4. Bake the tart (in a 350-degrees F oven) for 25-30 minutes, or until the frangipane is puffed and golden brown.
Let the tart cool, on a wire rack. Do not unmold it.
Meanwhile, make the salted caramel filling, Step V
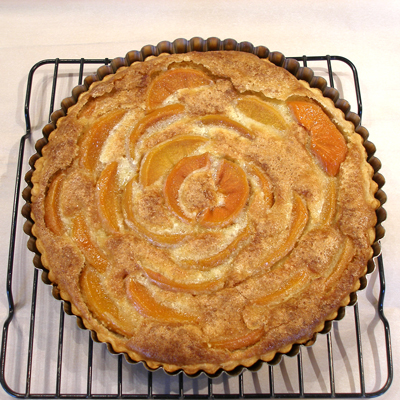
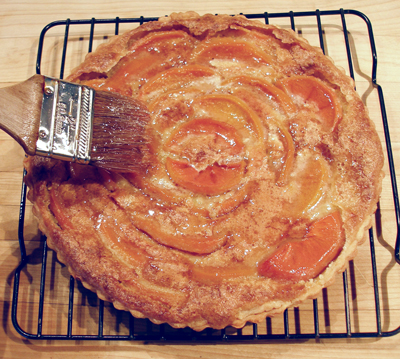
5. When tart has cooled, unmold the tart. Glaze the top by brushing the top, with a pastry brush, dipped in some of the cooled Thickened Persimmon Poaching Liquid.
STORAGE
The glazed tart can be stored in the refrigerator for a few days, but it is best enjoyed the same day. Do not umold if storing the tart before serving.
STEP V: MAKE THE SALTED CARAMEL AND DRIZZLE ON THE TART. SERVE.
1. In a heavy saucepan, combine the sugar, water and corn syrup. Stir till sugar dissolves and then STOP stirring.
2. Bring the mixture to a boil, over medium-high heat. Cook mixture till it is a medium amber color. Watch mixture carefully…it can burn if you are not careful.
Immediately remove it from the heat.

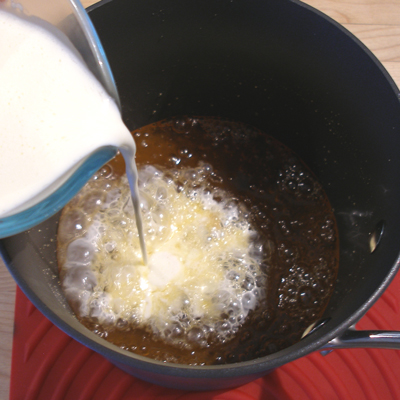
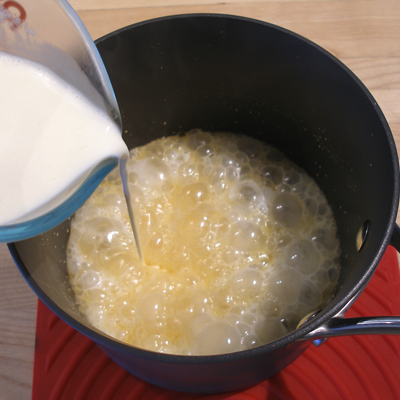
3. Heat cream in microwave, till it is hot or bubbles around the edges and steams.
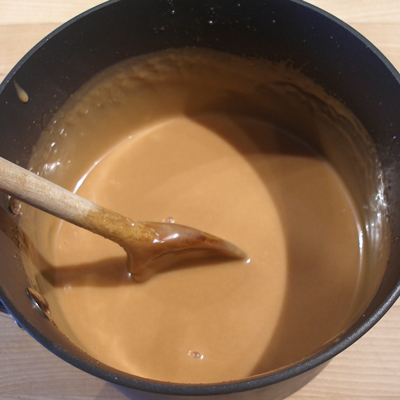
Pour the hot cream into the caramelized sugar mixture, a little at a time. Be careful, because it will bubble up, and it is very hot!
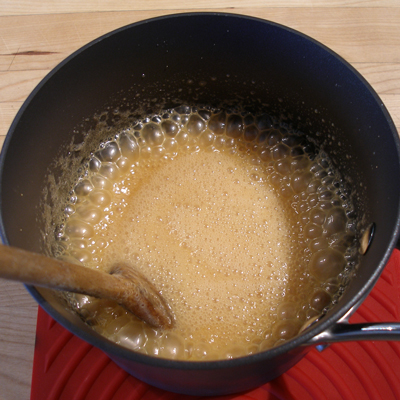
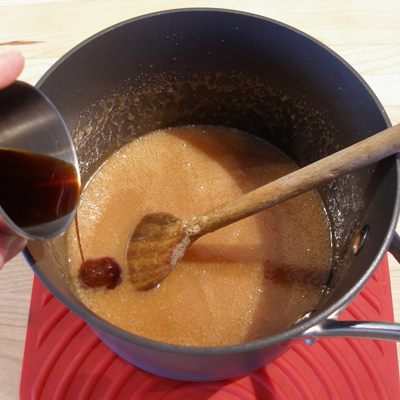
4. Stir mixture till it is smooth, and then add the vanilla extract, and the salt.
NOTE: I used Himalayan pink sea salt.

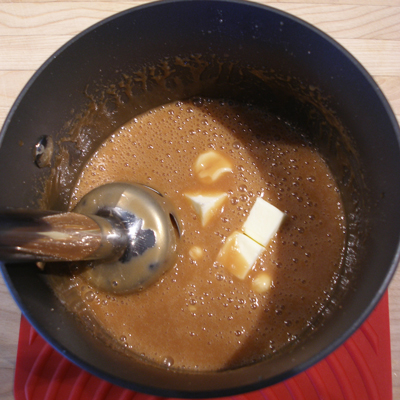
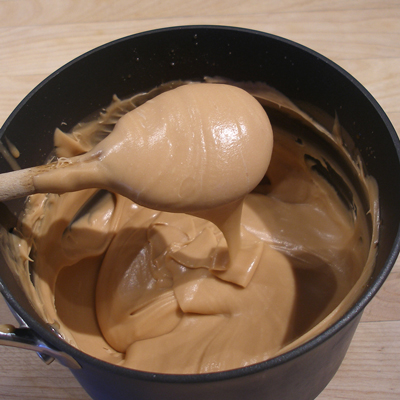
5. Cool mixture, stirring occasionally, till it is about 110 degrees F, or just a little hotter than body temperature.
Stir the mixture, and insert the end of an instant read thermometer into the center of the mixture to check; take care you do not touch the bottom of the pan.
6. When the mixture has cooled to 110 degrees F, add the cubes of butter, a few at a time, mixing them into the caramel with an immersion blender, to create an emulsion.
7. Place the pan in the refrigerator for about 15 minutes, stirring every few minutes, until the caramel starts to thicken up. It is ready to use and is pipeable.
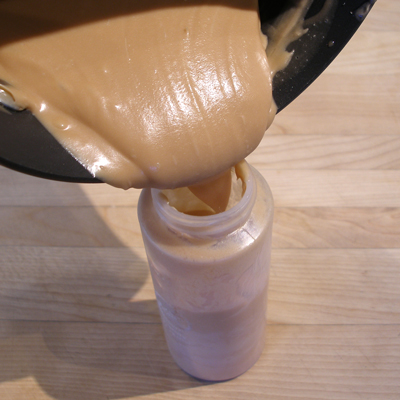
8. Pour the thickened caramel into a squeeze bottle fitted with a Wilton #3 tip.
9. (Make sure the glazed tart has been unmolded first.) Pipe it onto the entire tart, or on each individual serving.
STORAGE
If you have any salted caramel left over, it must be refrigerated. It will keep for a few days. Pour the finished caramel into a bowl, and cover with plastic wrap, placed directly on the surface, so a skin doesn't form on top.
If you want to thin it to drizzle consistency again, heat the squeeze bottle for about 8 seconds in the microwave, and pour the contents into a bowl. Stir until the caramel comes together again.
The tart, drizzled with the Salted Caramel, can be stored in the refrigerator for a few days, but it is best enjoyed the same day.
Food styling and photos by Kelly CA © Sarah Phillips CraftyBaking.com