
Variation: Valentine's Day Peanut Butter Teddy Bear Sandwich Cookies; Peanut Butter Siamese Cat Sandwich Cookies
VARIATION: Valentine's Day Peanut Butter Teddy Bear Sandwich Cookies
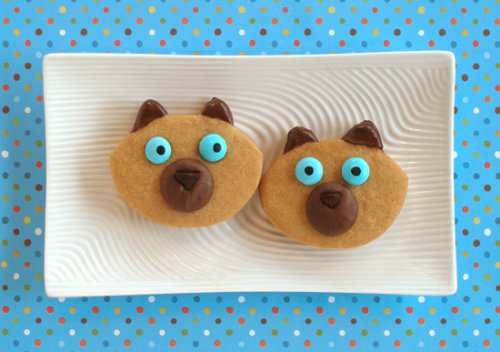
VARIATION: Peanut Butter Siamese Cat Sandwich Cookies
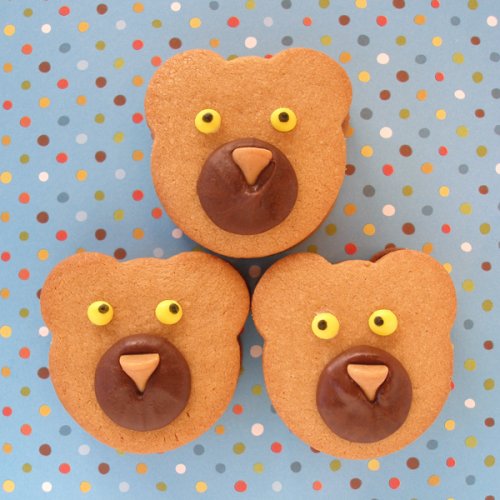
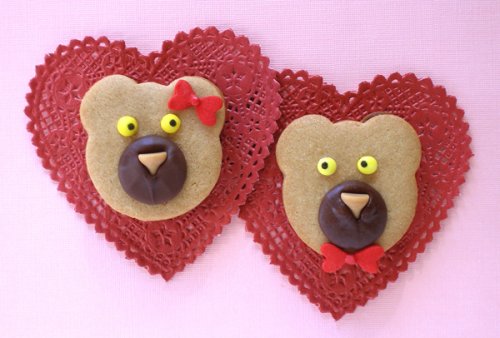
Peanut butter and chocolate are two of my favorite flavors, and they come together on these peanut butter sandwich cookies with a yummy peanut butter filling and chocolate decorations. I just love the sweet bears! Make them for Valentine's Day, dressed in cute red bows – I'll show you how! You can also use the Red Velvet Sandwich Cookie Recipe tinted in any color, if you like. See my recipe below which I developed especially for cutout cookies so they don't spread too much yet remain full of delicious flavor.
COOKIE RECIPE HELP
SARAH'S SECRETS: I have developed these cookie recipes so they remain flavorful, but do not spread much; the choice and amount of leaveners in the recipe I selected especially helps with that.
INGREDIENTS
Peanut Butter Sandwich Cookies:
1 1/2 cups unbleached all-purpose flour; spoon into measuring cup and level to rim
1/2 teaspoon baking soda
1/2 teaspoon salt
1 1/4 cups creamy peanut butter; DO NOT use “natural” peanut butter
1/2 cup (8 tablespoons or 1 stick) unsalted butter
3/4 cup sugar
1/4 cup dark brown sugar, packed
1 large egg
1 teaspoon vanilla extract
Peanut Butter Filling:
1 cup creamy peanut butter; DO NOT use “natural” peanut butter
2/3 cup powdered sugar, sifted; measure and then sift
1/2 teaspoon vanilla
pinch of salt
SUPPLIES
To make these cookies you will need:
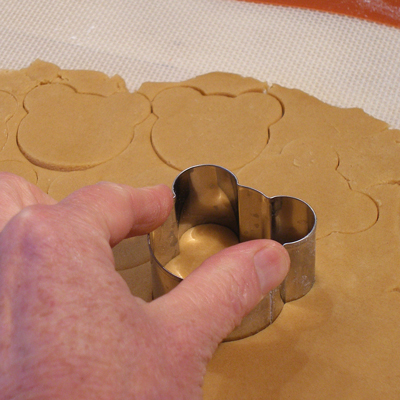
1, 2-inch Teddy Bear head cookie cutter.
The one I used is actually a Japanese rice mold. You can purchase the exact one I used here or here
NOTE: You may also use any other animal head cutter that you like, or already own. The decorating concept will be the same.
1 9.5 ounce bag Hershey's Milk Chocolate Baking Melts
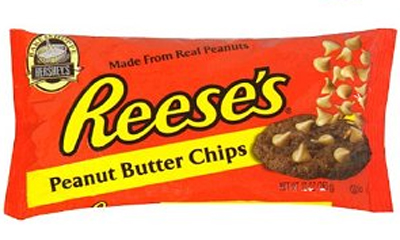
1 bag Hershey's Reese's Peanut Butter Chips
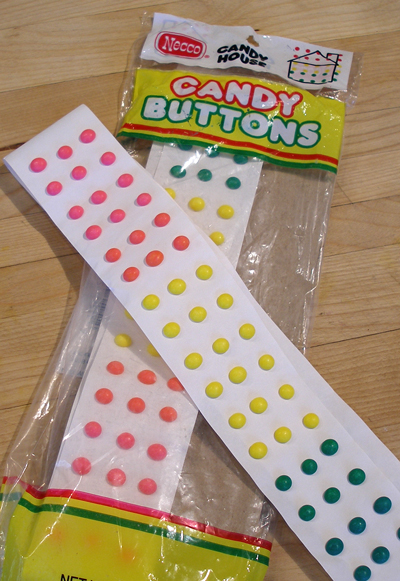
1 bag Necco Candy Buttons
If you can't find these, you may also use yellow mini M&Ms
1 bag Yellow Wilton Candy Melts-only about 1/4 cup
1 Black edible ink marker
1 Disposable piping bag
Valentine's Day Bear Supplies – in addition:
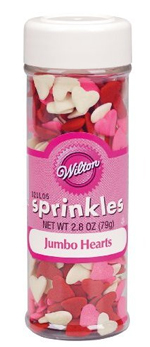
1 2.8 oz tube Wilton Jumbo Heart Sprinkles
1 bag Red Wilton Candy Melts- a very small amount
1 additional Disposable piping bag
STEP I: MAKE AND CHILL THE PEANUT BUTTER SANDWICH COOKIE DOUGH
INSTRUCTIONS
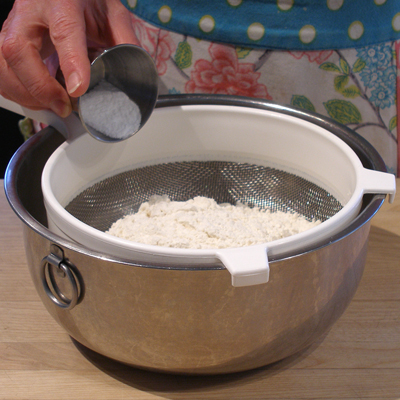
1. Sift together the measured flour, baking soda and salt in a medium size bowl. Set aside.
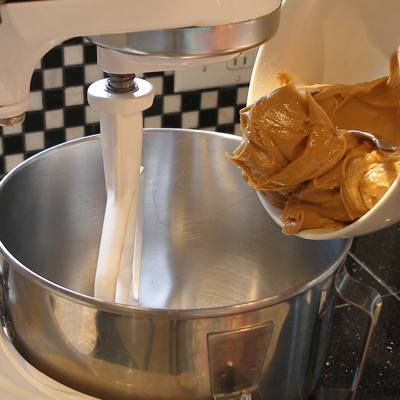
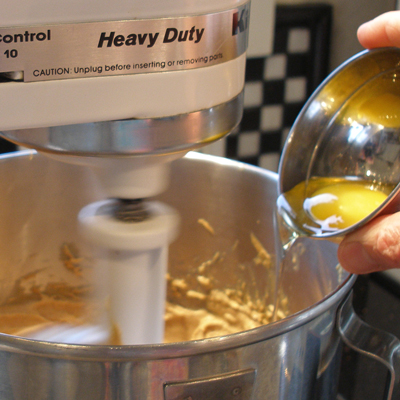
2. Add peanut butter and butter to the bowl of a stand mixer fitted with a paddle attachment. Beat on medium to combine.
Stop the mixer and scrape the sides and bottom of the mixer bowl.
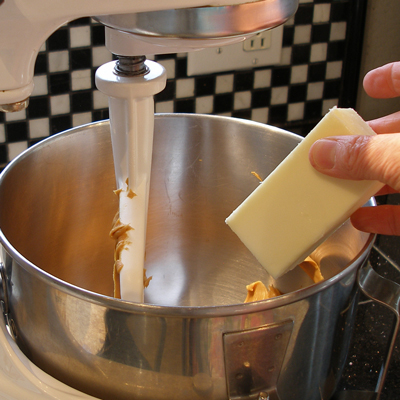
3. Turn mixer to medium and beat until the mixture is fluffy, then slowly add the sugars at the side of the bowl.
Cream the mixture until it is light and fluffy, about 1 minute.
Stop mixer and scrape down the sides of the bowl.

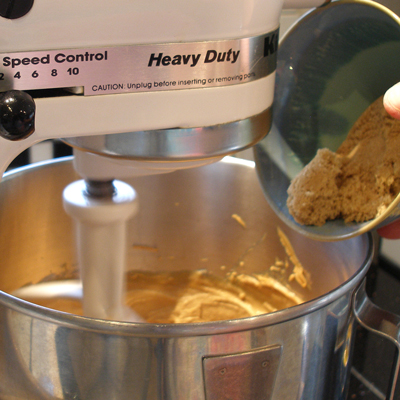
4. Add the egg and the vanilla and beat on low until incorporated.
Stop the mixer and scrape the sides and bottom of the bowl again.


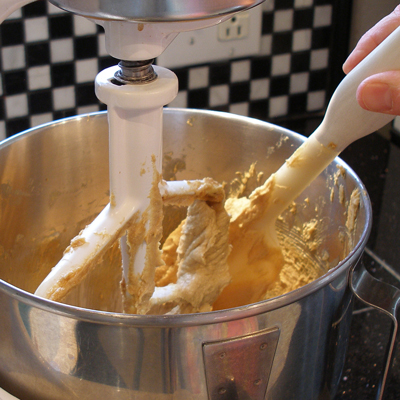
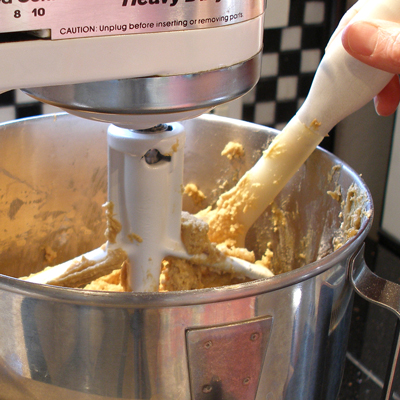
5. Add the flour in three equal portions, and beat on low until a dough is formed.
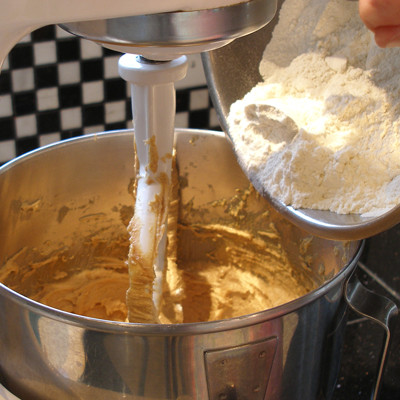
6. After the last addition of flour, scrape the sides of the bowl to make sure all the flour is incorporated.
Be careful not to overmix.
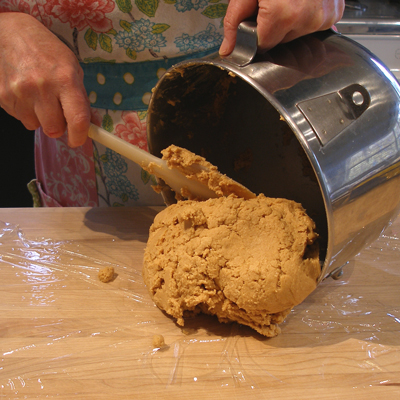
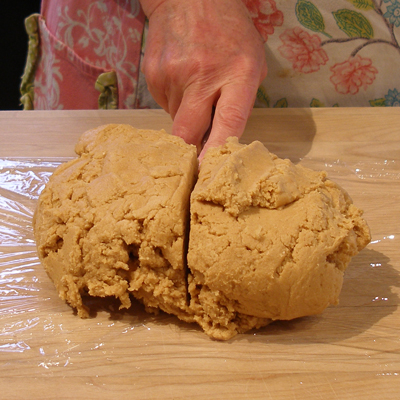
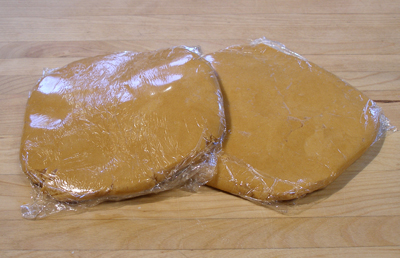
7. Remove dough from the bowl onto a piece of plastic wrap. Form the dough into a ball, and cut it in half.
Flatten each portion into a disk and wrap each of them in plastic wrap.
Refrigerate the dough for AT LEAST one hour.
NOTE: This dough needs to be very cold when you work with it. Do not skip this step or you will be frustrated. You *can* place the disks for dough in the freezer, briefly, to hasten the cooling process.
STEP II: MAKE THE PEANUT BUTTER FILLING
While dough chills, make the filling.
1. Put the peanut butter, powdered sugar, salt and vanilla into a medium bowl.
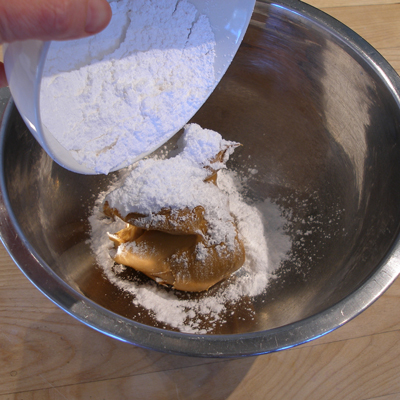
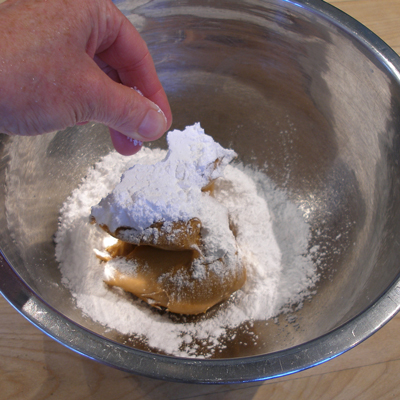
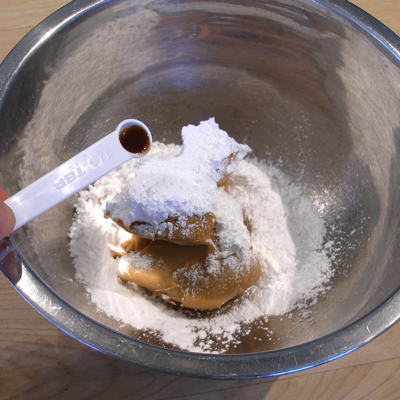
2. Beat at medium speed, with a hand mixer, until it is creamy and fully combined.
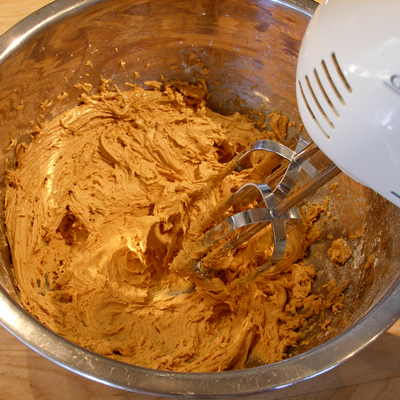
3. Cover it with plastic wrap. Store it at room temperature until you are ready to assemble the cookies.
STEP III: BAKE, ASSEMBLE AND FILL THE PEANUT BUTTER SANDWICH COOKIES
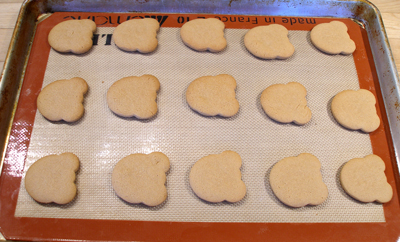
1. When dough has chilled, position the oven shelves in the lower and upper thirds of the oven and preheat oven to 350 degrees F.
2. Line two baking sheets with parchment or silpat mats.
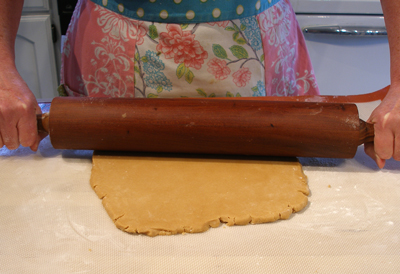
3. Remove one disk of dough from the refrigerator and roll it out on a lightly floured surface to about 3/8-inch thick.
2. Cut out cookies, producing as few dough scraps as possible.
Stack scraps up in a pile, then flatten into a disk, and rewrap in plastic wrap. Place scraps in the freezer to chill once again.
Place cookies on baking sheet, about 2-inches apart.

3. Bake cookies for 8-10 minutes, or until the edges just start to brown.
The following steps 4 – 7 are very important!
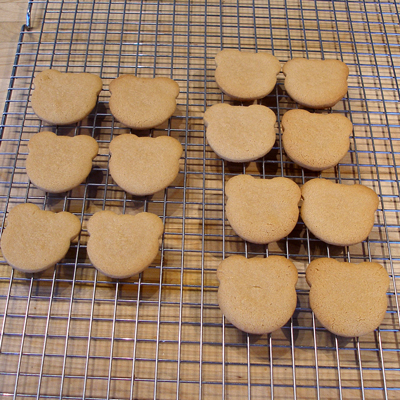
4. Leave the baked cookies on the baking sheet for 2 minutes. DO NOT try to move them before then, because they are very fragile when hot.
After 2 minutes, move the cookies to a rack, with a metal spatula and match them up in pairs.
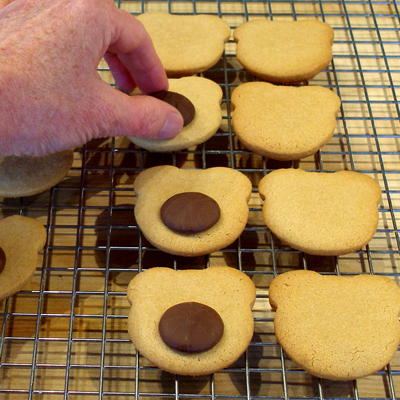
5. The cookies are still warm at this point, and this is a MUST.
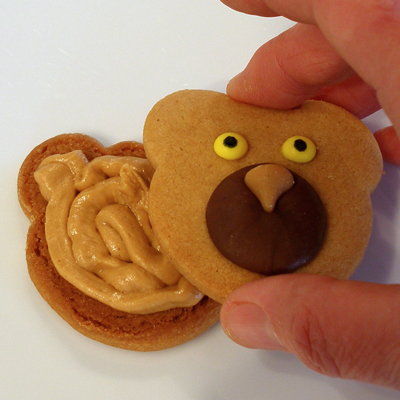
Choose a better side from each cookie pair(which will become the front of the sandwich cookie) and place Hershey's Baking Melt on the lower center of the “front” of each cookie pair.
The residual heat from the cookies will slightly melt the disk, which will adhere it to the cookie. This usually takes about 3 minutes.
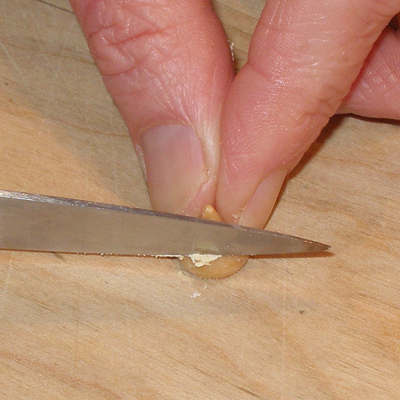
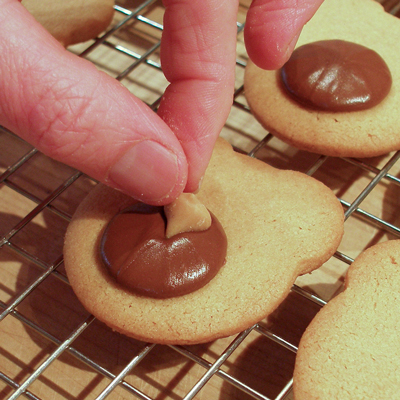
6. While you wait for the chocolate disks to soften, trim one side of the Reese's Peanut Butter Chip with a sharp knife so it is flat on one side.
These trimmed chips will become the bears' noses.
After you are finished trimming the chips, go back to the cookies.
7. Look at the cookies and check to see if the chocolate disks are sufficiently softened.
They should look shiny, but still have kept their shape.
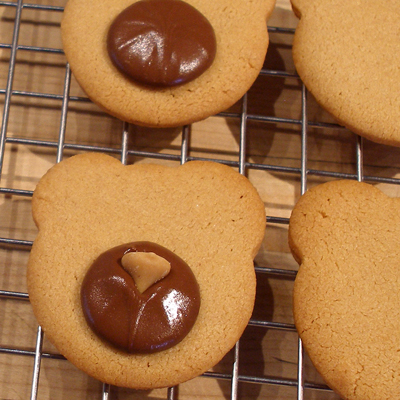
Carefully place on trimmed chip on each disk…. bottom side up, pointy side down…to form the bears' noses.
Repeat for all the cookie pairs, then set the cookies aside to set the chocolate, then repeat the above steps with the second disk of dough.
Remove the dough scraps from the freezer and roll out as many cookies as possible from the scraps, and repeat the steps.
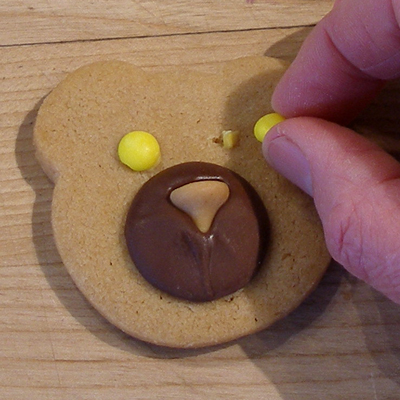
8. Remove the yellow candy dots from the paper and match them up in like-size pairs. YES, there are size/shape variations. 🙂
Melt about 1/4 cup yellow candy melts in the microwave and, using a toothpick, place a little dot where you want the eyes to be.
Working quickly, before the melts harden, and set the eyes in place.
Repeat the steps with all the bear faces.

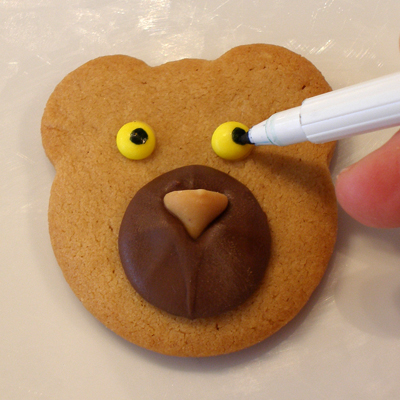
9. Draw pupils on all the eyes with a black edible ink marker.
10. Place cookie filling in a disposable piping bag and clip an opening in the bottom.
Pipe filling on the bottom cookie, leaving a border around the edge, then place the top cookie on the filling and press gently to adhere.

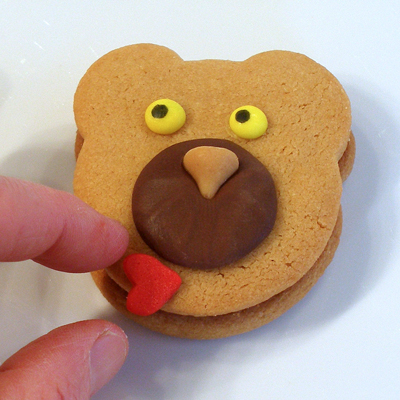
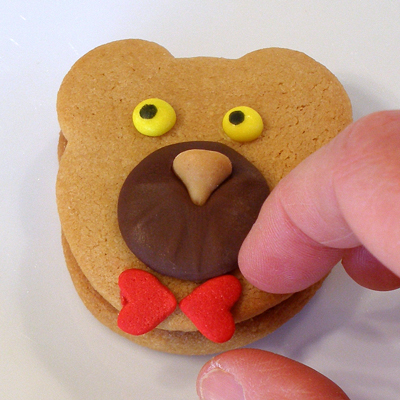
VARIATION: VALENTINE'S DAY PEANUT BUTTER TEDDY BEAR SANDWICH COOKIES
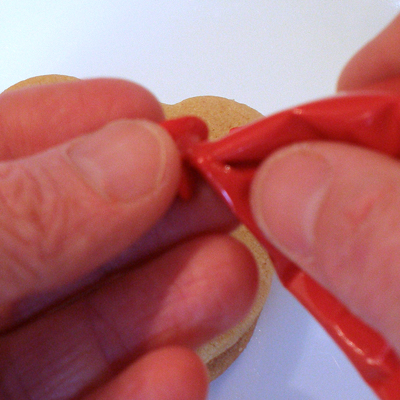
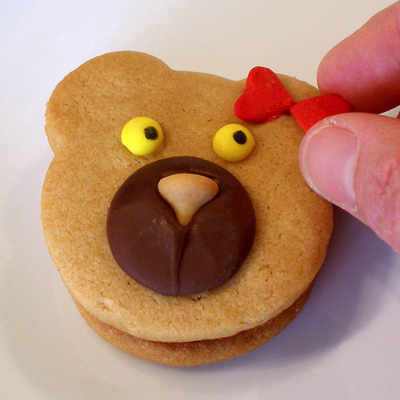
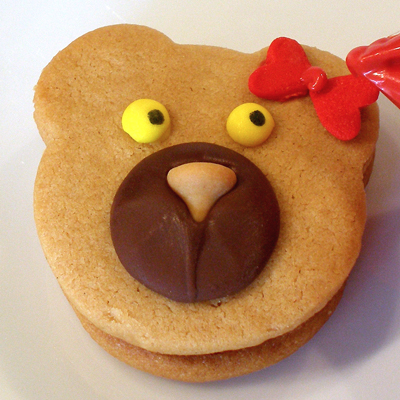
1. To dress the cookies up for Valentines Day, melt a small amount of red Wilton Candy Melts in the microwave.
2. Place the melted candy in a disposable piping bag or plastic sandwich bag, and cut a tiny hole in the bottom, or corner.
3. Place a small dot on the back of the heart sprinkles and set them in place to form a bow on the girl cookie, or a bow tie
Put a small dot of melts in the center of the bow/bow tie to finish.
VARIATION:
Peanut Butter Siamese Cat Sandwich Cookies