
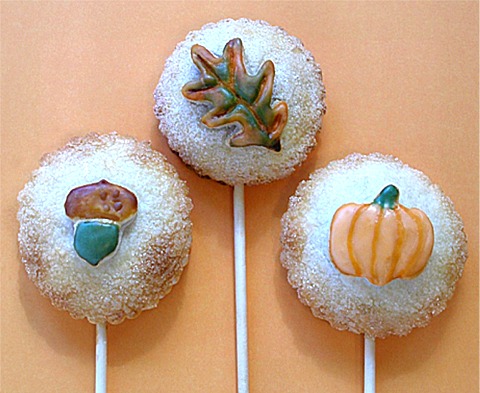
Make these adorable, and tasty, apple pie pops for Thanksgiving or anytime!
Flaky pastry filled with a delicious and cinnamon-ey apple filling…all on a stick, for a fun noshing experience.
PIE RECIPE HELP
INGREDIENTS
Pie Pops:
Perfect Food Processor Pie Crust, chilled, Step I
Apple Pie Pop Filling, chilled, Step II
water, Step IV
1 large egg, mixed well with a fork or small whisk, Step V
3 tablespoons sugar or more, for sprinkling, Step V
Finishing touches:
1 recipe Powdered Sugar Painting Glaze, Step VI
Special Equipment:
Two rimmed baking pans lined with silpat mats or parchment paper
Extra silpat mat or parchment paper
Step IV:
14 paper lollipop sticks
One 2 1/2 – inch fluted round cookie cutter*
One 3 – inch fluted round cookie cutter*
1 tablespoon ice cream scoop/disher
small clean paint brush
*NOTE: The reason we use different size cutters for the Pie Pops because if the same size is used, there was not enough room for the filling, and the pie would be mostly dough.
STEP I: MAKE DOUBLE CRUST DOUGH
KELLY'S PERFECT FOOD PROCESSOR PIE DOUGH / Recipe alone
Makes a double crust for a 9-inch standard or 9 1/2-inch deep-dish pie
INGREDIENTS
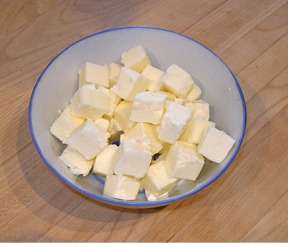
1 cup (2 sticks) unsalted butter, cold
2 1/2 cups unbleached all-purpose flour; spoon into measuring cup and level to rim
1 teaspoon sugar
1 teaspoon salt
1/2 teaspoon cinnamon (optional, use if pie filling goes well with cinnamon)
1/4- 1/2 cup ice water; make with water and ice cubes
INSTRUCTIONS
1. Cut butter into cubes and place in a bowl and place in the refrigerator to chill.
2. A. Place dry ingredients into the bowl of your food processor, fitted with the metal blade. Process a few seconds to combine.
B. Add the well-chilled butter cubes on top of the dry ingredients, in the food processor.
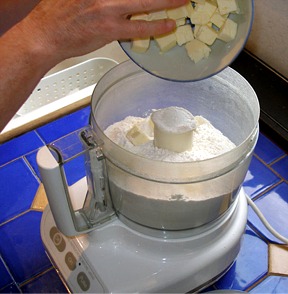
C. PULSE the butter and flour mixture together till the butter is no longer in large chunks. You should be able to still see small chunks of butter in the mixture.
This helps form the flaky texture you are looking for in your pie crust.
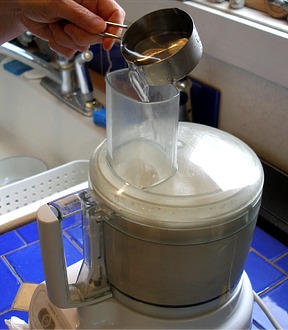
3. Add the water to the dry ingredients.
This is where you must proceed with caution. Too little water and your dough will be crumbly and impossible to roll out. Too much water and your crust will be sticky to roll and tough, when baked. You must use a gentle hand with pie dough and proceed slowly!
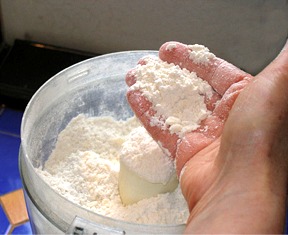
A. START with 1/4 cup of water, adding it to the flour mixture, through the feed tube in the food processor, while pulsing the machine until the dough starts clumping together. DO NOT just turn the processor on – use the PULSE button.
B. Open the processor to check the condition of the dough. It should still be a bit crumbly, but it should start to clump together. To test the dough, squeeze it between your fingertips and it should just stick together. If it does, the dough is done – do NOT add any more water.

If the dough is too dry, add more water, a few drops at a time, up to a teaspoon, and hit the pulse button for a second. Open the food processor and check the dough after each addition. Most of the time, I find that 1/4 cup water total is plenty. Of course, the moisture content of flour can vary, and you MAY have to add more than 1/4 cup, but do so, about 1 teaspoon at a time.
If the dough is too wet, add a teaspoon of flour at a time, and pulse the food processor to combine.
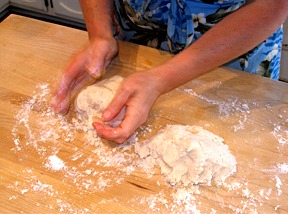
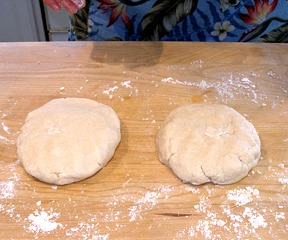
4. A. Empty the food processor contents out onto your work surface and gather the dough into two evenly-sized mounds.
Flatten the disks, and make them as round as possible, so it is easier to roll them out, when the time comes.
B. Wrap each disk in plastic wrap and place it in the refrigerator, to chill 1 to 2 hours, preferably overnight.
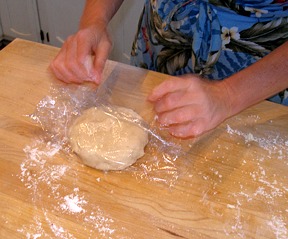
KELLY SAYS: It is important that your pie dough is well chilled before you go to roll it out.
STORAGE
The pie dough can be made 2 to 3 days in advance and refrigerated or frozen for up to a month. Thaw in refrigerator before use.
STEP II: MAKE THE APPLE PIE POP FILLING
APPLE PIE POP FILLING
IMPORTANT NOTE: Use our special filling recipe for best results; it has to be thick, low in moisture and pre-cooked. The fruit must be chopped in small dice or pieces.
INGREDIENTS
4 medium size apples or pears, peeled and cored, cut in small dice or pieces; example: medium fuji apples
1/3 cup sugar
1/2 cup unsweetened or sweetened apple juice
1/2 teaspoon ground cinnamon
Dash of ground ginger
Small pinch of salt
2 tablespoons unsweetened or sweetened apple juice
2 teaspoons cornstarch
INSTRUCTIONS
1. Place diced apples, sugar, apple juice, cinnamon, ginger and salt in a medium size saucepan.
3. Cook mixture for 15 minutes, on medium-low heat, stirring occasionally, or until apples have softened and most of the apple juice has reduced.
4. In a small bowl, place the cornstarch and mix 2 tablespoons apple juice with it. Stir it into the cooked apple mixture.
5. Cook for one minute, or until the juices have thickened.
6. Remove pan from heat and spoon filling into a bowl or a 9 x 13-inch baking pan so it cools faster.
Set aside to cool or place a piece of plastic wrap on its surface and refrigerate a few hours until cold.
STORAGE
The filling can be made a few days in advance and refrigerated, well covered.
STEP III: ROLL OUT THE PIE DOUGH DISKS, CUT THE DOUGH CIRCLES, APPLIQUES AND REFRIGERATE
Roll each dough disk to a little less than 1/4-inch thick.
From the two dough disks, make sure you cut out a total of fourteen 2 1/2-inch circles for the back of each pie pop.
Fourteen 3-inch circles of dough for the front of each pie pop.
Fourteen appliques. Reroll scraps if necessary
Ingredients:
2 disks Perfect Food Processor Pie Dough, chilled
Special Equipment:
Two rimmed baking pans lined with silpat mats or parchment paper
One 2 1/2 – inch fluted round cookie cutter
One 3 – inch fluted round cookie cutter
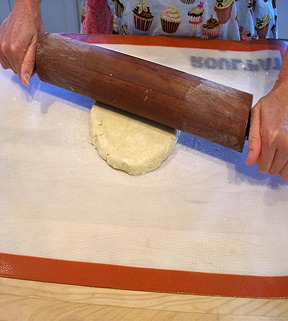
A. Roll out the first dough disk to a little less than 1/4-inch thick:
1. Remove one wrapped disk of pie dough from the refrigerator and let it sit on the counter for about 10 minutes, so it will roll out easily.
It is important that the pie dough is well chilled when you make the pie pops, but rolling it out when it is too cold makes it too hard to roll.
2. LIGHTLY flour your rolling pin and work surface or only enough to keep the dough from sticking.
It is important to add as little flour to the work surface during the rolling process because it toughens the pie crust dough.
We like to use a silpat mat because it minimizes the use of flour.
3. Begin in the center of the dough and roll outward.
Stop the rolling pin as it nears 1/4 inch from the edge of the dough; don't roll over the edges as they crack or become too thin.
Do not roll backwards; simply lift the rolling pin when done.
4. Lift and rotate the dough by a quarter before resuming again, tossing a light dusting of flour beneath, only if necessary.
This is to ensure that it is not sticking to your rolling surface and that is being evenly rolled. If your dough is cold enough, it should not stick.
If your dough sticks, loosen it with a long offset icing spatula, dusting underneath with a small amount of flour.
5. Roll dough to a little less than 1/4-inch thick.
B. Cut out the pie pop dough circle shapes and appliques from one rolled out dough disk:
1. As closely together as possible, cut out a total of seven 2 1/2-inch circles for the back of each pie pop.
Seven 3-inch circles of dough for the front of each pie pop.
Seven appliques. Reroll scraps if necessary
2. Set cut-out pieces on the prepared cookie sheet and cover with plastic wrap. Refrigerate until needed.
You do not want the dough to become warm.
C. Repeat Step III, A – B with second dough disk:
STEP IV: FILL THE PIE POPS
Ingredients:
Cut-out pie dough shapes from Step III
Apple Pie Pop Filling from Step II
Water
Special Equipment:
14 paper lollipop sticks
One 2 1/2 – inch fluted round cookie cutter
One 3 – inch fluted round cookie cutter
1 tablespoon ice cream scoop/disher
small clean paint brush
First cookie sheet tray of cut-out pie pop parts:
1. Remove the first cookie sheet containing the cut-out pie dough pieces from the refrigerator and set in a cool place.
2. Place one 2 1/2-inch circle on the work surface.
I like to line my work surface first with a silpat mat.
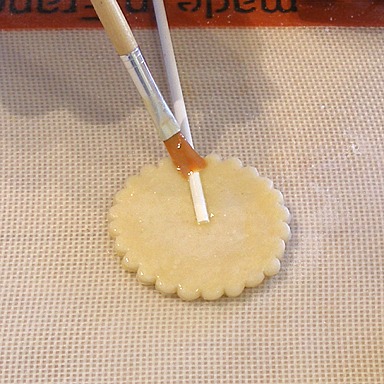
3. With a small brush, paint the edge of the small circle with water.
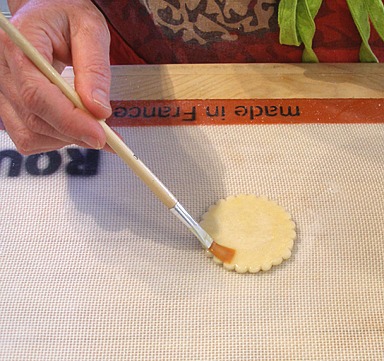
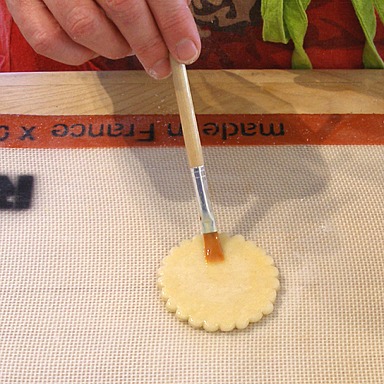
4. Paint the water about 1/2 way up the middle of the center bottom of the circle. The water will act as a glue, to keep the stick in place.
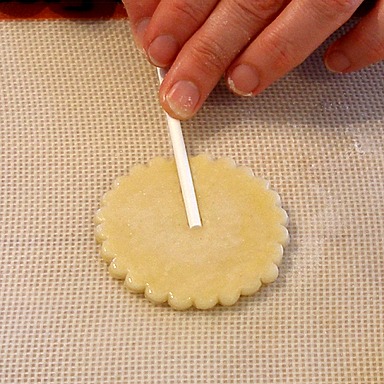
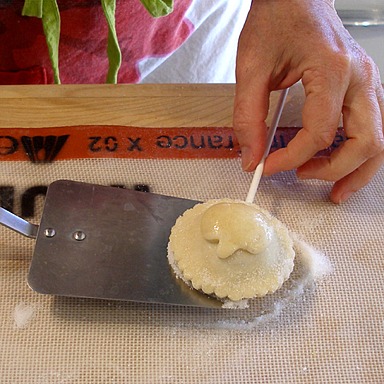
5. Gently press the lollipop stick onto the painted area, so the top of the stick reaches the center of the circle. Be careful to not press all the way through the dough.
Do not place the stick's top near the top of the circle – it has a tendency to slide while you're eating the pie pop and will break the pie.
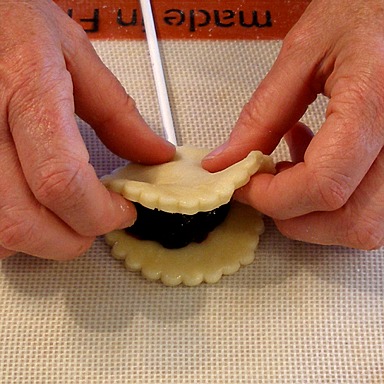
6. Paint the end of the stick that touches the dough with water. This will help it adhere to the top circle of dough.
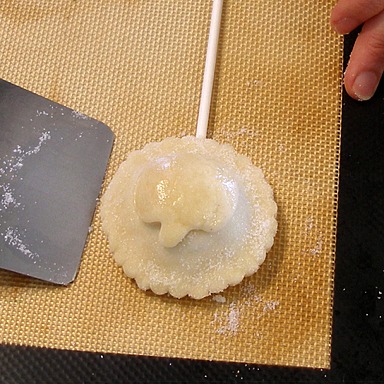
7. Place 1 tablespoon fruit filling in the center of the dough. Be careful not to get any filling near the edge, or the pop may not seal correctly.
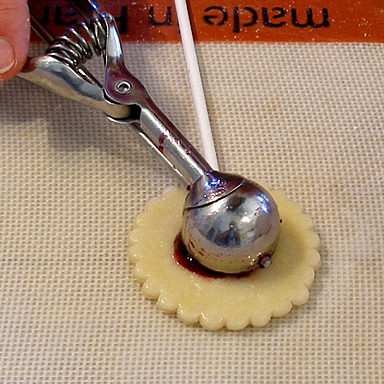
A tablespoon size ice cream scoop is handy to use to fill the dough with; this makes a nice high mound, which looks prettier and keeps the filling away from the edges of the dough.
8. Place the 3-inch dough circle on top and press the edges to seal.
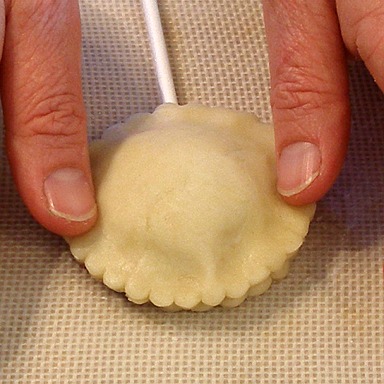
9. Repeat with the remaining 6 pie pops from the first cookie sheet tray.
10. Use a flat pancake spatula to help you transfer the pie pop back to the prepared cookie sheet.
Do not lift the pie pop without ample support otherwise the stick with pull out from the pie.
Cover and refrigerate until chilled.
You just do not want the dough to become warm.
Second cookie sheet tray of seven:
1. Repeat the pie pop filling process, STEP IV, 1 – 10, above.
STORAGE
For long term storage, refrigerate pie pops for a day or two before baking. Can be frozen for a month.
Thaw in refrigerator.
STEP V: FINISHING TOUCHES AND BAKE
Ingredients:
14 filled pie pops from Step IV
1 large egg, mixed well with a fork or small whisk
3 tablespoons granulated sugar or more, for sprinkling
INSTRUCTIONS
First cookie sheet tray of seven filled apple pie pops:
1. Take first cookie sheet tray of seven filled apple pie pops from the refrigerator.
Use a flat pancake spatula to help you transfer the pie pops onto a silpat or parchment paper lined work surface.
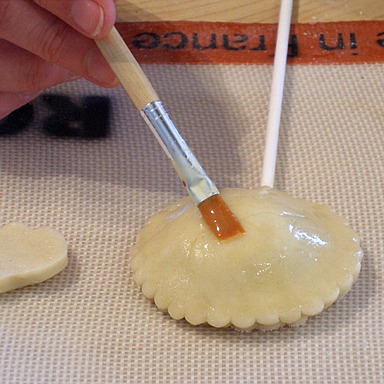
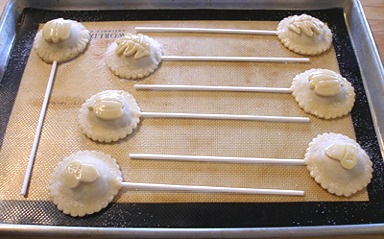
2. On the work surface, paint the top of each pie pop with the beaten egg.
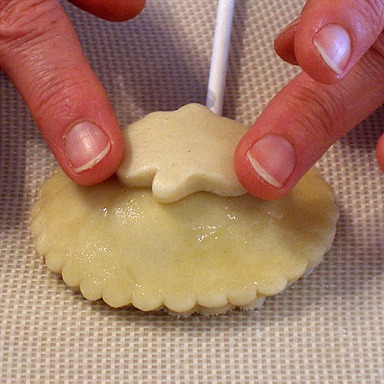
Place one appliqué in the center of the pop and press gently to adhere.
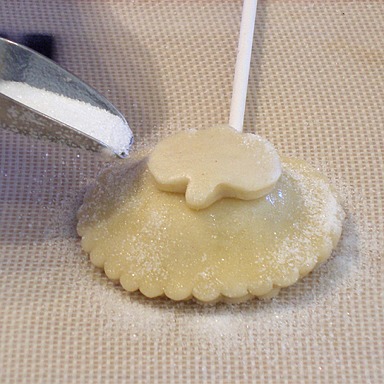
3. Sprinkle each pie pop with granulated sugar, trying to keep most of it off the appliqué.
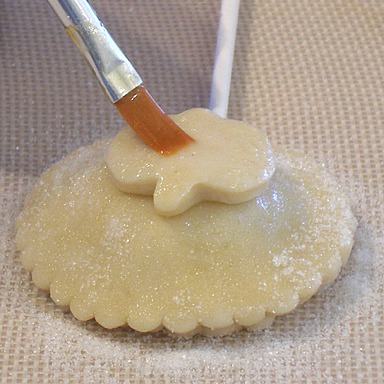
4. Brush the top of each appliqué with beaten egg, so it would stand out from the background.
5. Use a flat pancake spatula to help you transfer each pie pop to a silpat or parchment lined baking sheet.
Do not lift the pie pop without ample support otherwise the stick with pull out from the pie.
6. Continue with the rest of the pie pops until you have 7 pie pops on each baking sheet.
Do not cover. Place cookie sheet in the refrigerator. You do not want the dough to become warm.
Second cookie sheet tray of seven filled apple pie pops:
1. Repeat the pie pop filling process, STEP V, 1 – 6, above.
STEP VI: BAKE THE PIE POPS AND GUILD THE LILLY – PAINT PIE POPS WITH THE POWDERED SUGAR PAINTING GLAZE
Bake the pie pops:
1. Preheat the oven: Position a shelf in the middle of the oven and preheat to 375 degrees F for about 20 minutes.
2. Bake one tray at a time, right from the refrigerator, for about 18 – 20 minutes until just golden brown. Do not overbake.
3. Let sit for 5 minutes. Carefully remove each one with a wide spatula to a wire cake rack to cool. Do not pull on the stick.

Paint the pie pops:
Ingredients:
14 baked and cooled pie pops; they must be thoroughly cooled
1 recipe Powdered Sugar Painting Gaze, recipe below
small paint brush
POWDERED SUGAR PAINTING GLAZE
INGREDIENTS
2 cups powdered sugar, sifted; sift after measuring
2 tablespoon water
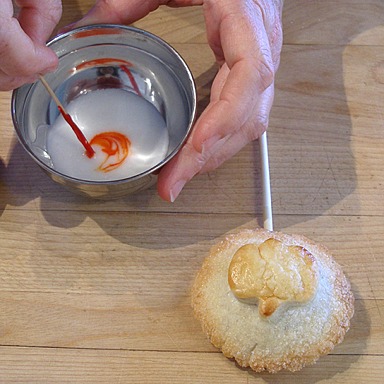
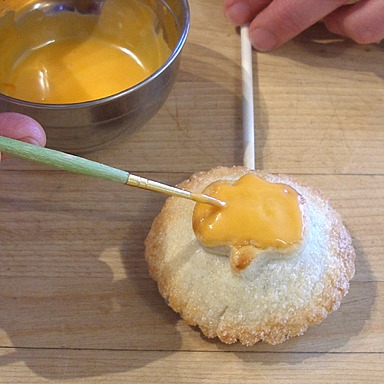
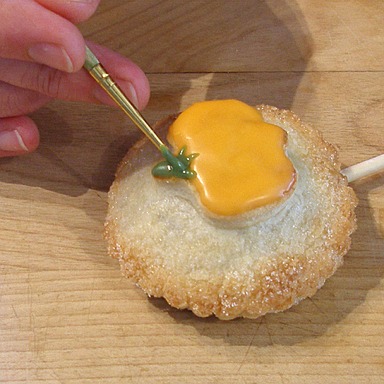
Gel food colors – for these fall themed pie pops, we made orange, deep orange (orange with a bit of brown added) green and brown “paint”.
INSTRUCTIONS
1. Combine sugar and water and stir until smooth.
2. Place two tablespoons of the mixture into 4 small bowls.
3. Tint the “paint” by adding a very small amount of gel food coloring, with the end of a toothpick.
Keep painting glaze covered with plastic wrap.
4. Stir until color is evenly distributed.
5. Using a small paintbrush, paint each pie pop appliqués.
While you are using one color, be sure to keep the other painting glaze colors covered with plastic wrap, so they don't dry out.
If the colors get too stiff to paint with, you may thin them with some water, adding one drop at a time. Make sure you stir really well after each drop.
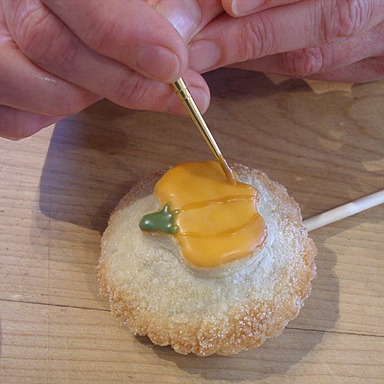
6. Let painting glaze dry and serve!
STORAGE
Store at room temperature for a few days, loosely covered. Do NOT refrigerate.