
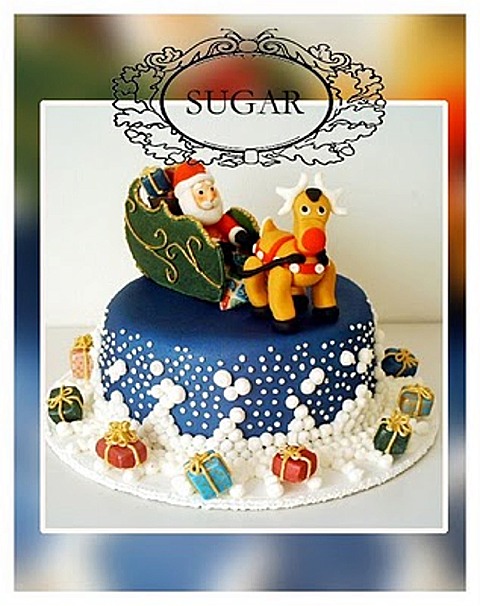
Premium Member chocolatedrummer has worked hard to put together a tutorial just for us on how to make a special holiday Christmas cake! Her whimsical and yet detailed style, includes complete step-by-step instruction on how to cover the cake board, work with fondant, pipe decorations on the cake, and to hand-build a fabulous Santa in his Sleigh pulled by Rudolph Cake Topper – and, last but not least, how to assemble the entire creation. All of chocolatedrummer's designs are unique and specially done for this website! I applaud her for yet another sensational and creative design!
CAKE RECIPE HELP
EQUIPMENT NEEDED
1. Thick cake drum (cardboard cake round) at least 2-inches larger in diameter than the cake; example: for a 9-inch cake, use an 11 or 12-inch cardboard cake round.
2. piping bag with Wilton round tips #3 & #12
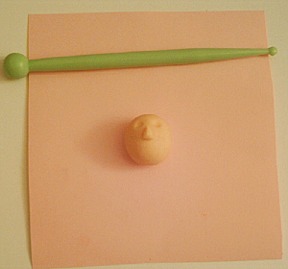
3. ball tool
4. cocktail stick
5. cotton bud (Q-Tip)
6. paste food colors; black, red, blue, green, flesh, brown, violet
7. Gold and white luster dust
8. Red coloring powder (optional)
9. Any clear alcohol e.g. gin or vodka
10. Styrofoam collar or paper towels
11. paintbrush
12. dry spaghetti sticks
13. pizza wheel or knife
14. cardboard for stencil
I. ASSEMBLE AND DECORATE THE CAKE
INGREDIENTS
1 recipe 2 x 9-inch layer cake – I recommend either a fruit cake covered with marzipan or Sarah's Ultimate Butter Cake or UBC filled and frosted with Tami's or Perfect Buttercream. You need a sturdy cake with this project to support the decorations and cake topper
1 recipe Rolled Fondant
1 recipe Royal Icing
INSTRUCTIONS
STEP I: COVER CAKE DRUM AND CAKE
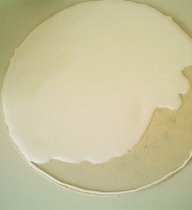
1. The first step is to cover your cake drum (cardboard cake round) in white royal icing. You do this as you would ice a runout cookie. Pipe a line of stiff royal icing around the outside of your cake drum.
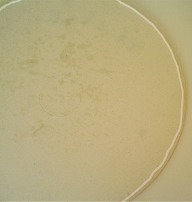
Take half of your royal icing, thin down with a couple of tablespoons of water to a pouring consistency and spoon gently onto the board covering the whole area with the back of the spoon, touching right up to the line. This is quite simple to do as the icing is fairly self leveling.
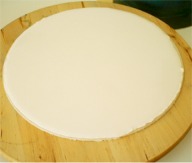
Leave the board to dry overnight if possible although the board will be touch dry after a couple of hours if you really can’t wait!
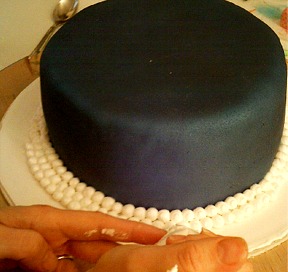
2. Next you need to cover your cake in fondant.
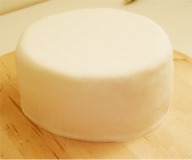
I airbrushed my cake using blue and violet paste color mixed with gin and white luster dust.
If you aren’t airbrushing color half of the fondant with blue and violet food color paste and then cover cake and finally dust liberally with white luster dust.
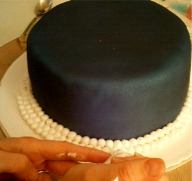
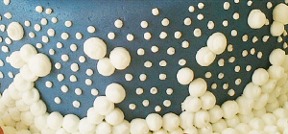
3. Once your cake is covered place it onto the iced cake drum and begin piping your snowballs. This line of icing also holds your cake onto the board so you don’t need to worry about it staying in place.
Fill your piping bag with stiff royal icing and start piping with the larger Wilton round tip # 12.
Start with three rows of snowballs at the base of the cake, staggering them slightly. To pipe balls place your icing tip onto the cake and squeeze gently until a ball forms then stop squeezing and pull off the cake.
To remove peaks or points from your snowballs just use the flat of a paintbrush to gently flatten them.

Next pipe snowballs onto the board and up the side of the cake. Try to vary the ‘piles’ of snowballs on the sides to give a more natural looking effect.
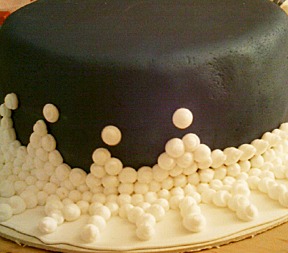
4. Finally switch to the smaller #3 Wilton round tip and pipe the smaller snowballs in the spaces on the side. Pipe in the same way as the larger ones flattening peaks with a brush as you go along.
Your cake is now finished and ready for your topper!
STEP II. MAKE THE CAKE TOPPER
Order of assembly and tips for the topper – Since many of the pieces need to dry overnight you can make better use of time if you prepare the topper in this order:
Day 1
Make Santa’s head and arms
Make Rudolph’s head and body but don’t assemble
Make pieces for sleigh
Make and paint gift boxes
Day 2
Join Rudolph's head and body
Join sleigh pieces then paint and pipe designs.
Pipe ribbon onto gift boxes
Make Santa’s sack and rug
Assemble topper
Many of the pieces can be joined without glue but where I have specified sugar glue you can use shop-bought sugar glue, royal icing, egg white or even water. If I have specifically indicated royal icing for joining please don’t substitute sugar glue or water, royal icing is needed for strong fixes.
SANTA TOPPER
You will need to color small amounts of your fondant in red, flesh, white and black as shown below.
These are the individual pieces you’ll need to make Santa’s head.
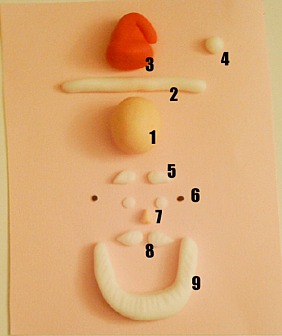
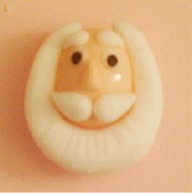
1. head in flesh
2. hat trim in white
3. hat in red
4. pompom in white
5. eyebrows in white
6. pupils in black and whites for eyes
7. nose in flesh
8. mustache in white
9. beard in white
INSTRUCTIONS
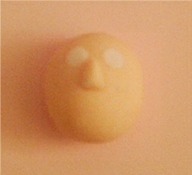
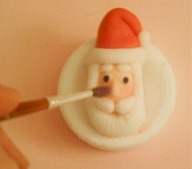
Attach the nose to the middle of the face. If you make the pieces as you go along you can attach them to the head without glue as the fondant remains sticky.
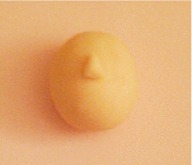
Then using the ball tool make two sockets in the face for the eyes.
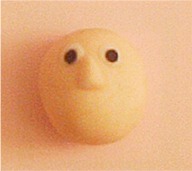
Stick the white of the eyes into the sockets.
Add the pupils, can be fiddle work to get them straight – you can gently move them into place using the ball tool or a cocktail stick.
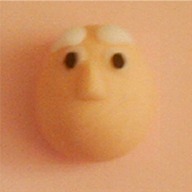
Add the eyebrows.
Add the mustache and beard and gently score ‘hair’ with a cocktail stick.
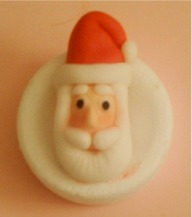
Put hat in place and gently push into the top of head. Add the hat trim and pompom.
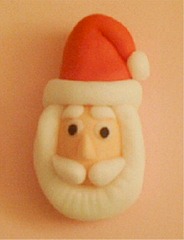
Now take a flat piece of white fondant about the same size as the head and wrap around the back of the head to form hair. You can also score this to make strand marks.
Now you can add a little blush to Santa cheeks using red powder color and a brush or a very small amount of paste color on the end of a cotton bud.
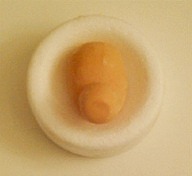
Use a cocktail stick to make a hole in the bottom of the head so you can attach it to the body later.
Leave finished head to dry on some kind of curved surface, I’ve used a Styrofoam collar but you can also use scrunched up paper towels.
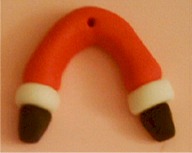
To make arms take a roll of red fondant and curl. Add cuffs, small circles of white fondant, and then hands, small fondant pieces in black. Make a hole through the middle of the arms with the cocktail stick to attach head.
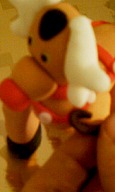
STEP III. MAKE RUDOLPH
These are the individual pieces you’ll need to make Rudolph – Now color small amounts of your fondant brown, white, red and black as shown below.
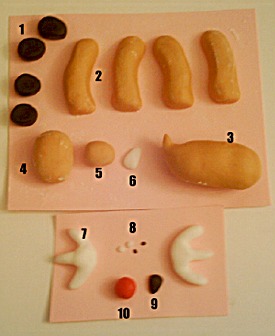
1. feet in black
2. legs in brown
3. body in brown
4. head in brown
5. muzzle in brown
6. tail trim in white
7. antlers in white
8. pupils in black and whites for eyes
9. hair in black
10. nose in red
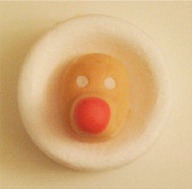
Attach the muzzle to the head
Then attach nose to muzzle
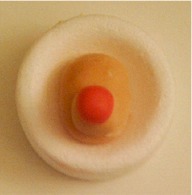
Using ball tool or cotton bud gently rub above the muzzle to make the eye sockets.
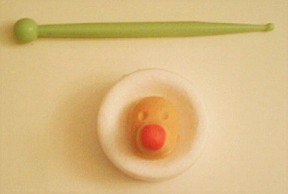
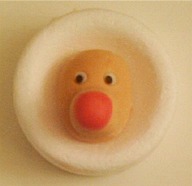
Put the eye whites into the sockets.
Put the pupils onto the eye whites using the ball tool or a cocktail stick to move into place.
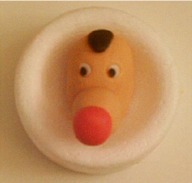
Add the hair.
Then stick the antlers onto either side of the head, you may need to use a little royal icing to get them to stick.
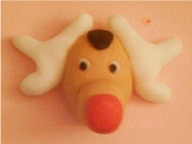
To finish the head make a hole in the base with the cocktail stick so you can fix it to the body when dry.
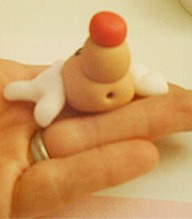
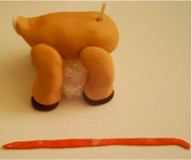
To construct Rudolph’s body first make two holes with a cocktail stick on each side of the main body where the top of the legs will go.

Make similar holes in the top of the legs and place a small piece of spaghetti inside the holes in the body. Attach the leg by joining to the body. The spaghetti gives the joint some strength but I also recommend using a little sugar glue to ensure a good fix.
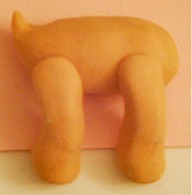
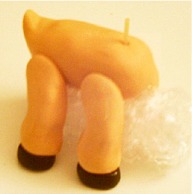
Continue with the other legs until finished.Then add a foot to the bottom of each leg again using a little sugar glue. Place a piece of scrunched saran wrap/cling film under the body. This supports the weight of the body until the legs are dry.
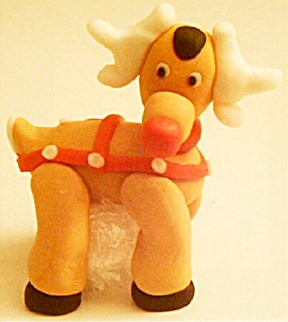
Add the tail trim to the peak at the back of the body.
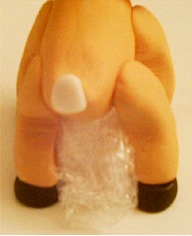
To make the trim take a piece of strip of red fondant about equal to the circumference of the body and wrap around using a little water to stick into place. Then place a smaller strip over the back.
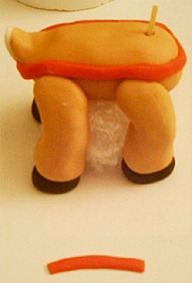
Then using the ball tool or cotton bud add little balls of white to the trim.

Leave the body to dry overnight before you add the head.
Just before you are ready to add the head to make the collar place a ball of red fondant onto the spaghetti for the head and gently push the head down onto the body.
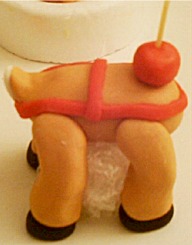
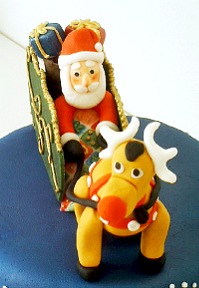
Rudolph is now finished and ready to go on the cake.
STEP IV. MAKE THE SLEIGH
Color a small amount of fondant green. I add a little tylose powder, which makes the fondant dry faster and gives more strength to the structure. This is optional but if not using you will have to prepare the sleigh at least three days in advance to allow it to fully dry before assembly. Alternatively use gumpaste / pastillage for the sides.
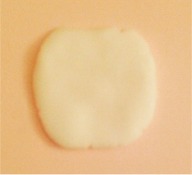
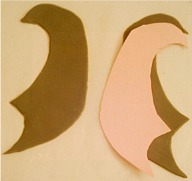
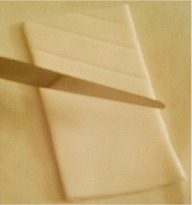
Make a stencil using cardboard to give you a shape for your sleigh. Using a pizza wheel or knife cut out the sides flipping the stencil for the second side.
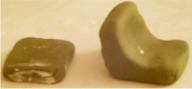
Make a seat for Santa and the back piece for the sleigh.
Allow to dry overnight (see note above).
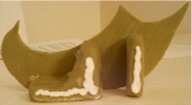
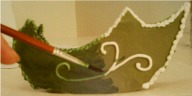
Using a little royal icing attach the sides to the seat and the back.
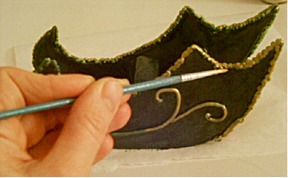
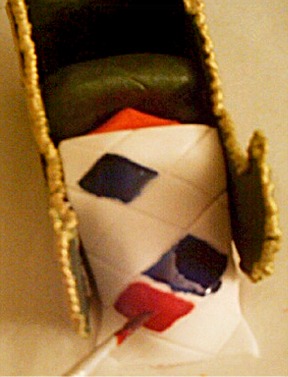
Using wilton round tip #3 and royal icing your design to the sides of the sleigh and a trim over the top.
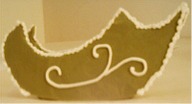
Apply a liquid paste mix of white luster dust with a little green color all over the sides to give some shine. Leave to dry for about an hour.
After about an hour you can paint the trim using a paste of gold luster dust and white alcohol, such as vodka.
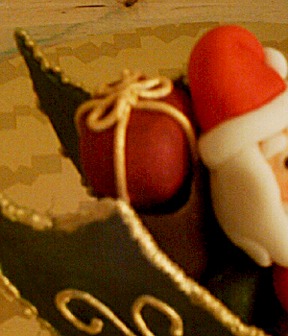
STEP V. MAKE THE GIFTS
The gifts are simply blocks of fondant painted with paste color.
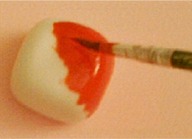
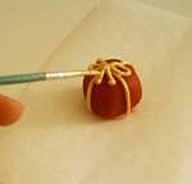
Leave to dry overnight and finally using the Wilton round tip # 3 pipe on the ribbon. This can be left white or painted with luster dust paste.
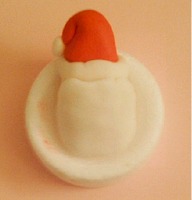
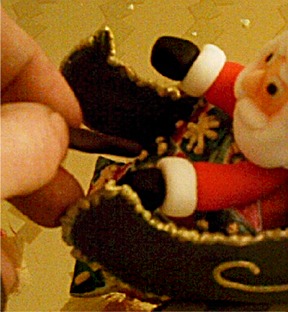
STEP VI. ASSEMBLE SANTA'S RUG AND SACK
When all the topper pieces are painted and dry you can assemble them. I recommend doing this directly onto the cake. Any bits of icing that fall onto the cake during assembly should be removed with a dry brush.
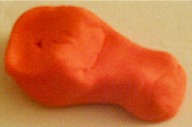
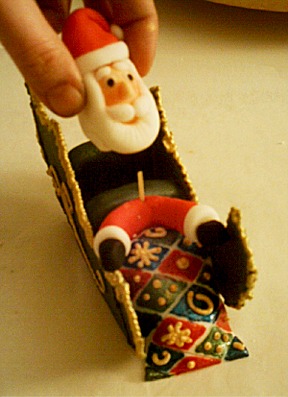
Put a little sugar glue onto the bottom of the sleigh and place the sleigh onto the cake. Now using a roughly rolled piece of fondant make Santa’s body, this will be completely covered by the rug so don’t worry too much about the shape or color, sit the body in the seat of the sleigh and make a hole to attach the arms and legs.
Now make the rug from a small square of thinly rolled white fondant. You can score the quilt marks using a ruler or by lightly scoring with a knife.
Place the rug over Santa’s body tucking it into the sides of the sleigh. You can now decorate the rug using paste colors and royal icing as you wish.
When the rug is touch dry (an hour or so) you can add Santa’s head and arms. Slot spaghetti into the body and gently add the arms and then the head. You can use a little sugar glue in between each piece for further stability. Try not to press too hard to ensure the rug doesn’t crack.
Now make Santa’s sack using a small piece of thinly rolled brown fondant.
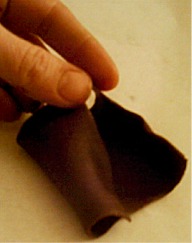
Tuck the sack into the space between the back of the chair and the sleigh.
Leave to dry completely before you add any gift boxes.
Now add Rudolph to the cake and roll out long strands of black fondant to make the reigns. Tuck the reigns under Santa’s hands and attach with a little royal icing to Rudolph under his chin.
Add the gift boxes to the cake and you're finished!
Photo and decorated cake and Santa cake topper by chocolatedrummer © Sarah Phillips