Recipe by Sarah Phillips and Kelly Hong; Food styling and photos by Kelly Hong © 2013 Sarah Phillips CraftyBaking.com
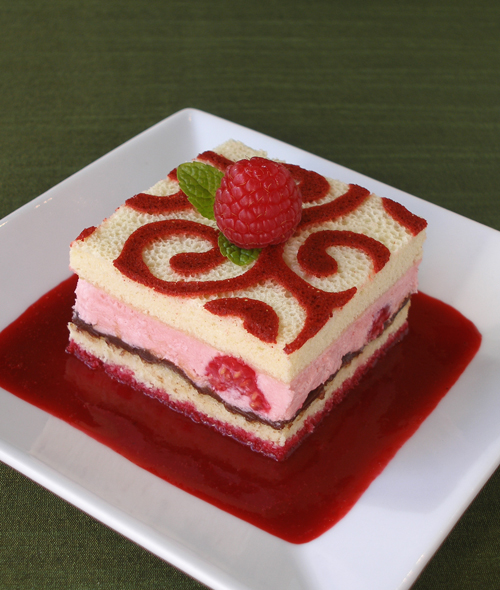
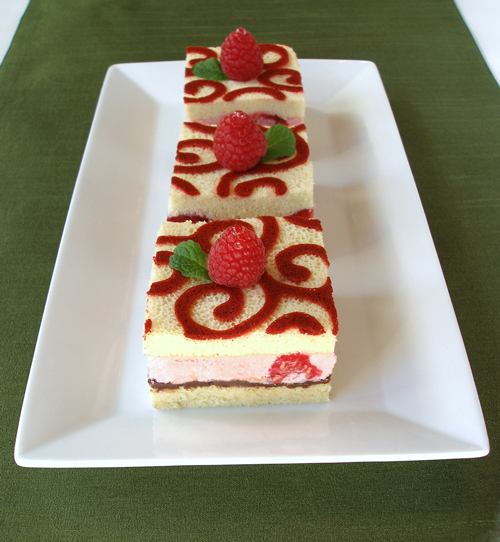
Cake cut into 3-inch squares
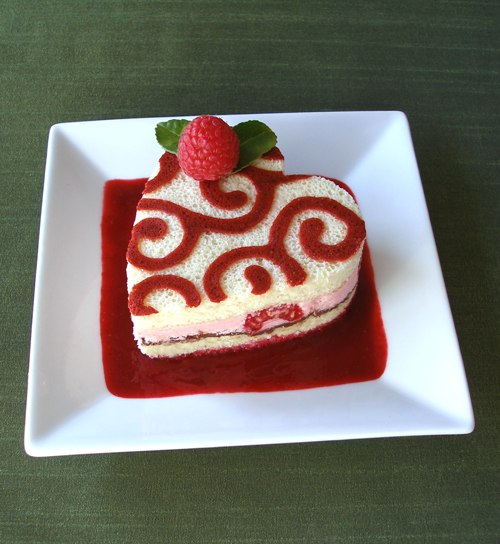
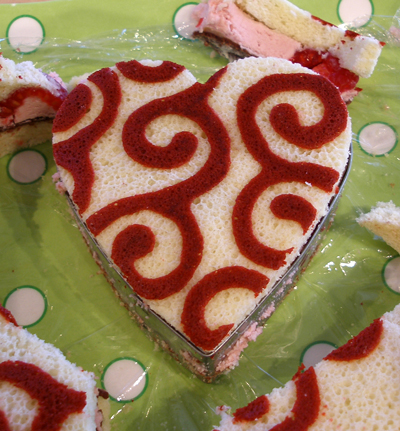
Cake cut into a heart shape
For months, Kelly and I were seeing darling decorated sponge cake rolls all over the internet. Unfortunately, most of the recipes I found were in Japanese or Chinese and I couldn’t quite figure out the technique. It took translating a recipe, rewriting it for home bakers, and testing it over and over to make it work. Nine cake rolls and lots of frustration later, I was able to perfect the technique.
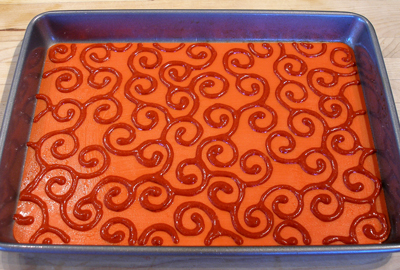
Next, I decided to create a flat, layered sponge cake using this technique – which is explained in great detail below – to decorate the top. For this project, I decided to decorate the cake with an arabesque pattern (the template is included with this recipe), but you can use any design you like. Arabesque is a form of decoration that employs flower, foliage, or fruit and sometimes animal and figural outlines to produce intricate patterns of interlaced lines. I find it just beautiful.
The cakes are filled with fluffy White Chocolate Raspberry Ganache and fresh raspberries, and are light and quite refreshing. They are also not overly sweet, because they are not loaded down with icing or fondant. Once the cake is chilled, it can be cut into any shape or size, giving you loads of options. I’ve cut mine into squares and hearts and serve it with a scrumptious raspberry puree.
Make sure you have all your ingredients measured out and grouped together according to the mixing instructions in the recipe before you get started. While the recipe isn’t difficult, there are a lot of steps and it is easy to get confused the first time around. After you have made it several times, it will be much easier!
Check out the other recipe tutorials with design templates similar to this, such as the Decorated Sponge Cake Roll, the Cherry Blossom Cake Roll, and the Autumn Leaves Cake Roll, each with different patterns and templates.
CAKE RECIPE HELP
SECRETS
NOTE: Decorated roll cakes have been popularized in Asian countries, primarily by a Japanese baker named Junko. Check out her blog at http://ameblo.jp/chottono-kufu/. A big thanks to our dear premium member “Kake” for helping me with the recipe and instruction translation so I could come up with a home baker riff on this technique.
The tops of these delicious filled mini-cakes are decorated with swirly designs…all done with batter that you pipe onto a template then bake for a couple of minutes, just enough to set the batter. You then add the vanilla cake batter and bake the flat sheet cake atop the swirled design, so that the design becomes part of the cake. I’ve included a design template which you will find makes things remarkably simple. This technique works better than the frozen batter technique because the colors remain vibrant and the lines stay more precise. Better yet, there is no frosting or fondant involved.
INGREDIENTS
For the bottom plain cake layer, STEP II:
3 large eggs, separated
1/3 cup sugar, separated – use 3 Tablespoons for egg yolks; 2 Tablespoons and 1 teaspoon for egg whites
1/4 cup water
3 tablespoons vegetable oil
1/2 teaspoon vanilla
2.8 ounces/80 grams cake flour
For the decorated top cake layer, STEPS III and !V:
3 large eggs, separated
1/3 cup sugar, separated – 3 Tablespoons for egg yolks; 2 Tablespoons and 1 teaspoon for egg whites
1/4 cup water
3 tablespoons vegetable oil
1/2 teaspoon vanilla
2.8 ounces/80 grams cake flour
For the decorations:
1 large egg white
pinch of cornstarch
Super Red gel paste food coloring
Chocolate Brown gel paste food coloring
1 1/2 teaspoons cake flour
For the filling:
1 recipe White Chocolate Raspberry Ganache Frosting and Filling
NOTE: I added about 1 drop of Super red gel paste food color to the ganache to give it a rosy glow.
3/4 cup Chocolate Cake Glaze
about 20 raspberries, washed and placed on paper towels to drain
Garnish and plating:
raspberries, washed and placed on paper towels to drain
1 recipe Raspberry Puree
Equipment:
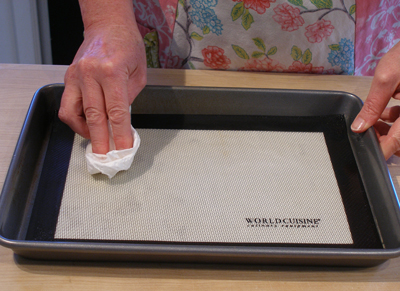
Silicone Baking Mat, translucent to fit a 9 x 13-inch baking sheet: Must make sure it is 100% silicone if you have to cut to fit pan size and use for baking.
Sources: NordicWare.com and World Cuisine Non-Stick Silicone Baking Mat
INSTRUCTIONS
STEP I: PREPARE THE RECIPE
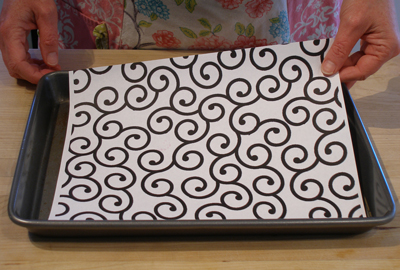
Print out ONE piping template:
1. Arabesque Pattern Piping Template (for the pan)
Click on the link, above and then print
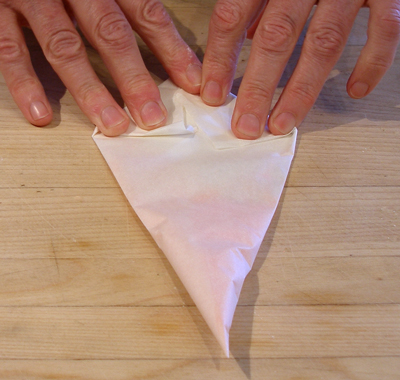
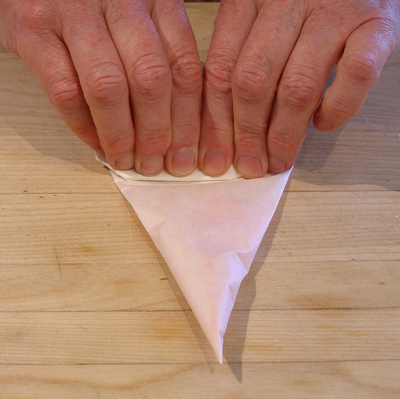
2. Make two parchment paper cones. Do not cut the opening in the bottom of the bag until after you have filled them with batter.
Set bags aside until needed in Step III.
STEP II: PREHEAT THE OVEN. MAKE AND BAKE THE PLAIN CAKE LAYER.
Preheat the oven and prepare the pan:
1. Position an oven shelf in the middle of the oven and preheat oven to 325 degrees F for 20 minutes.
2. Place the silicone liner in a shallow 9- x 13-inch baking sheet(this is also known as a 1/4 sheet pan, or a brownie pan).
Rub the liner and sides of the pan with a little vegetable oil. Set aside.
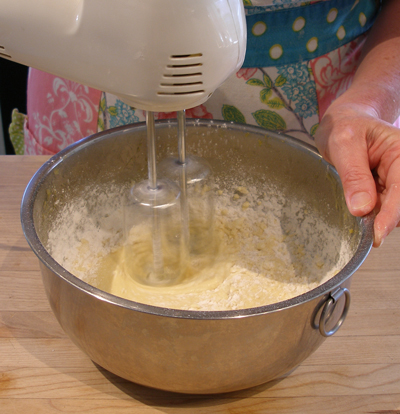
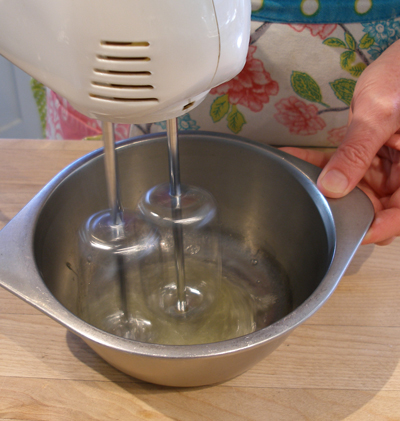
1. Beat three egg yolks with 3 tablespoons sugar with hand mixer on high, until ribbons form.
Make sure to scrape down the sides of the bowl so no thick globs of egg yolk cling to the sides of the bowl.
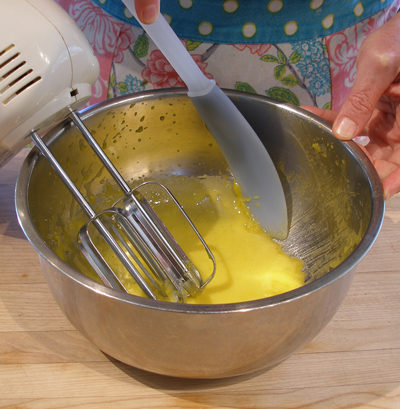

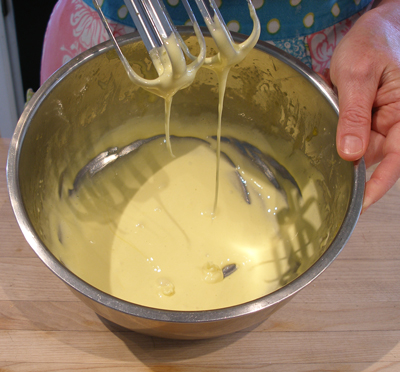
2. Add water, oil, vanilla, and mix well on high speed.
5. Cover and set the egg yolk batter aside while you beat the egg whites in the next step.
Make the beaten egg whites. Fold into the egg yolk batter. Pour into baking pan:
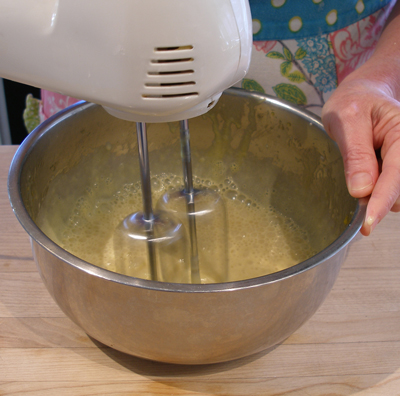
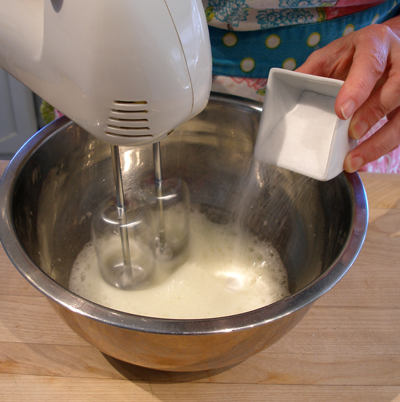
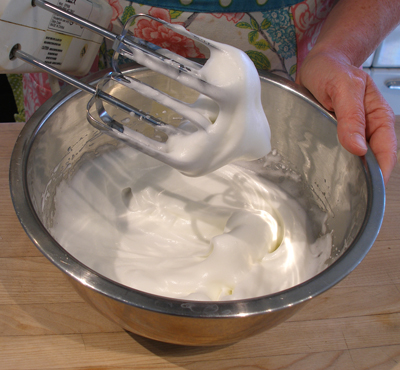
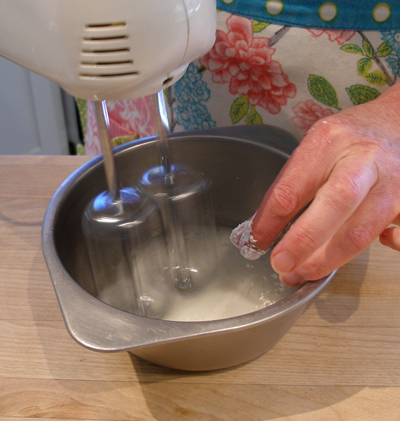
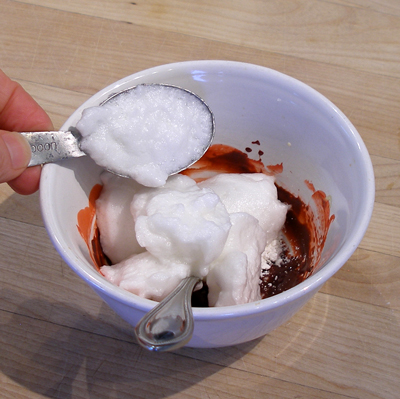
1. Clean the beaters thoroughly, then whip the three egg whites with the remaining 2 tablespoons and 1 teaspoon of sugar.
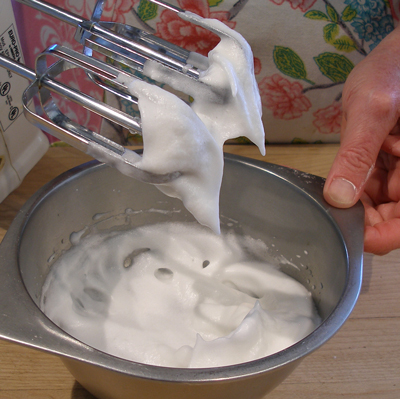
Beat until stiff peaks form.
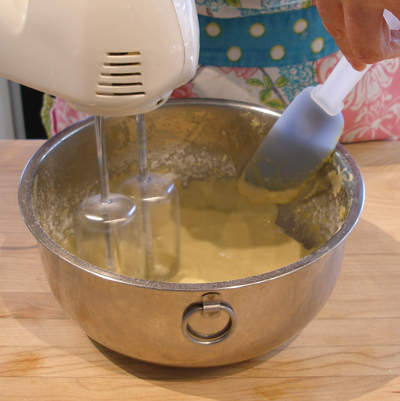
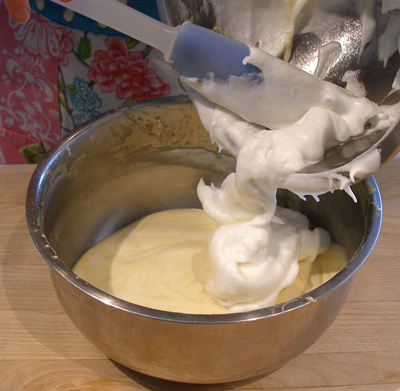
 3. Then, add 1/3 of the beaten egg whites to the egg yolk mixture and fold with a large rubber spatula to combine.
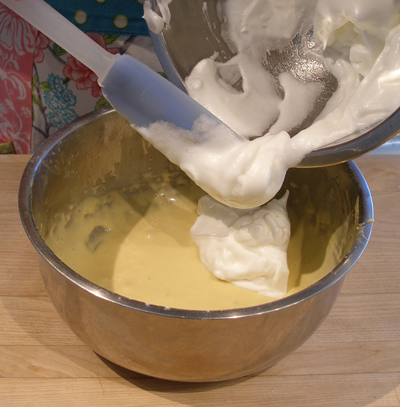
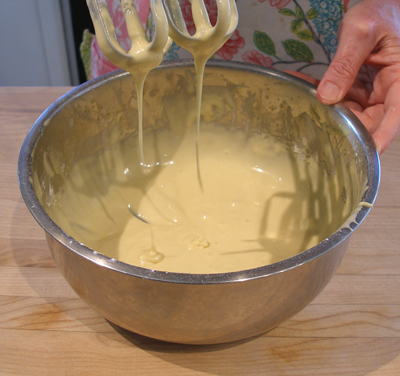
4. Add the rest of the egg whites, folding gently until no clumps of egg white are showing.

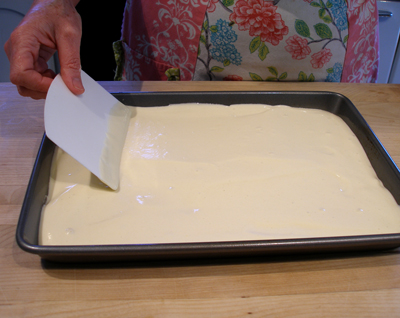
5. Pour the batter into the prepared pan and spread the batter evenly with a rubber spatula.
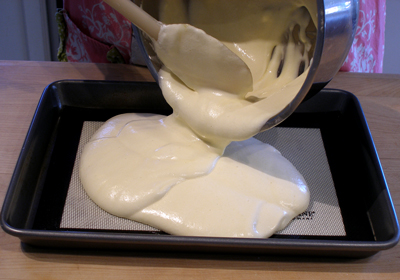
6. Gently drop the pan on the counter a couple of times to release any extra air bubbles.
Bake the cake and unmold:
1. Bake the cake for about 10 to 11 minutes.
To test for doneness, the cake should be slightly brown on the edges and still fairly pale on top. Test it with a toothpick. It should come out dry.
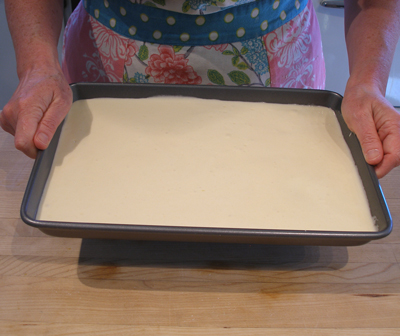
2. Place cake, while still in the pan, on a wire rack. Do not let it cool.
3. Remove the cake from pan while still hot.
To do:
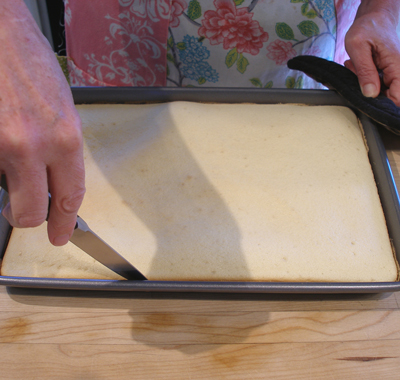
a. Use a thin, sharp knife to loosen the sides of the cake from the pan.

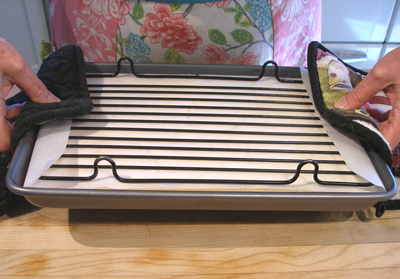 c. Remove the silicone sheet from the bottom of the cake, then place a piece of parchment on the surface of the cake so it does not dry out.
Set aside until needed.
4. Optionally, turn off the oven.
STEP III: PIPE THE ARABESQUE DESIGN AND BAKE THE DECORATED CAKE LAYER
Prepare the pan:
1. Place the Arabesque Pattern Piping Template (for the pan – Click on the link, and then print if you haven’t done so before) in the bottom of a shallow 9 x 13-inch baking sheet(this is also known as a 1/4 sheet pan, or a brownie pan).
Trim the template to fit your pan, if you have to so it lies flat.
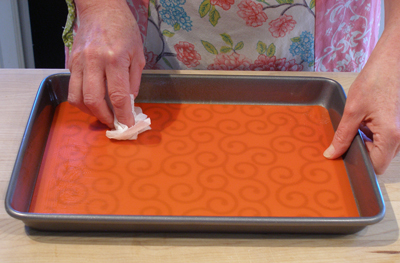
2. Place the silicone liner in the pan and rub the liner and the sides of the pan with a little vegetable oil.
NOTE: You will need to use a translucent liner, such as the one being used here, so you can see the Black and White Piping Template, below.
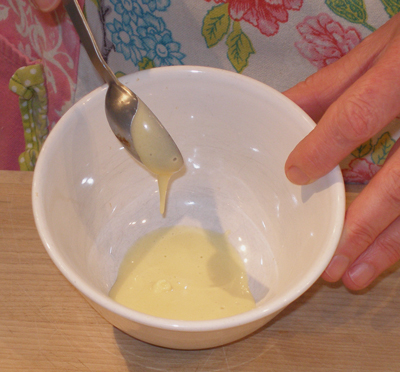
1. Beat three egg yolks with 3 tablespoons sugar with hand mixer on high, until ribbons form.
Make sure to scrape down the sides of the bowl so no thick globs of egg yolk cling to the sides of the bowl.
2. Add water, oil, vanilla, and mix well on high speed.
Separate the egg yolk batter and tint batter:
1. Put three teaspoons of the egg yolk batter into a small bowl. Cover the remaining egg yolk batter in the larger bowl and refrigerate.
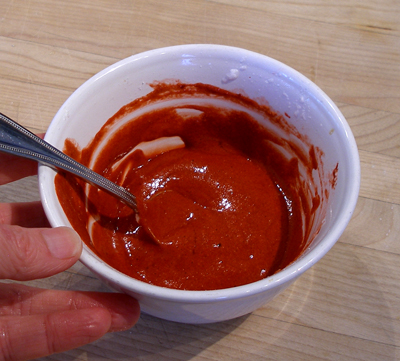
2. Using a toothpick, add a small amount of Super Red gel paste color to the egg yolk batter and stir to combine.
NOTE: You want the batter to be a DEEP red, so keep adding color until you have a deep red color.
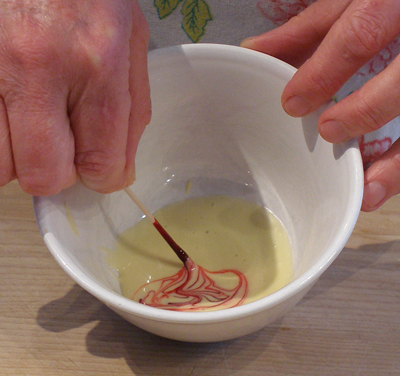
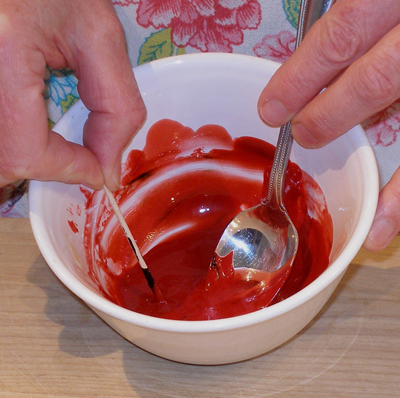
3. Add a VERY small amount of Chocolate Brown gel paste food color and stir until combined. The brown will help deepen the red to a rich maroon color.
Complete the tinted batter for decorated layer:
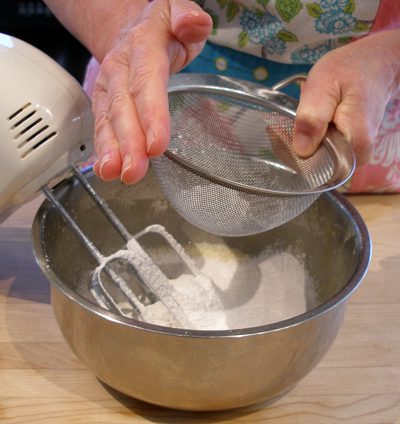
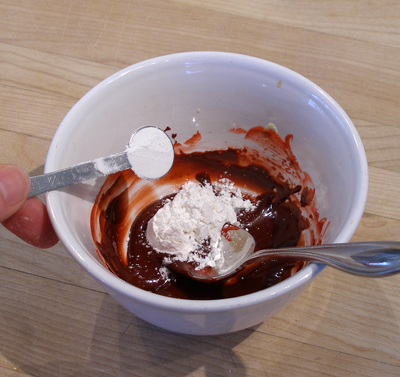
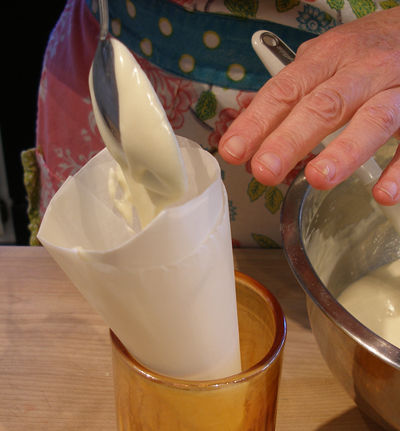
1. To the tinted batter, add 1 1/2 teaspoons cake flour, and 6 tablespoons of the beaten egg whites. Stir until the mixture is uniform.
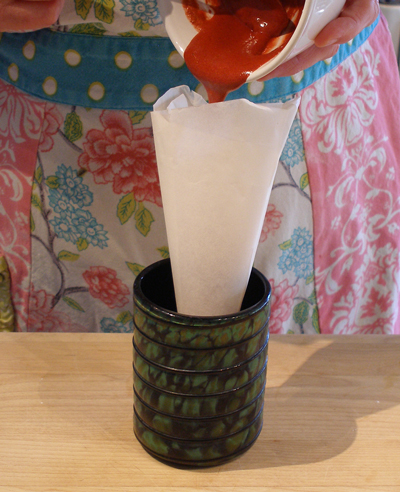
2. Place the tinted batter mixture in a parchment piping bag and fold down the top of the bag. This will force the batter to the tip of the bag. Set aside.
Preheat the oven. Pipe the decorated sponge cake roll and bake:
Preheat the oven:
1. Position an oven shelf in the middle of the oven and preheat oven to 325 degrees F for 20 minutes, if you turned it off in STEP II, above.
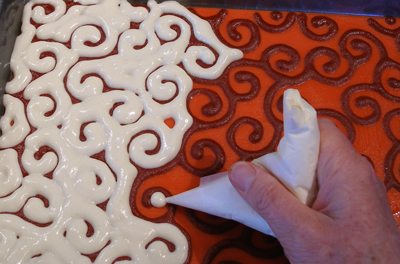
Pipe the decorative Arabesque pattern on the prepared cake pan and bake:
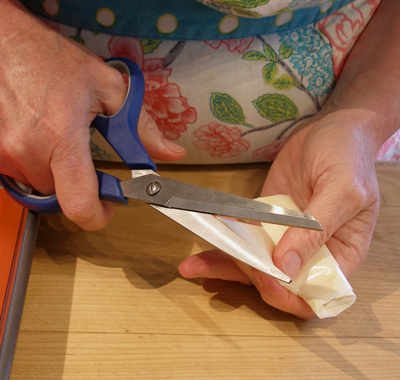
1. If necessary, cut a tiny hole in the end of the parchment cone piping bag; you want to make sure the batter does not come out too quickly while piping!
2. Pipe the Arabesque pattern, on the prepared silicone liner, from STEP I.

3. BAKE: Bake for exactly for 1 minute and 30 seconds, then remove the pan from the oven.
Do not turn off the oven.
STEP IV: FINISH THE ARABESQUE CAKE DESIGN LAYER AND BAKE
Complete the remaining cake batter for the layer:
1. With the mixer on medium-low, beat the remaining 3 egg whites until they are foamy, then slowly add the 2 Tablespoons and 1 teaspoon(remaining sugar from the original 1/3 cup). Increase the mixer speed to high and beat until firm peaks form.
2. Remove the egg yolk batter from the refrigerator.
Refresh it by briefly mixing it with the hand mixer on medium-high to high speed. Scrape the sides and bottom of the bowl of the bowl when necessary.
3. Then, add 1/3 of the beaten egg whites to the egg yolk mixture and fold with a large rubber spatula to combine.
4. Add the rest of the egg whites, folding gently until no clumps of egg white are showing.
 6. Cut a small hole in the tip of the piping bag. Pipe the plain cake batter around the partially baked decoration in the pan.
NOTE: This helps make sure that no air-bubbles form around the design in the finished cake.
7. Pour the rest of the batter into the pan, and gently smooth the top with a rubber spatula, taking care you do not press down.
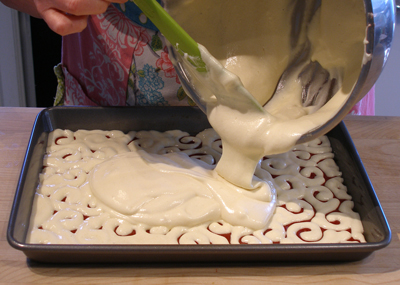
8. Gently drop the pan on the counter a couple of times to release any extra air bubbles.
Bake the Arabesque decorated cake layer:
1. Bake the cake for about 10 to 11 minutes.
To test for doneness, the cake should be slightly brown on the edges and still fairly pale on top. Test it with a toothpick. It should come out clean.
2. Place cake, while still in the pan, on a wire rack. Do not let it cool.
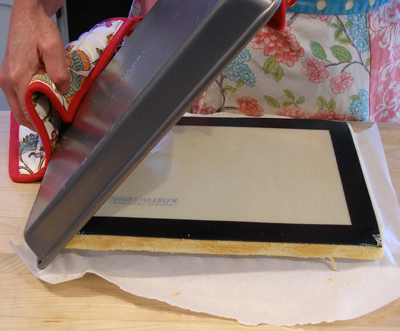
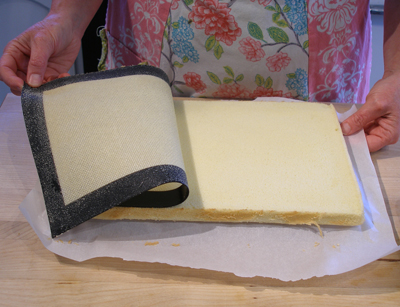
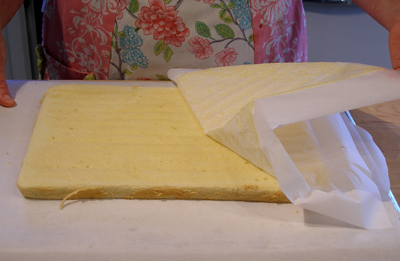
3. Remove the cake from pan while still hot.
To do:
a. Use a thin, sharp knife to loosen the sides of the cake from the pan.
b. Place a piece of parchment on the top of the cake and flip the pan over.
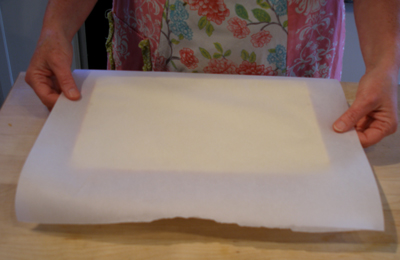
c. Remove the silicone sheet from the decorated side of the cake, and remove the Black and White Piping Template(the white paper between the silicone sheet and the pan). Then place a large piece of parchment on top of it, so it doesn’t dry out while cooling.
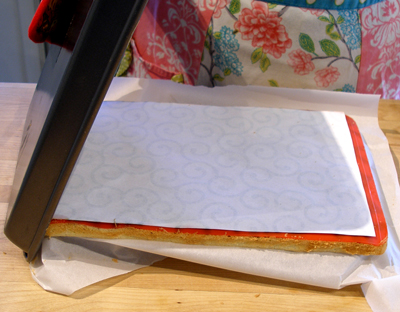
d. Let the cake cool for 15 minutes with the parchment on top of it, to keep it from drying out.
4. While cake is cooling, make the White Chocolate Raspberry Ganache Filling and the Chocolate Glaze recipes.
When the filling and glaze are done, you can begin to assemble the cake.
STEP V: ASSEMBLE THE CAKE LAYERS AND SERVE
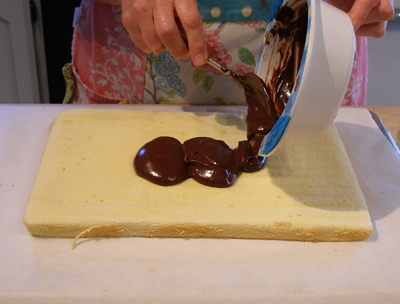
1. Flip the plain cake layer(Step II) over and place it on back of a large flat baking sheet.
Remove the piece of parchment from the top of the cake.
2. Pour the chocolate glaze in the center of the cake and spread it with an offset spatula to make an even layer over the surface of the cake.
Put the cake in the refrigerator for about 15 minutes to set the glaze a bit.

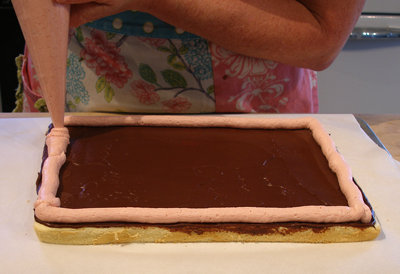
3. After 15 minutes, remove the cake from the refrigerator.
Place the White Chocolate Raspberry Ganache in a disposable pastry bag and cut a generous hole in the tip.
NOTE: The ganache must be at room temperature.
Pipe a dam around the perimeter of the cake, then fill it in with the rest of the filling.
Smooth the filling using an large offset spatula.

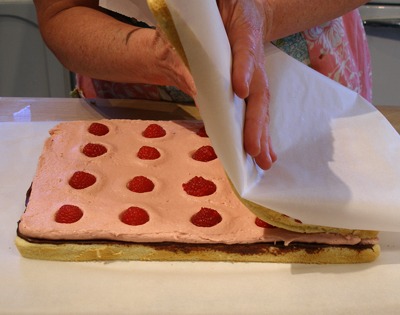
4. Place the raspberries over the surface of the cake, spacing evenly.

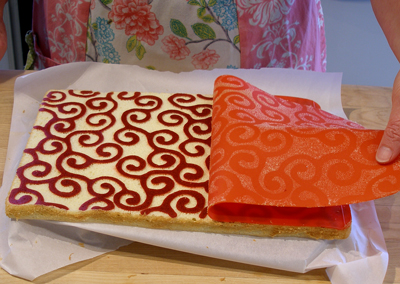
5. Flip the Arabesque design decorated cake layer(from Step IV) over, and remove the parchment from the bottom of the cake.
Gently flip the cake back over, then ease it onto the top of the filling, decorated side up.
Remove the parchment from the top of the cake and cover the cake with plastic wrap.

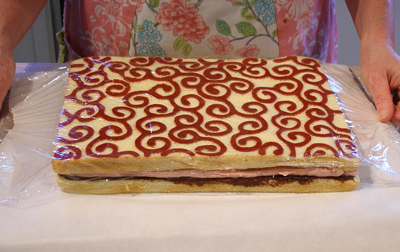
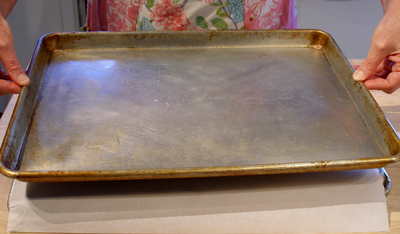
6. Place a baking sheet on the top of the layered cake and gently press on it to even up the layers. Place the cake in the refrigerator, with the baking sheet on top of it, and set the cake in the refrigerator to set the fillings, about 2 hours.
SERVE
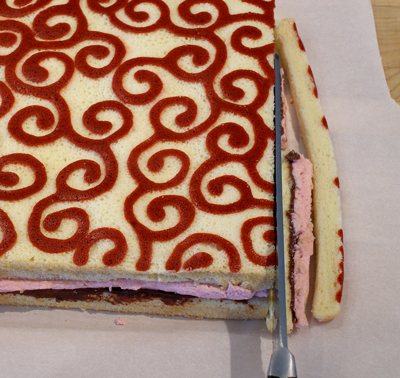
When you are ready to serve your cake, you can cut it into rectangular or square portions of whatever size you like. Keep in mind that the filling is very rich, and the portions should not be too large.
NOTE: The cake must be very cold when cutting. Let stand at room temperature for about 20 minutes before serving.
We cut ours intto 3-inch squares.
To cut, use a warm knife….dip a sharp serrated knife in a glass of hot water, wipe off the water then slice the cake, wiping the knife after each cut.
Cut all the browned edges of the cake off first, then slice it into portion-sized pieces.
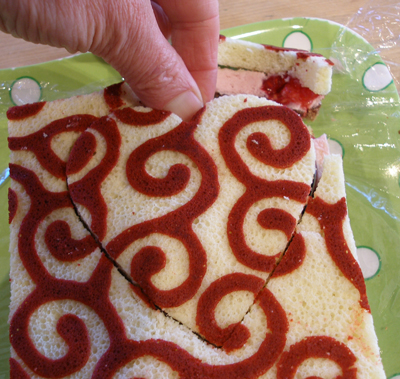
You may also cut the cake into shapes, by using metal cookie cutters. Plastic cutters are not advisable, because they are not sharp enough.
Push the cutter straight down, then remove the excess cake. Gently push the cake out of the cutter from the bottom up.
STORAGE
The filling used dictates the storage requirements for your cake.