
Variations: Italian Apricot Jam Tart (Crostatina marm, Albicocca) and variations
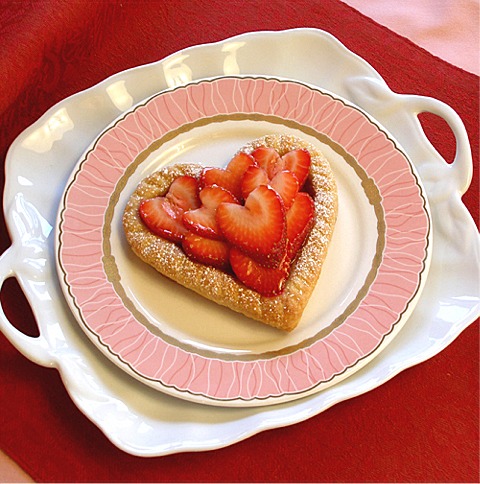
One, 4-inch mini-tart:
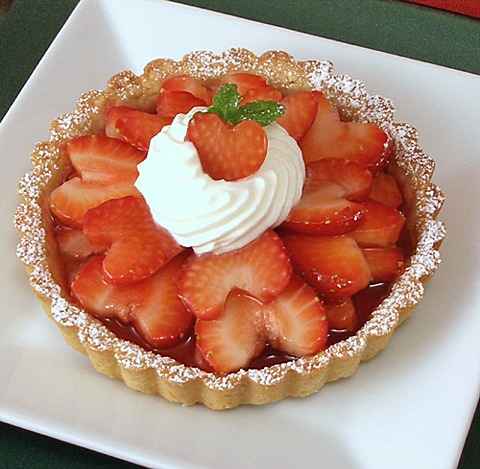
One, 4-inch tart made with a cookie cutter:
My interest in this type of pastry started when my daughter went to Italy for study abroad for her school semester. She sent me photos of delicious pastries, such as an Italian Apricot Jam Tart (Crostatina marm, Albicocca. I started looking up related Italian pastries, and found out that these types are “simple”, traditional pastries used to highlight and celebrate the harvest of fresh fruit of the season! I thought you would enjoy it as a wonderful way to make a tart, especially in a heart shape for Valentine's Day. For shape variations, you can make this tart square, rectangular or in minis. Instead of a pastry border, as we have, you can roll out all of the dough flat, and use a border or whole or halved strawberries, and fill the interior with another type of fresh fruit. We show you how to make a few variations of this wonderful recipe.
PIE RECIPE HELP
INGREDIENTS
Almond Pasta Frolla (Italian Shortbread) Crust for the Crostada / Pasta Frolla (Italian Shortbread:
1 1/4 cups all-purpose flour; spoon into measuring cup and level to rim
1/2 cups almond flour or finely ground blanched almond flour
1/3 cup sugar
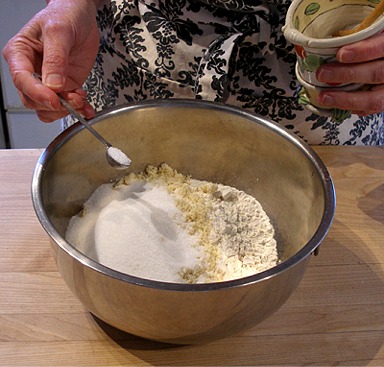
1/4 teaspoon salt
5 tablespoons COLD unsalted butter, cut into tablespoon size pieces
1 large egg; can be cold from the refrigerator
1 teaspoon grated lemon zest (peel) or 1 teaspoon grated orange zest (peel), optional
Strawberries and Fruit Filling:
2 or 3 pints ripe strawberries; cleaned and hulled; or 4 cups fresh apricots, sliced or berries, such as raspberries, sweet cherries, kiwi, oranges; you can use canned fruit, well drained.
2 tablespoons sugar
1 teaspoon lemon juice
1/2 cup strawberry jam for assembling tarts
KELLY SAYS:
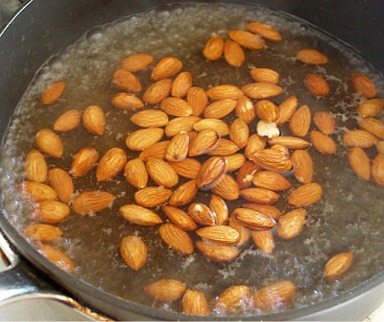
NOTE: I could not locate almond flour locally for making the Almond Pasta Frolla, so I made my own, from whole almonds.
1. Bring water to a boil in a large wide pan.
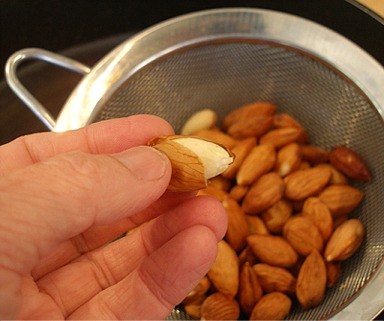
2. Put 3/4 cups whole almonds in the boiling water and let boil for approximately 30 seconds, then drain.
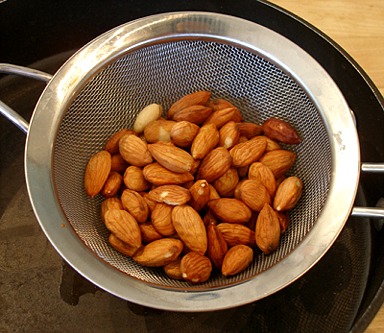
3. Run cold water over the almonds to cool them.
When they are cool, you should be able to slip the skins right off with your fingers.
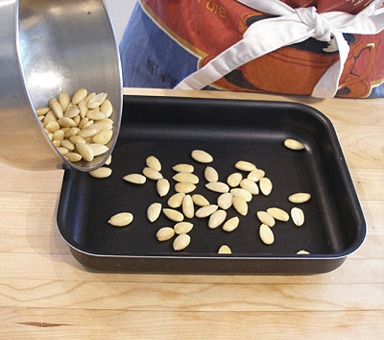
4. When all of the almonds are skinned, put them in a baking pan, in one layer, and place in a warm oven, to dry out. Do not toast the almonds, you just want to dry them.
If you have a pilot light in your oven, you can leave the pan in the oven overnight. The pilot light should be hot enough to dry the almonds overnight.
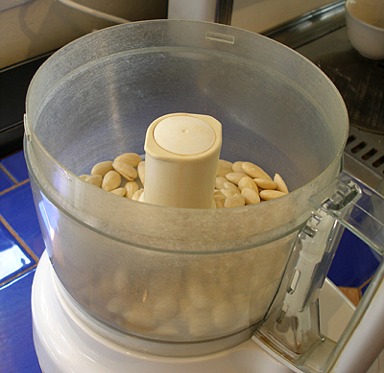
Process the almonds into flour:
1. When the almonds are dry, place them in the bowl of a food processor, and pulse them until the almonds are finely ground. Be careful that you don't take them too far, or you will start to make almond butter.
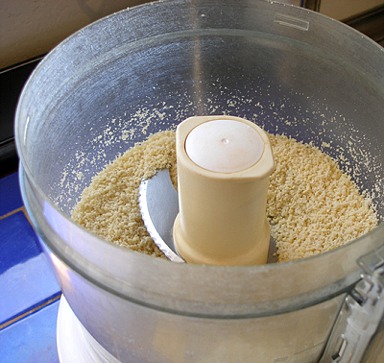
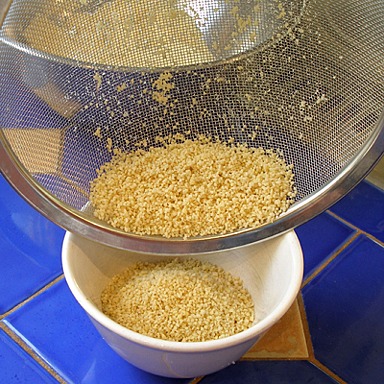
2. Sift the almonds through a sieve, to remove the larger bits of almonds.
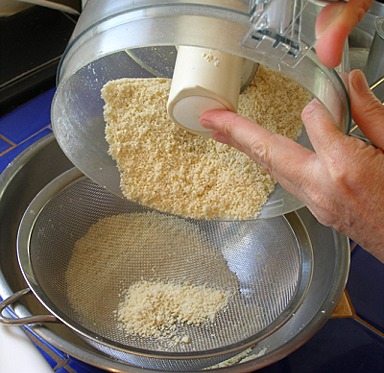
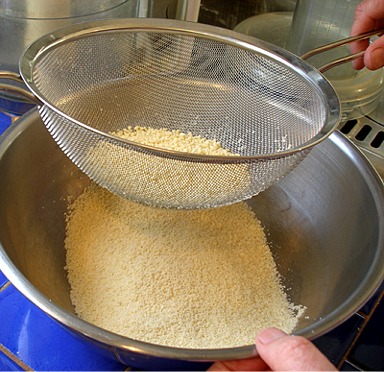
KELLY SAYS: The larger almond pieces that are left in the sieve can be toasted in a dry pan and used as toppings for ice cream, or in a streusel, or even sprinkled on a salad, to add a little crunch. Just set them aside, for later use.
INSTRUCTIONS
STEP I: MAKE THE ALMOND PASTA FROLLA DOUGH
Keep everything cold!
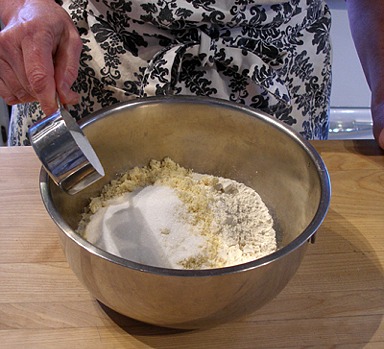
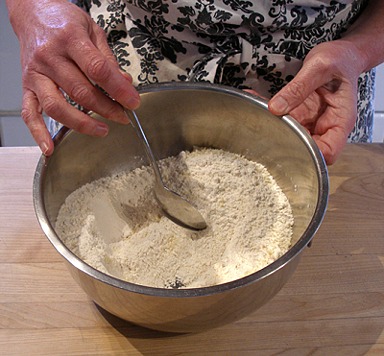
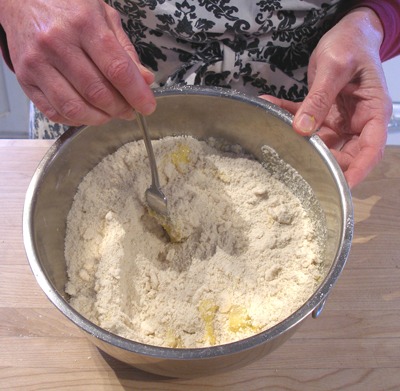
1. In a medium size mixing bowl, mix the flour, almond flour, sugar and salt.

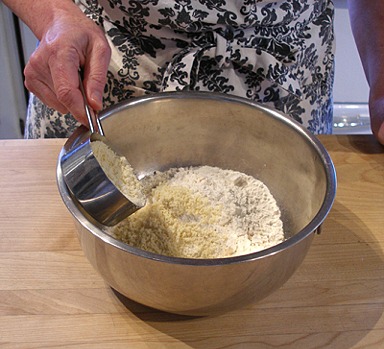
2. Toss the cold butter pieces into the flour mixture.
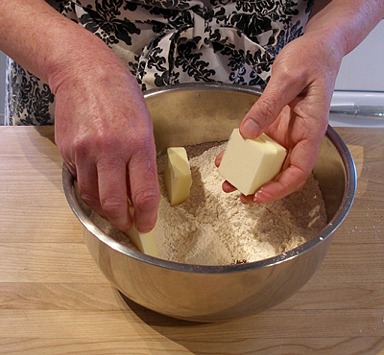
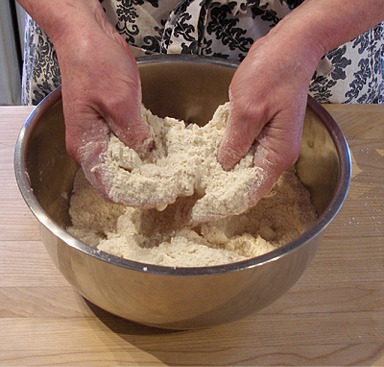
3. With both hands, using your thumbs and fingertips, quickly press and rub the butter into the flour ingredients.
Make sure you reach down into the bottom of the bowl and press and squeeze all of the butter into the flour ingredients.
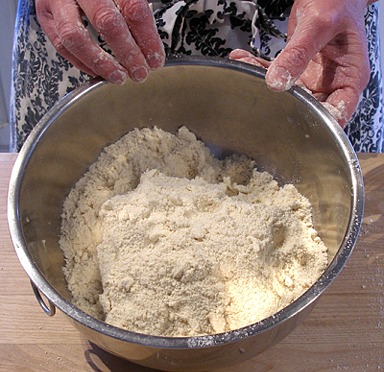
Continue until the butter pieces are the size of small pebbles and a few pieces are the size of small peas.
SARAH SAYS: Work quickly; you do not want the dough to become pasty from overworking the butter and causing it to soften and melt.
Make sure the flour mixture stays dry, powdery and cool.
2. Beat the egg with the optional lemon or orange zest.
SARAH SAYS: The citrus zest adds so much flavor to the crust!
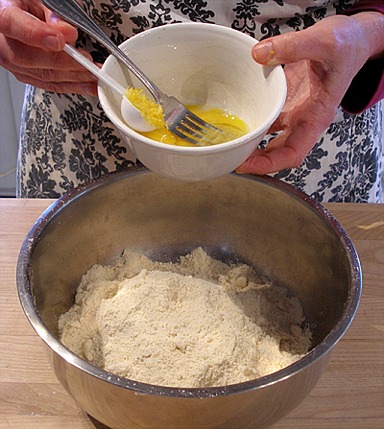
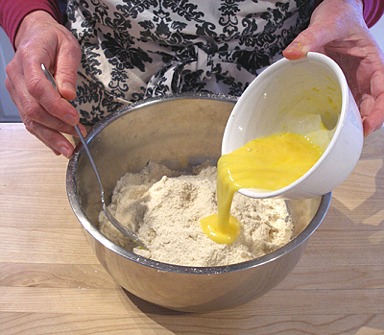
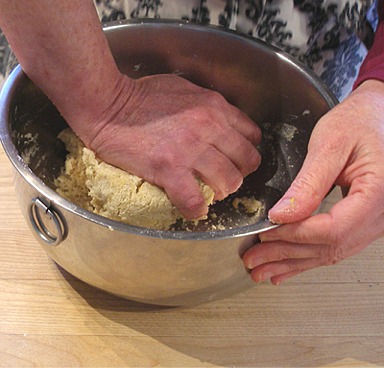
3. With a fork, stir the egg mixture into the flour / butter mixture JUST UNTIL IT HOLDS TOGETHER.
SARAH SAYS: Make sure you do NOT overmix, otherwise you will toughen the crust and reduce its light texture!
4. Gently knead the dough a few times just until smooth. Do NOT overknead or overwork the dough.
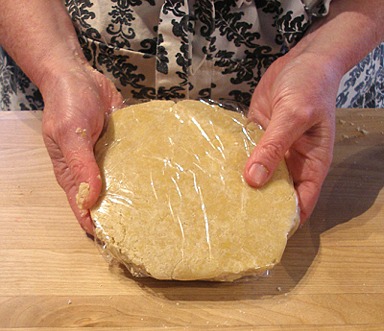
5. Gently press the dough into a disk shape, cover with plastic wrap and place in a resealable plastic bag, and refrigerate for at least an hour,
preferably overnight.
STEP II: FORM THE TART CRUSTS
There are various ways to form the pastry crust: you can roll it out and shape it with a cookie cutter or fit the dough into a tart pan.
Makes one 9- or 10-inch inch tart
OR four 4-inch free-form mini-tarts
OR four 4-inch mini-tarts in pans
OR two 4-inch free form tarts AND two 4-inch mini-tarts in pans
A. MAKE FREE FORM CRUSTS: SHAPE THE CRUSTS WITH A FOUR INCH COOKIE CUTTER
Cut-out the dough:
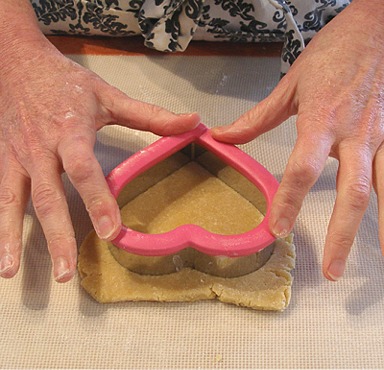
1. Select a 4-inch size cookie cutter; make sure it is NOT of an intricate design.
NOTE: You can make at most 4 mini-free form tarts if using one Pasta frolla dough recipe.
2. Divide the main dough into four equal portions. Wrap three portions separately and return to the refrigerator until needed.
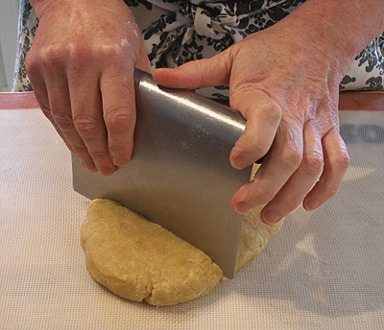
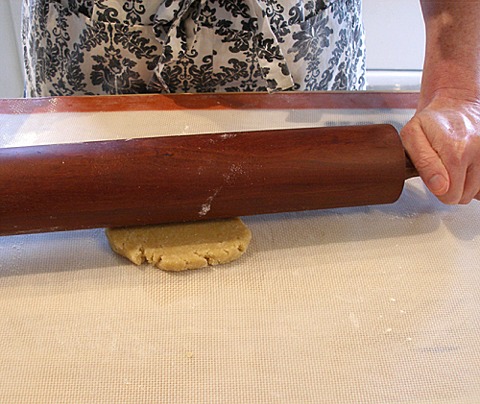
3. Starting with one dough portion at a time, roll it out to 3/16-inch thickness, about 5 1/2-inches square in shape.
To avoid using flour on the rolling surface, use a silpat, nonstick baking mat or roll the dough in between two pieces of waxed paper.
4. Cut the shape out with the cookie cutter you have selected. Set the scraps aside.
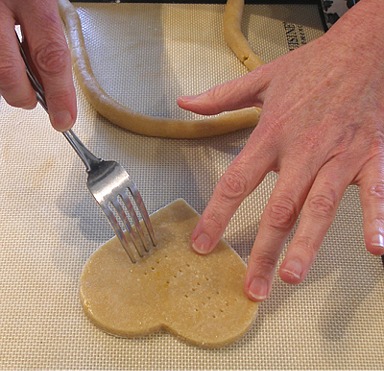
5. Carefully slide the dough onto the prepared cookie sheet.
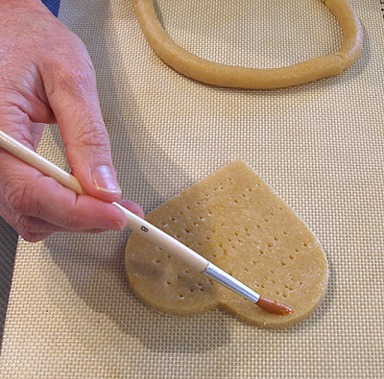
Pierce the dough all over with a fork (called docking) at 1/2-inch intervals so it will not puff in the oven during baking.
SARAH SAYS: If you roll it on parchment paper, you can slide the dough, still attached to the paper onto the cookie sheet.
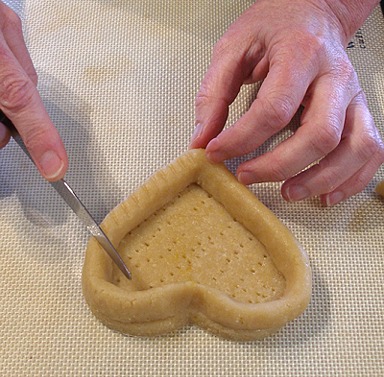
Form the rim of the tart:
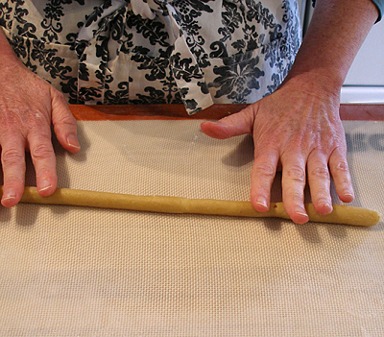
1. With the left-over dough scraps from Step A, above, roll out a thin rope, about 15-inches long or so, depending on the base shape you have selected.
2. With water, lightly moisten the edge of the dough disk, with a clean paint brush. The water will help adhere the rope to the base during baking.
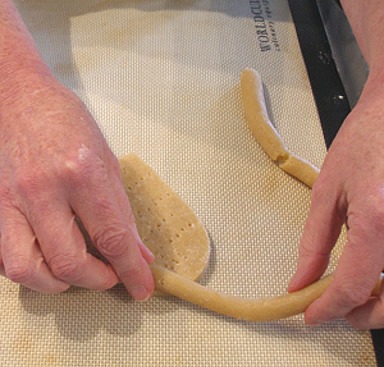
3. Starting at the top of the heart shape, carefully arrange the rope of dough on the lightly moistened dough base edge.
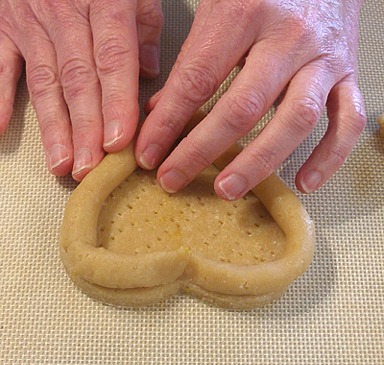
Gently press it into place to form a border.
4. When you reach the top of the heart shape, moisten the ends of the dough ropes with a small amount of water, and press together.
5. To create a design in the border, mark a series of diagonal lines in the dough with a table (not sharp) knife or mark designs all the way around the border.
6. Place the crust, covered in the refrigerator, while you prepare the remaining three tart crusts.
Finish the remaining dough pieces
1. Repeat Steps, above with the three remaining dough pieces, using the cookie cutter.
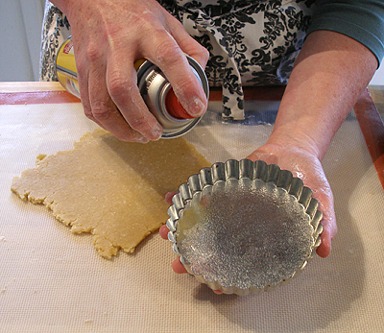
B. SHAPE THE CRUSTS WITH A FOUR INCH TART PAN
1. Select a 4-inch tart pan with a REMOVABLE bottom. Spray its inside with nonstick spray.
NOTE: You will need at least 4 mini-tart pans if using one Pasta frolla dough recipe.
2. Divide the main dough into four equal portions. Wrap three portions separately and return to the refrigerator until needed.
3. Starting with one dough portion at a time, roll it out to 3/16-inch thickness, about 5 1/2-inches square in shape.
To avoid using flour on the rolling surface, use a silpat, nonstick baking mat or roll the dough in between two pieces of waxed paper.
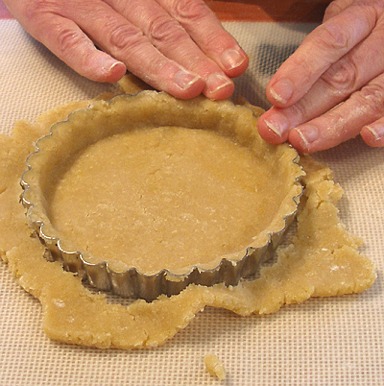
4. Gently lift and fit the rolled dough into the tart pan.
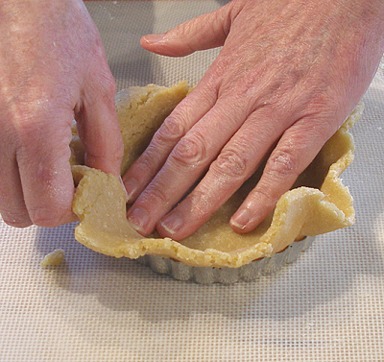
5. Press the dough against the walls of the tart pan and then press down, all the way around the edge of the pan, to remove the excess dough.
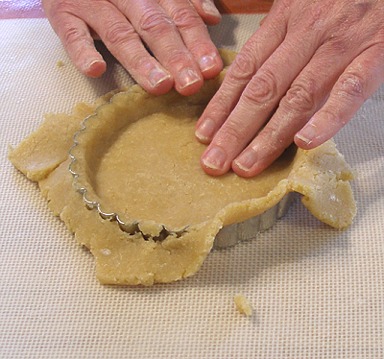
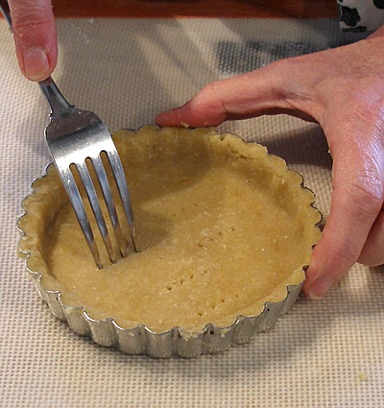
6. Pierce the dough all over with a fork (called docking) at 1/2-inch intervals so it will not puff in the oven during baking.
7. Place the crust, covered in the refrigerator while you prepare the remaining three tarts.
Finish the remaining dough pieces
1. Repeat Steps, above with the three remaining dough pieces, using mini-tart pans.
STEP III: PRE-BAKE THE TART CRUSTS AND COOL
Four 4-inch free-form mini-tarts
OR four 4-inch mini-tarts in pans
OR two 4-inch free form tarts AND two 4-inch mini-tarts in pans
1. When ready to bake, position an oven shelf in the middle of the oven and preheat the oven to 350 degrees F.
Place a silpat mat or parchment paper on a cookie sheet. Do NOT grease.
3. Bake the tart dough or those formed in pans, directly on the prepared cookie sheets, for about 15 – 20 minutes, until the crust is light golden brown and feels firm when pressed with a fingertip.
SARAH SAYS: If the crust starts to darken it's burning; this can happen very suddenly, so keep an eye on your oven. An overbaked crust
will be dry and hard when cooled.
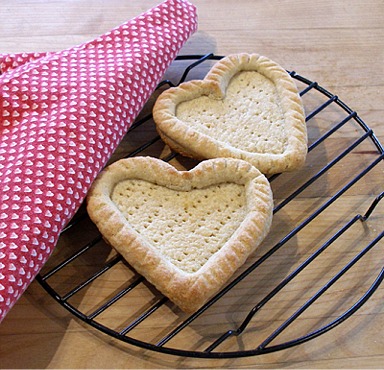
2. Cool the crusts directly on a wire cake rack, if free-formed.
Cool the crusts in their tart pans, if using, on a wire cake rack.
3. While the tart crusts cool, prepare the strawberries, in STEP II.
STORAGE
Store prebaked crusts at room temperature for a few days, wrapped, or freeze for a month or more. Thaw in
wrappers at room temperature.
VARIATIONS:
For a 9- or 10-inch Free Form Tart:
1. When ready to bake, position an oven shelf in the middle of the oven and preheat the oven to 350 degrees F.
2. Draw a 9-inch circle on a piece of parchment paper to serve as a rolling guide. Turn over so the pencil markings are on the other side.
3. Roll out 3/4s of the dough on a lightly floured surface to a 9-inch round size. Trim and save the scraps.
4. Slide the dough, on the parchment paper, onto a cookie sheet. Pierce the dough all over with a fork at 1/2-inch intervals.
5. With the remaining 1/4 dough and dough scraps, roll out a thin rope shape, about 30-inches long.
6. With water, lightly moisten 1/2-inch of the edge of the dough disk. Arrange the cylinder of dough on the lightly moistened dough and
gently press into place to form a border. Mark a series of diagonal lines in the dough with a table knife or mark designs all the way around the
border.
For a 9- or 10-inch Tart Pan:
1. Select a tart pan with a REMOVABLE bottom. Spray its inside with nonstick spray.
2. Roll the dough out to 3/16-inch thickness, 13-inch round in shape.
To avoid using flour on the rolling surface, use a silpat, nonstick baking mat or roll the dough in between two pieces of waxed paper.
3. Gently lift and fit the rolled dough into the tart pan.
4. Press the dough against the walls of the tart pan and then press down, all the way around the edge of the pan, to remove the excess dough.
5. Pierce the dough all over with a fork (called docking) at 1/2-inch intervals so it will not puff in the oven during baking.
Bake – For a 9- or 10-inch Free Form Tart or a Tart Pan:
1. Bake the dough for about 20 – 25 minutes, on a parchment paper or silpat, nonstick mat, until the crust is light golden brown and feels firm when pressed with a fingertip.
SARAH SAYS: If the crust starts to darken it's burning; this can happen very suddenly, so keep an eye on your oven. An overbaked crust
will be dry and hard when cooled.
2. Cool the crust on its pan on a wire cake rack.
STEP II: PREPARE THE STRAWBERRIES AND MAKE THE FRUIT FILLING
Do NOT make this in advance; prepare the berries when the crostada has been baked and is cooling because they will become mushy and unusable in the tart.
INSTRUCTIONS
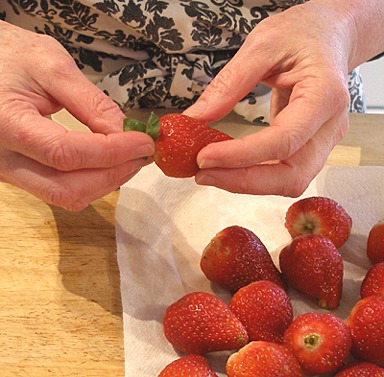
1. Select the most symmetrical and evenly sized berries for the the tart(s).
2. Run cold water over the berries to clean them and place on paper towels to dry.
3. Pull the leaves off the top of the strawberries.
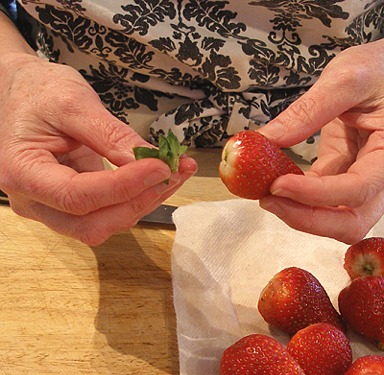
NOTE: For a Valentines Day variation, additionally prepare the tops of your strawberries into heart shapes:
a. Using a sharp paring knife, cut diagonally towards the center of the berry.
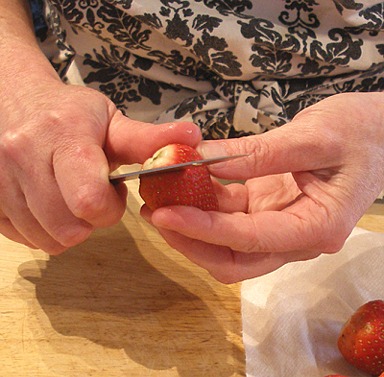
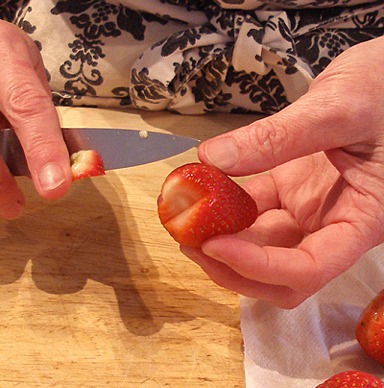
b. Make another diagonal cut on the other side of the stem end, making a V-shape.
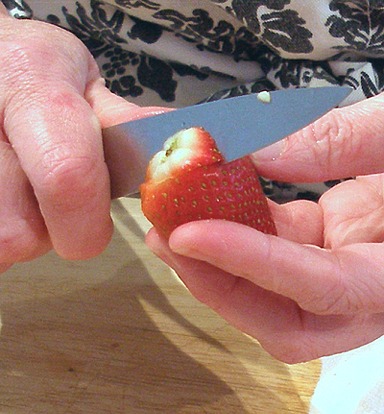
c. Remove the v-shaped top of the berry.
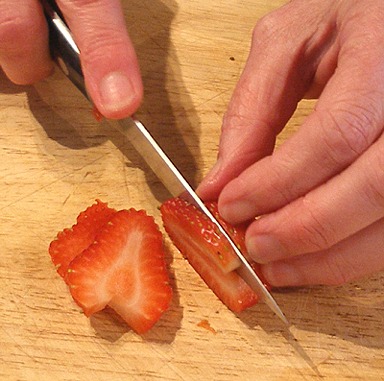
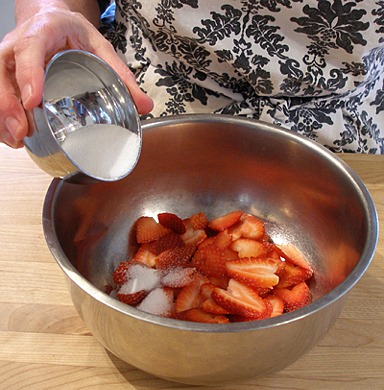
4. Slice the berries; take care not to slice them too thinly.
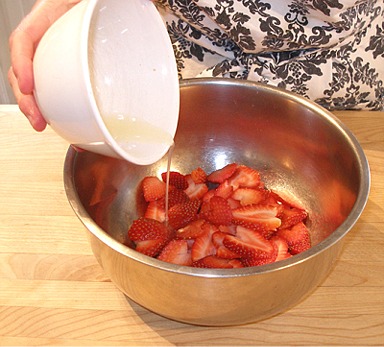
5. Gingerly, with your fingertips, toss the berries with sugar and lemon juice. Take care not to break up the sliced berries into pieces.
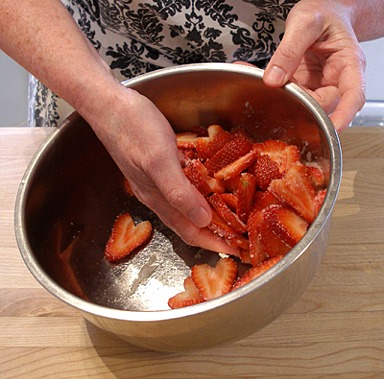
6. Cover with plastic wrap and refrigerate until needed.
STEP III: ASSEMBLE THE TARTS
There are various ways to assemble the berries on the tarts, depending on whether they are made free-form (with cookie cutters) with rims or made in tart pans.
You can drain the berries and pile them on top of the jam or arrange them beautifully in a pattern.
For purposes of this tutorial, we will show you how to make Valentine's Day Tarts:
A. Four 4-inch free-form mini-tarts:
1. Place the baked and cooled shaped Pasta frolla onto a serving plate.
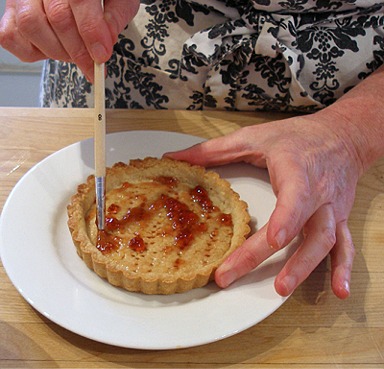
2. With a pastry brush, paint the bottom of the tart shell with a small amount of the strawberry jam.
SARAH SAYS: If the jam is too stiff, warm for a few seconds so you can brush it on.

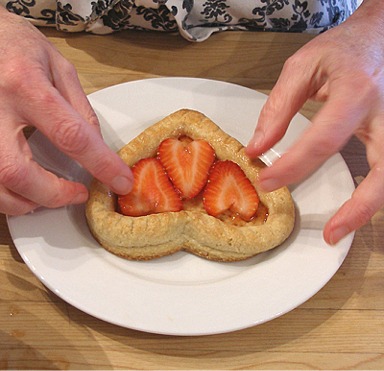
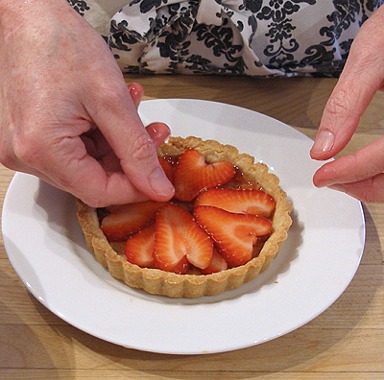
3. Arrange the reserved halved strawberries inside the edge of each tart.
Make sure you layer the strawberry hearts on the crust, overlapping the layers so the hearts show.
a. Place the first layer of sliced strawberries on the strawberry jam. Brush the tops lightly with strawberry jam.
b. Layer a second row berries on top, alternating between the first. Brush the tops lightly with strawberry jam.

c. Alternate a third layer of berries on top. Brush the tops lightly with strawberry jam.
d. Repeat with the three remaining tart shells.
B. Four 4-inch mini-tarts:
1. Unmold baked and cooled Pasta frolla mini-tart shells from their pans. Place onto a serving plate.
2. With a pastry brush, paint the bottom of the tart shell with a small amount of the strawberry jam.
SARAH SAYS: If the jam is too stiff, warm for a few seconds so you can brush it on.
3. Arrange the reserved halved strawberries inside the edge of each tart.
Make sure you layer the strawberry hearts on the crust, overlapping the layers so the hearts show.
a. Place the first layer of sliced strawberries on the strawberry jam. Brush the tops lightly with strawberry jam.

b. Layer a second row berries on top, alternating between the first. Brush the tops lightly with strawberry jam.
c. Alternate a third layer of berries on top. Brush the tops lightly with strawberry jam.
d. Repeat with the three remaining tart shells.
One, 4-inch mini-tart:
One, 4-inch free-form made with a cookie cutter:
SERVE
Optionally, sprinkle the crostada with whipped cream or dust with powdered sugar right before serving. Eat out of hand or cut with a VERY SHARP knife.
STORAGE
Crostada are best consumed within a day or two of making. Store in the refrigerator for a day, at most, if not serving right away.
VARIATION
Italian Apricot Jam Tart (Crostatina marm, Albicocca) and variations