
Cherry pie is an all-time favorite around our house. There is just something about the special alchemy that happens when one tastes tart cherries, enrobed in sweet juices, enhanced with almond flavor and wrapped in a flaky, buttery crust. This recipe is very good, and very simple. Here, we also show you how to make a lattice top crust, step-by-step with color photos. Also go to our Fresh Cherry Pie Recipe.
PIE RECIPE HELP
STEP I: MAKE THE PIE CRUST
KELLY'S PERFECT FOOD PROCESSOR PIE CRUST / recipe alone
Makes a double crust for a 9-inch standard or 9 1/2-inch deep-dish pie
INGREDIENTS
1 cup (2 sticks) unsalted butter, cold
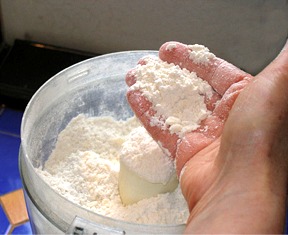
2 1/2 cups unbleached all-purpose floour; spoon into measuring cup and level to rim
1 teaspoon sugar
1 teaspoon salt
1/2 teaspoon cinnamon(optional, use if pie filling goes well with cinnamon)
1/4- 1/2 cup ice water; make with water and ice cubes
For finishing pie crust before baking:
1/8 to 1/4 cup milk
Some sugar for sprinkling
INSTRUCTIONS
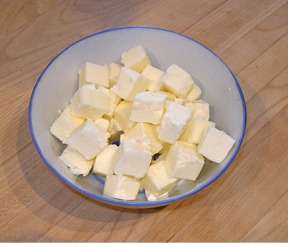
1. Cut butter into cubes and place in a bowl and place in the refrigerator to chill.
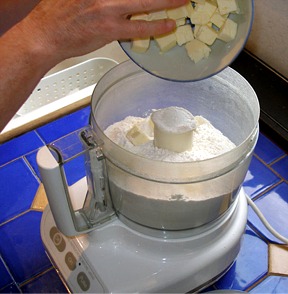
2. A. Place dry ingredients into the bowl of your food processor, fitted with the metal blade. Pulse a few times to mix the dry ingredients.
B. Add the well-chilled butter cubes on top of the dry ingredients, in the food processor.
C. PULSE the butter and flour mixture together till the butter is no longer in large chunks. You should be able to still see small chunks of butter in the mixture. This helps form the flaky texture you are looking for in your pie crust.
3. Add the water to the dry ingredients.
KELLY SAYS: This is where you must proceed with caution. Too little water and your dough will be crumbly and impossible to roll out. Too much water and your crust will be sticky to roll and tough, when baked. You must use a gentle hand with pie dough and proceed slowly!
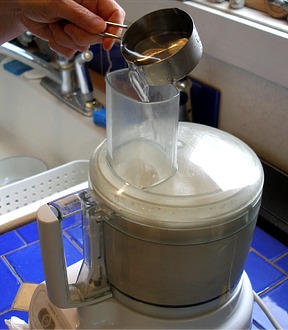
A. START with 1/4 cup of water, adding it to the flour mixture, through the feed tube in the food processor, while pulsing the machine until the dough starts clumping together. DO NOT just turn the processor on – use the PULSE button.
B. Open the processor to check the condition of the dough. It should still be a bit crumbly, but it should start to clump together. To test the dough, squeeze it between your fingertips and it should just stick together. If it does, the dough is done – do NOT add any more water.

KELLY SAYS: If the dough is too dry, add more water, a few drops at a time, up to a teaspoon, and hit the pulse button for a second. Open the food processor and check the dough after each addition. Most of the time, I find that 1/4 cup water total is plenty. Of course, the moisture content of flour can vary, and you MAY have to add more than 1/4 cup, but do so, about 1 teaspoon at a time.
If the dough is too wet, add a teaspoon of flour at a time, and pulse the food processor to combine.
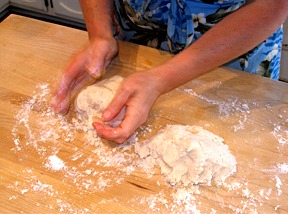
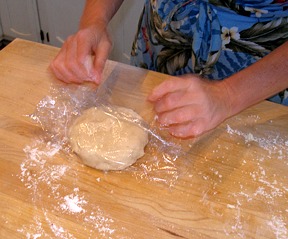
4. A. Empty the food processor contents out onto your work surface and gather the dough into two evenly-sized mounds. Flatten the disks, and make them as round as possible, so it is easier to roll them out, when the time comes.
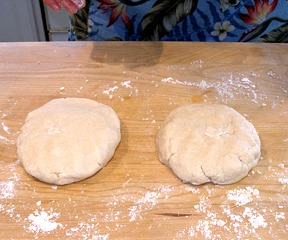
B. Wrap each disk in plastic wrap and place them in the refrigerator, to chill.
KELLY SAYS: It is important that your pie dough is well chilled before you go to roll it out.
STEP II: MAKE THE CHERRY PIE FILLING
While the pie dough is chilling, make pie filling.
EASY CHERRY PIE FILLING
Cherry pies can be made from fresh, frozen or canned cherries. Since fresh sour cherries are not in season quite yet where I live, I used a combination of canned cherries, both sour and sweet. But, fresh cherries can be used, as well.
INGREDIENTS
1 1/2 cups sugar
3 tablespoons cornstarch
1/4 teaspoon salt
1 tablespoon of butter, softened
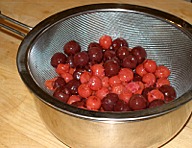
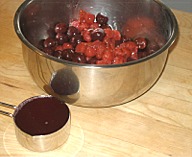
2 cans (15 ounces each; about 4 cups) pitted Montmorency Cherries, drained, reserve 1/2 cup juice used in recipe, next line
1/2 cup cherry juice reserved from draining cans* or water
2 teaspoons lemon juice
1/2 teaspoon vanilla extract
1/4 teaspoon almond extract
*KELLY SAYS: I reserved 1/2 cup cherry juice from the tart cherries, to be used in the recipe.
}
INSTRUCTIONS
1. Position a shelf in the lower third of the oven and preheat oven to 400 degrees F.
2. Prepare the filling:
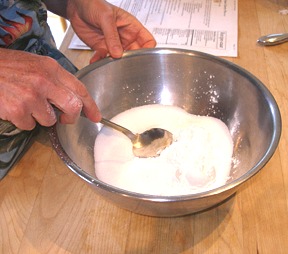
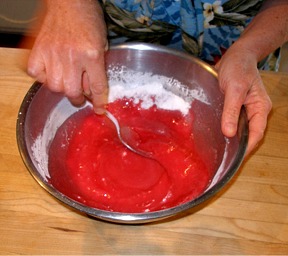
A. Combine sugar, cornstarch and salt in a large bowl, stir.
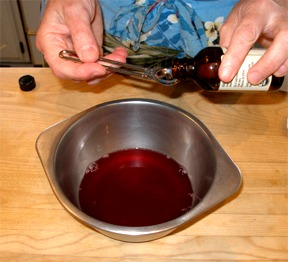
B. Combine cherry juice, lemon juice, vanilla and almond extracts, in a small bowl.
C. Add juice mixture to sugar/cornstarch mixture and stir.
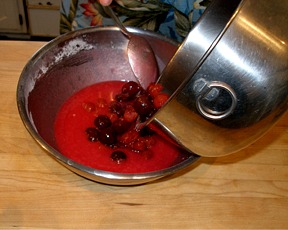
D. Add cherries to mixture and stir gently, so you don't break the fruit.
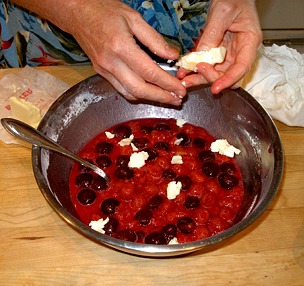
E. Break butter up and scatter over the top of the mixture, stir to distribute.
Set filling aside while you roll out your dough.
STEP III: ROLL OUT THE PIE DOUGH FOR THE BOTTOM CRUST
Roll until the pie dough is 3-4″ larger than the pan you will be using for your pie (at least 12″ wide, for a 9″ pie). Your dough should be about 1/8″ thick.
KELLY SAYS: I like to use a Pyrex ovenproof glass pie pan for best results.
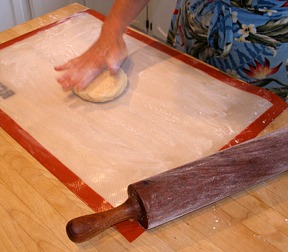
1. Remove one disk of dough from the refrigerator and unwrap it. Place dough on lightly floured work surface or silpat rolling mat (a.k.a. bakers best friend!).
KELLY SAYS: It is important to add as little flour to your dough as possible, during the rolling process. LIGHTLY flour your pin and rolling surface. Use only enough flour to keep the dough from sticking. Before rolling, if necessary, flatten dough slightly by hitting it a few times in different spots, on the side of your rolling pin, if it is very cold. Otherwise, pat it down with your fingertips.This helps to get you started with your rolling.
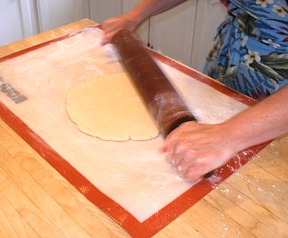
2. A. Roll dough from center to edge, being careful to not exert too much pressure as you near the edge of the dough, or it will begin to get too thin there.
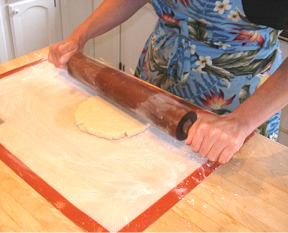
B. Turn the dough a quarter-turn each time before you roll, again. This is to ensure that it is not sticking to your rolling surface and that is is being evenly rolled. If your dough is cold enough, it should not stick.
KELLY SAYS: If your dough sticks, you may loosen it with a knife or long off-set spatula, dusting underneath with a small amount of flour.
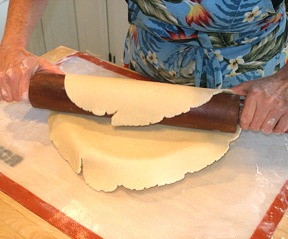
3. Fit the rolled out pie dough into the bottom of the 9-inch pie pan.
A. Starting with one edge, loosely roll dough around your rolling pin to help transfer it from counter to the 9-inch pie pan.
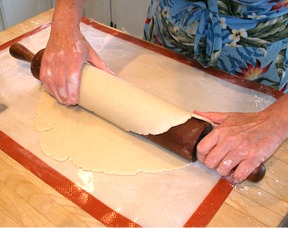
B. Position dough over the pie pan and begin unrolling the dough, starting from one edge, leaving a 2-inch overhang on all sides
C. When the dough is unrolled, GENTLY easy the dough into place.
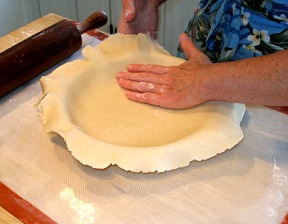
KELLY SAYS: Lift up the dough edge and ease the dough down into the pan with your other hand. DO NOT stretch the dough because this will make it shrink when baking.
D. Trim the edge of the dough, leaving a nice even overhang, for fluting purposes. After you trim the edge, place pan on a cookie sheet in the refrigerator to chill, while you prepare your lattice top.
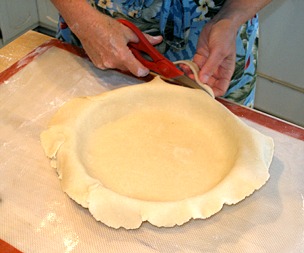
KELLY SAYS: I like to use kitchen scissors for this task.
STEP IV: MAKE THE LATTICE TOP AND CRIMP THE PIE CRUST EDGE. OPTIONALLY DECORATE THE PIE CRUST EDGE WITH PASTRY LEAF CUT-OUTS.
KELLY SAYS: Now we get to the fun part…the part where baking meets math and basket weaving….when worlds collide!!
1. Roll the dough and cut the lattice strips.
A. Remove second disk of dough from refrigerator and roll until the pie dough is 3-4″ larger than the pan you will be using for your pie (at least 12″ wide, for a 9″ pie). Your dough should be about 1/8″ thick. See Step III, above, for rolling tips.
B. Decide how wide you want your lattice strips to be, and mark your dough for cutting.
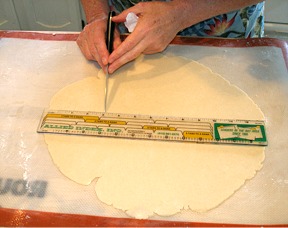
KELLY SAYS: I marked 10 strips, each an inch wide – or I marked the dough at every inch. I used a ruler. :^) Make sure the strips are not too thin in width because they are harder to work with.
C. Cut marked dough with a pastry cutter or a pizza wheel.
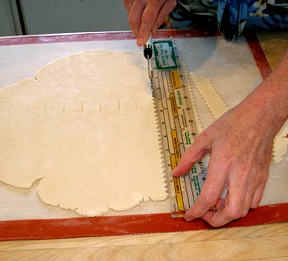
KELLY SAYS: I use a fluted pastry cutter because I think it looks pretty.
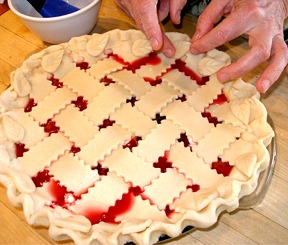
2. Weave the lattice strips:
A. When your strips are all cut, remove pan from refrigerator and pour the pie filling into pie dough lined pan. Place the longest strip in the center of your pie pan.
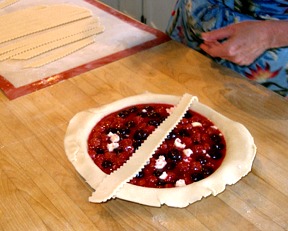
B. Take another long strip and place it over the first strip, making a cross.

KELLY SAYS: From this point on, you will be weaving, you know, under over, under over.
C. Take two more strips and place them, one to the left of the first strip, and one to the right of the first strip, and OVER the second strip.
Then, lift up the first strip and place another strip over the third and fourth strip and under the first strip.
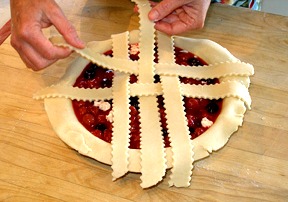
D. Repeat on the other side.

E. Continue weaving your strips, until you reach the edge of the pie pan.
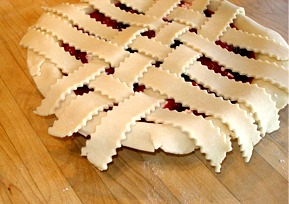
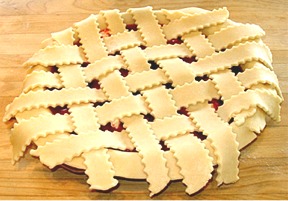
When you are done weaving, your lattice should look like this:
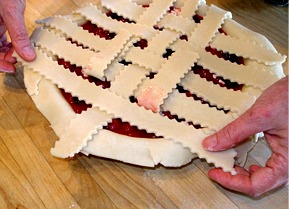
3. Complete the pie crust edge.
A. Trim the lattice so it is the same length as the bottom crust overhang.
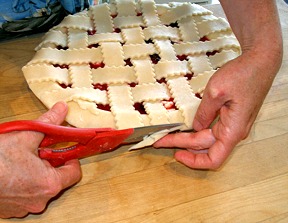
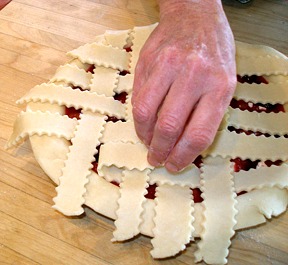
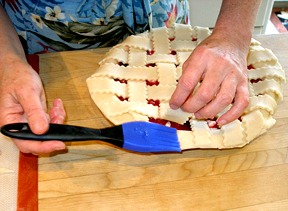
B. When your weaving is complete, brush water under all the strips, where it meets the bottom crust. Gently press the lattice to the bottom crust. This will help the lattice top adhere to the bottom crust.
C. Fold the bottom crust OVER the lattice and give it all a traditional crimped edge. This creates a streamlined, tailored look.
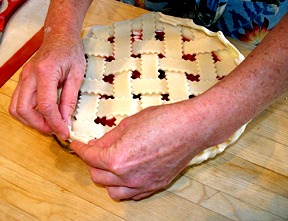
KELLY SAYS: There are many ways to finish the edge of a lattice crust.
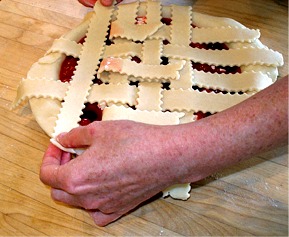
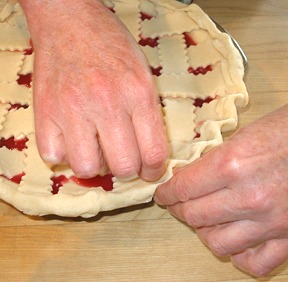
D. Crimp the pie crust edge:
I use the knuckle of one hand and press it between the thumb and index finger of the other hand, to create a scalloped edge.
4. OPTIONAL: Make pie crust decorations!
Since I had a lot of dough left over from my dough trimmings, I decided to fancy up the edge of my dough with some simple leaf cut-outs.
A. I re-rolled my scraps and took a tear drop shaped cutter and cut out the leaf shapes.

B. To make the leaves look more leaf-like, I took a small paring knife and gently pressed in “veins” in the leaves. The cut is only in the surface of the dough. Use a light hand. You do not want to cut all the way through!

C. Use a very light brushing of water, on the underside of the leaf, to “glue” it to the edge of your crust.

D. Lightly press the dough leaves linto place.
KELLY SAYS: When placing the leaves, I like to use a little variation in the angle, to make for a more dynamic appearance.
STEP V: BAKE THE PIE
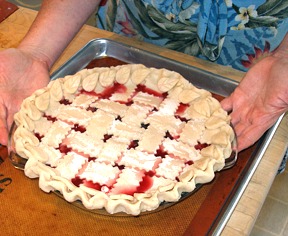
1. When the edge of the pie crust has been crimped and the optional decorative leaves are in place, Place the chilled pie onto a silpat lined baking sheet. Put the pie in the refrigerator to chill for 30 minutes.
2. Position the oven rack in the lower third of the oven and preheat the oven to 400 degrees F.
KELLY SAYS: Make sure the oven preheats for a good 30 minutes; you want it to be really hot!
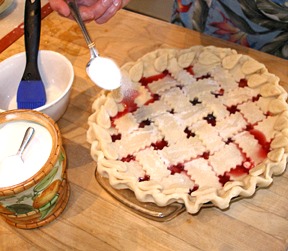
3. Remove the pie from the refrigerator, and lightly brush the lattice work with milk and sprinkle it with granulated sugar. Do not brush milk on leaves or the edge of dough because it will cause them to burn more easily.
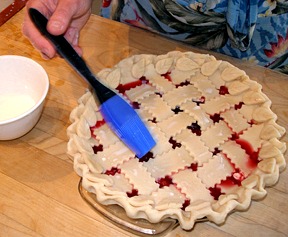
KELLY SAYS: I like to bake all my pies on a silpat-lined sheet, in case of any boil-overs. Sticky oven boil-overs make a mess and burn and really stink up your house.
I used my ugly silpat here, forgetting to use the “pretty one”, for the photo op. Please ignore my ugly silpat…it has given me years of faithful service.
4. Bake pie in 400 degree F oven for 15 minutes and then turn temperature down to 375 degrees F and continue baking until crust is golden brown and filling is bubbling. This usually takes a total of 50-60 minutes baking time. Your filling MUST be bubbling or it will not thicken. Such is the nature of cornstarch. So, if your filling does not bubble and your pie looks done, it isn't.
You may find that the edge of your crust is browning more quickly than your lattice. If this is the case, cover the edges of your crust with a pie shield or strips of aluminum foil.
KELLY SAYS: I find that I almost always have to use a pie shield. I have an ancient oven, perhaps this is why. I LOVE my pie shield!
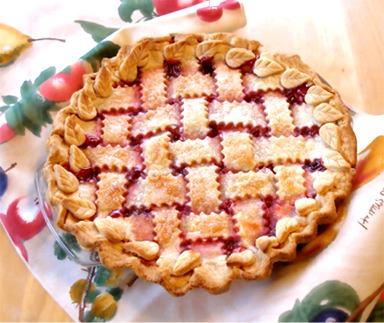
The finished pie! As you can see, the sugared center looks pretty against the unsugared leaves and edge:
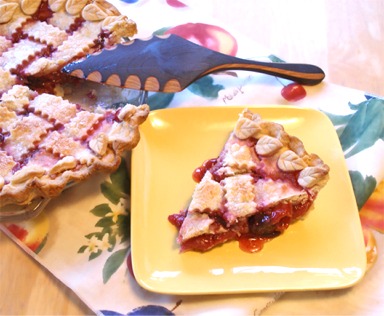
And the yummy slice! The filling is nicely thickened, but not a solid block of goo, like the stuff you get in a can.