Royal Icing decorated and friendly bears are perfect to give as gifts for the Holidays. This decorating tutorial uses several royal icing techniques, such as flooding, wet-on-dry piping and wet-on-wet. Royal icing is probably the most popular icing that cookie decorator's use and can also be made into a glaze. It is preferable because it holds up very well if the cookies need to be stacked, shipped, stored, etc. However, if cookies have piped flowers or other raised designs on them, they tend to snap off so store or ship in one layer only with plenty of cushioning. Royal icing works great for very fine detail work. Discover the new way we thin and work with it.
It is my hope that this will help you attack your next sugar cookie decorating task with confidence and know-how.
COOKIE RECIPE HELP
INSTRUCTIONS
STEP I: PREPARE THE RECIPES
1. Pick a recipe that makes has little leavening and makes a flat cookie instead of a puffy one. They decorate much more easily and look better. Sarah's Creative Cut-out Sugar Cookies is a perfect recipe to use.
2. Next, cut out and bake your cookies. Let them cool thoroughly on a wire cake rack before mixing the colors and frosting.
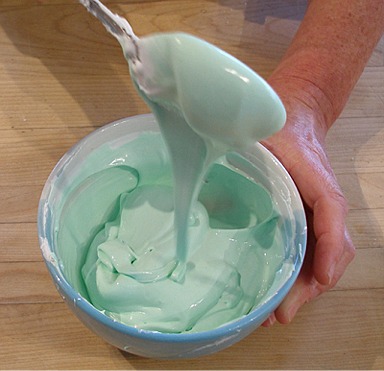
3. Prepare Royal Icing, thinned to the consistency of heavy whipping cream.
NOTE: Don't mix too much in advance because the icing will crust or dry out. (Crusting is a thin layer of icing that hardens on top. It can be difficult to remove. If you stir even a small amount into the icing, you ruin it.)

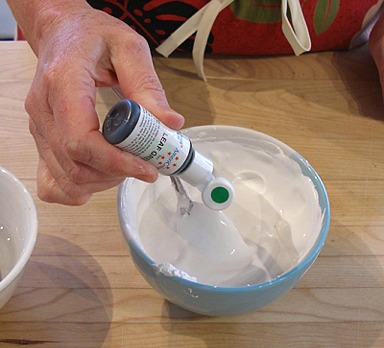
3. First separate icing into small bowls before coloring. You may need larger or smaller amounts depending on the color being used.
Add the desired color and stir till uniform.
4. Cover immediately with a damp paper towel as Royal Icing can dry quickly. Leave some white in case you need to correct a color.
STEP II: DECORATE THE COOKIES
Cover the cookies using the Flooding Technique:
1. When ready to decorate, fill a squeeze bottle, fitted with a #2 Wilton plain round tip, with uncolored royal icing, thinned to the consistency of heavy whipping cream. Right before piping, always squeeze a small amount of icing from the tip onto a piece of parchment paper; you want to make sure all the air is out of the bottle beforehand, otherwise you won't be able to pipe evenly.
You can also use a piping bag fitted with the same tip. For piping small decorations, you can use small parchment cones for each color, fitted with a decorating tip.
NOTE: Fill piping bags or parchment cones about half full.
2. If using a squeeze bottle. always place the cap on.
If using a piping bag, Set each one in a tall drinking glass for each of the colors you are using and keep within reach. First put a damp piece of paper towel in the bottom of each and then put your parchment cones in the glasses with the tips resting on the paper towel to keep them from drying out and clogging the opening! If you are using buttercream, you really don't need to do this, but I do anyway.
Place a damp piece of paper towel into the bottom of a drinking glass for each piping bag used.
This will help keep the icing from drying in the tip of each piping bag and help prevent eventual clogging.
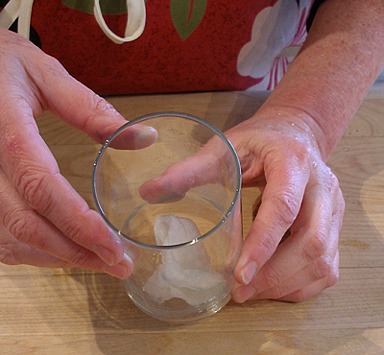
Fit a disposable piping bag with a tip and place one bag each into a prepared glass.
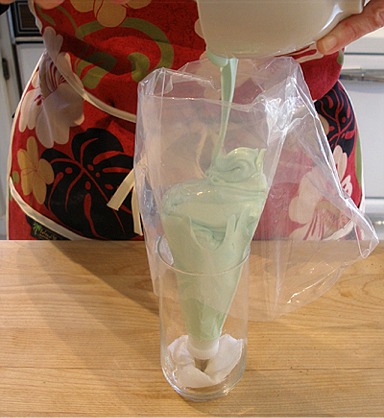
Fill piping bag with royal icing.
3. Pipe and outline around the perimeter of the cookie. Make sure you apply even pressure on the filled squeeze bottle because you do not want lines that are have thin spots or blobs of icing.
4. Pipe the royal icing in the outline loosely by making lines of icing closely together by using a back and forth motion.
5. Then nudge the icing around the cookie with a toothpick to fill in any gaps.
6. GENTLY tap the cookie on your work surface to level the icing, then set the cookie aside until the icing is dry. This could take a few hours on a warm dry day, or overnight on a humid, cold day.
Pipe the Scarf using the Wet-on-Dry Piping and Flooding Techniques:
When the white icing is dry, fill another piping bag or squeeze bottle, fitted with a Wilton #1 piping tip, with a contrasting color, and begin piping the scarf.
1. Pipe the scarf around the neck of the polar bear, then loosely fill it in. Coax the icing to fill in the outline with a toothpick.
2. Next, pipe the tails on the scarf, one at a time, then fill in with royal icing.
Pipe the first tail and fill in:
Pipe the second tail and fill in:
Decorate the Scarf Using the Wet-on-Wet Piping Technique:
1. Fill another piping bag or squeeze bottle, fitted with a Wilton #1 piping tip, with a contrasting color, and pipe polka dots on the scarf.
2. Use the same color to pipe the fringe on the scarf.
Add the nose, eyes and mouth:
1. Put a small amount of black royal icing in a squeeze bottle or piping bag, fitted with a #1. Wilton piping tip. Pipe the nose and eye of the polar bear.
Set cookies aside for about an hour, to let the scarf, nose and eyes dry a bit.
2. Using a black edible marker(I used a Wilton Food Writer) draw on a mouth and eyebrow, to give the polar bear face a cute expression.
3. Set cookies aside to dry overnight, uncovered, at room temperature.
STORAGE
Cover and store at room temperature, where the cookies will keep for about 5 days.
You can wrap and freeze for a month or more. Thaw them in their wrappers at room temperature.
The dye will not run.