
Variation: Basic Chiffon Cake
Cake and photo by kake, Premium Member © Sarah Phillips
Cake and photo by kake, Premium Member © Sarah Phillips
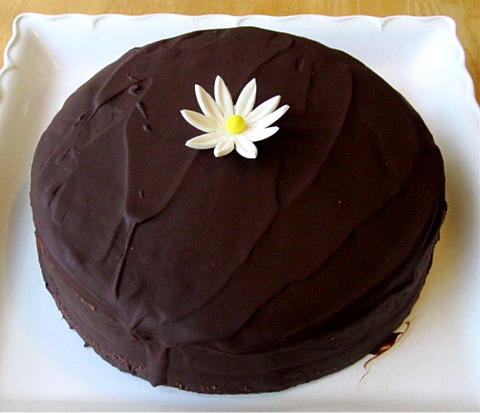
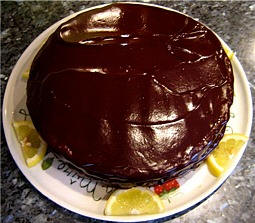
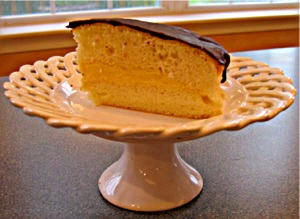
I made my Lemon-Orange Scented Chiffon Cake into a Boston Cream Pie, which is actually a cake, not a pie, and has been designated as the official state dessert of Massachusetts. I first tasted it when I worked in Boston during the summers when I was in college, and fell in love with it. I also invented a way for Chiffon Cakes, baked into layers, to be properly inverted while the layers cool, with my Aluminum Cooling Pan.
Just why this classic American dessert is called a pie and not a cake has long been a mystery. Perhaps it was because the cake layers were originally baked in pie tins, as many cakes from the mid-1800s were. “Washington pie plates” were often specified as the pan of choice for many kinds of cakes. They were used to make thin layers of cake that were stacked together with jam or jelly in between. Over time, custard replaced the jam or jelly, and the addition of the chocolate glaze appears in 1950, in Betty Crocker’s Picture Cook Book. Today, a hot milk sponge cake is seen in many recipes as is pastry cream and chocolate ganache.
My rendition uses my chiffon cake recipe as its base, and an easy Orange Cream Filling, recipe below, and my Chocolate Glaze. The flavor combination is simply sinful! You could also fill the cake with my homemade Vanilla Bean Pastry Cream for a more incredible variation!
CAKE RECIPE HELP
SARAH SAYS: My latest blog post for the NY TIMES: http://www.nytimes.com/info/cake/
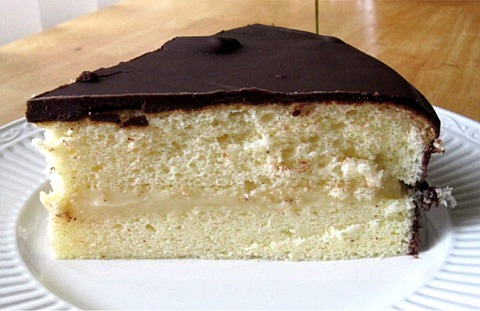
June 21, 2010 9:26 AM ET Not a pie at all, but a cake, the famed Boston Cream Pie consists of two layers of Sponge or butter cake filled with a thick custard and finished with a chocolate glaze.Careful research by Greg Patent, a baker and cookbook author, shows that the recipe evolved from Washington Pie, not from one used at Boston’s Parker House Hotel (today the Omni Parker House) as previously thought, except for the use of a chocolate fondant as a glaze. Washington Pie appeared in many cookbooks prior to 1856, and was popular well into the twentieth century. The recipe directs the cook to bake the batter in pie plates, more accessible in those days than cake pans, and the name stuck. — Sarah Phillips, founder, CraftyBaking.com, a baking advice and recipe site.
STEP I: MAKE THE ORANGE CREAM FILLING
ORANGE CREAM FILLING / Recipe alone
INGREDIENTS
3.9-ounce package Vanilla Instant Pudding (or any flavor you select – chocolate is also good!)
1 3/4 cups whole or 2% milk or orange juice for the pie filling recipe
1 teaspoon vanilla extract
1 tablespoon grated orange peel from 1 orange or 1/8 teaspoon orange citrus oil (or 1 teaspoon grated lemon peel from 1 lemon or 1/8 teaspoon lemon citrus oil)
INSTRUCTIONS
Follow the instructions for the pie filling recipe on the 3.9-ounce Jell-O Vanilla Instant Pudding package. When the filling is made, stir in the orange peel. Press plastic on the surface of the completed pie filling and refrigerate until ready to use.
STEP II: MAKE THE LEMON CHIFFON CAKE
LEMON CHIFFON CAKE
INGREDIENTS
6 large eggs; separated; (You will need 6 egg whites and 6 egg yolks for the recipe)
3/4 cup PLUS 1/8 cup (2 tablespoons) bleached cake flour (not self-rising); spoon into dry measuring cup and level to top; do NOT use a cake flour substitute (You can order cake flour from http://www.kingarthurflour.com)
3/4 cups sugar or superfine sugar, divided; use 6 tablespoons (1/4 + 1/8 cups) and 6 tablespoons (1/4 + 1/8 cups)
1 1/2 teaspoons baking powder
1/4 teaspoon salt
1/4 cup vegetable oil
1/4 cup PLUS 1/8 cup (2 tablespoons) water, cold; cold tap water not ice water
1 teaspoon vanilla extract
2 teaspoons grated lemon peel from 1 lemon or 1/4 teaspoon lemon citrus oil (or 1 tablespoon orange peel or 1/4 teaspoon orange citrus oil)
1/2 teaspoon cream of tartar or 1/2 teaspoon lemon juice from 1 lemon
Make an ALUMINUM COOLING PAN: from 9 1/4 diameter x 2 3/4-inch height aluminum disposable casserole pan. See below.
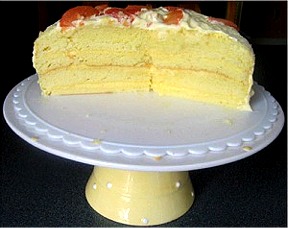
SARAH SAYS: I have successfully doubled this recipe and baked the layers in 2, 9 x 2-inch pans. I also doubled the Orange Cream filling recipe and split each layer and filled in between each. I topped this cake with whipped cream folded and topped with canned or fresh grapefruit slices! When making the Orange Cream Recipe, substitute the milk with the drained grapefruit juice from the canned grapefruit slices or use fresh grapefruit juice.
INSTRUCTIONS
1. Preheat the oven and prepare the baking pan:
A. Position the oven rack in the middle of the oven and preheat the oven to 350 degrees F.
SARAH SAYS: In my oven, the center rack is the third rung up. When you have an even number of racks, and have to choose as to whether the third or fourth rack up is the middle, as I do in my oven, when in doubt, go to the lower rack of the two.
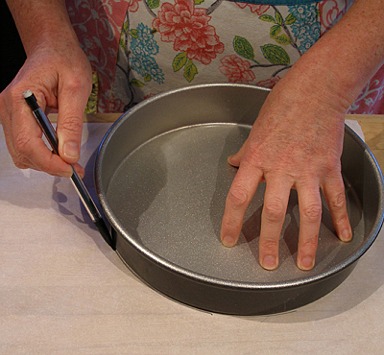
B. Prepare one 9 x 2-inch baking pan. Set aside:
SARAH SAYS: DO NOT use a non stick pan. The cake needs to be inverted to cool. You don't want the cake to fall out of the pan which it will with a non-stick one. For light-colored cake sides, use a light, heavy aluminum pan, not a dark-colored one.
1. Place one pan on top of a piece of parchment paper and trace around it with a pencil. The lead is nontoxic.
Cut out the round of parchment paper following the pencil marks as a guide.
2. Place the parchment paper round on top of the ungreased pan bottom.

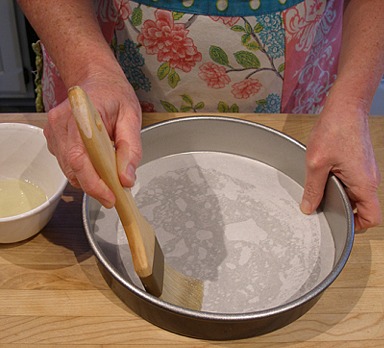
3. Grease the bottom of the parchment paper round with melted butter or vegetable oil with a pastry brush. Do NOT grease the side of the pan.
2. Make the cake batter:
A. Combine the dry ingredients:
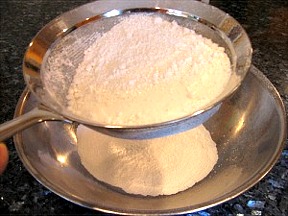
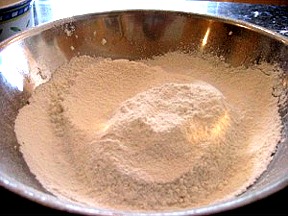
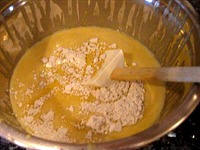
1. In large mixing bowl, preferably with a wide rim, sift together the flour, baking powder, and salt. Repeat two more times. If you don’t have a sifter, use a fine mesh strainer.
2. Add in 6 tablespoons sugar (1/4 + 1/8 cups) sugar. Whisk together to blend.
3. Make a well in the center of the flour mixture and set aside.
B. Prepare the batter mixture:
SARAH SAYS: In the well of the flour mixture, add the following, in order WITHOUT mixing.
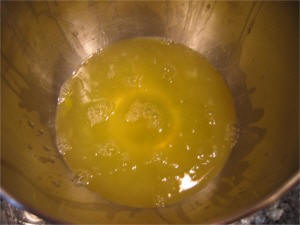
1. Add the oil
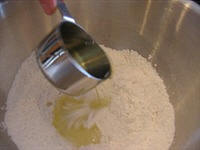
2. Add the egg yolks;
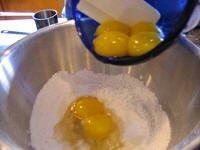
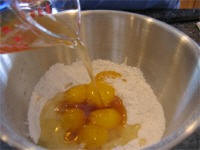
3. And, finally, the water and vanilla extract
C. Mix and strain the batter ingredients:
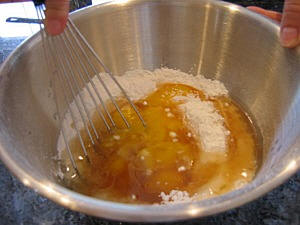
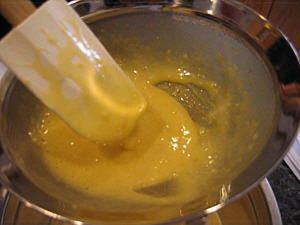
1. With a wire whisk, mix together the ingredients until smooth and light in color. It is critical that the resulting batter mixture is smooth and without lumps because when the cake bakes, the flour lumps will stay that way.
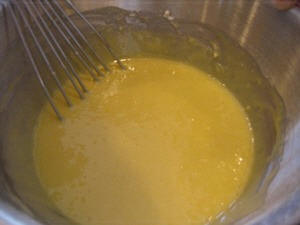
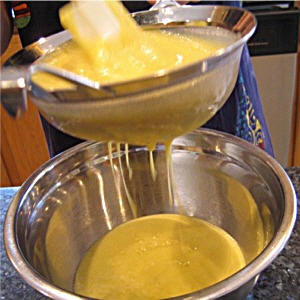
2. Strain the batter mixture through a fine mesh strainer by pushing the mixture through with the help of a rubber spatula to a large bowl below. Discard any flour lumps that are left in the strainer.
After the batter has been strained, add in the lemon peel. Cover the batter with plastic wrap and set aside.
SARAH SAYS: It is critical that the resulting batter mixture is smooth and without lumps because when the cake bakes, the flour lumps will stay that way.
HELP! I had to throw away a lot of flour lumps. I'm worried that there isn't enough flour left for the recipe. What should I do?
SARAH SAYS: ONLY if there is a tablespoon or MORE of flour lumps left in the strainer, sift a tablespoon of flour on top of the mixture and stir. But, be careful you don't get into the vicious cycle of adding flour and then straining the batter mixture.
5. Beat the six egg whites until they are stiff and glossy:
Use a stand mixer when you have a large amount of whites to beat, such as this recipe where you are beating six egg whites.
A. Place egg whites in a clean, dry grease-free mixer bowl of a stand mixer. Make sure there are no egg shells in the mixture.
SARAH SAYS: You can whip the egg whites if they are still cold. The real issue with egg whites is their freshness, not temperature, so you can beat whites right from the refrigerator, althought they may require slightly more beating time. Newer fresh eggs have thicker whites and will reach more volume and have greater stability when beaten than older eggs.
It is very important that anything that comes in contact with the egg whites is clean and completely free from any grease, oil or fat of any kind. Don't use plastic containers because they tend to absorb and retain fat even when washed. Even a tiny drop of the yolk mixed in with the whites adds fat to the whites. Fat will keep the whites from accepting air and won't aerate at all.
To make sure implements are free of grease, before starting, wipe the clean implements with lemon juice or white wine vinegar, rinse both in warm water, and then dry.
B. With a stand mixer fitted with a whisk attachment, beat egg whites on low until foamy.
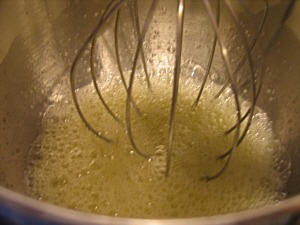
SARAH SAYS: As air is beaten into the egg whites, they will start to lighten in color. This beginning step is one of the most overlooked and important steps. If egg whites are beaten too quickly at the beginning, the structure of the foam will not be as strong, and later the egg whites will not beat as high as they should.
Keep mixing the egg whites on low speed. The egg white foam will increase in volume and become white and have large bubbles.
C. With the mixer running, immediately add the cream of tartar at the side of the bowl.
SARAH SAYS: Adding a small amount of acid, such as cream of tartar, lemon juice or vinegar, stabilizes egg whites and allows them to reach their full volume and stiffness. It does this by making the egg coagulate faster.
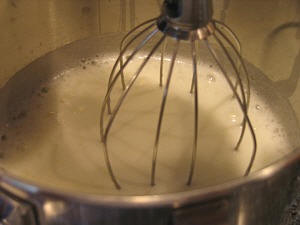
The bubbles in the egg white foam will become smaller and more even in size. When it reaches this stage, increase the mixer speed to medium-high.
D. Then, add 6 tablespoons sugar (1/4 + 1/8 cups) sugar slowly in a steady stream at the side of the bowl. After the sugar has been added, increase the mixer speed to high.
SARAH SAYS: Always add sugar in a stream, slowly at the side of the bowl while the whites are being whipped; do not dump it in the center — you don't want to risk deflating the whites.
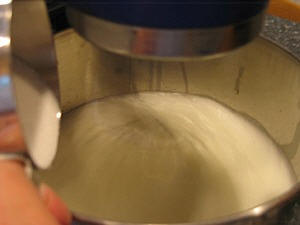
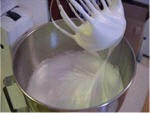
I stopped the mixer so you could see how the egg white foam is beginning to become glossy. This is called the soft peak stage. It is reached when the peaks of the whites droop slightly, when the beater is turned off and lifted.
But, this recipe calls for beating the whites to the stiff peak stage…so keep beating with the mixer on high.
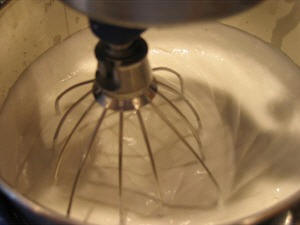
E. Beat until the egg whites are white, fluffy, very stiff and still very glossy. For this recipe, the whites should be stiffer than most. They will form lumps as the mixer beats. STOP beating when they start to form lumps around the beater as shown in the photo.
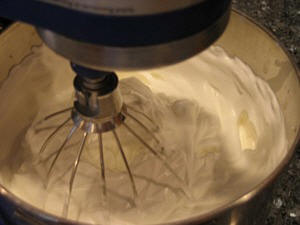
SARAH SAYS: If egg whites are beaten to dry and dull, they are overbeaten — Watch carefully, because egg whites can go from stiff to dry and overbeaten in as little as 30 seconds.
To test if properly beaten to the stiffly beaten stage, take the mixer bowl from the mixer or lift the beaters. You can gently cut a table or icing knife through the middle of the beaten egg whites; it creates a narrow grove with stiff walls. If not, continue beating for a few seconds more and perform the test, again.
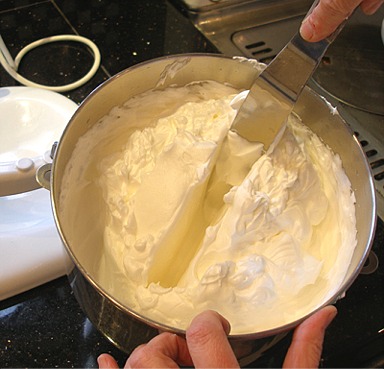
SARAH SAYS: Another test to perform to see if your egg whites are stiffly beaten are to stop the beaters and then lift them — straight and stiff peaks should form.
HELP! I've overbeaten my egg white mixture. Do I have to throw them out and start again! I just wasted twelve eggs and all of the time separating them…I'm heart broken!
SARAH SAYS: Do not overbeat the egg whites; if they are beaten too stiff, they lose their gloss and look curdled. Unfortunately, there is no more stretch left for them to rise when baked — some or will pop during the whipping stage and will collapse. To fix, try whisking in another egg white with a wire whisk — DO NOT use the electric mixer. If you can't fix them, unfortunately, you have to start over again with fresh egg whites…
4. Fold the egg whites and the batter mixture until thoroughly blended
SARAH SAYS: When you fold the batter and beaten egg whites together, they must be thoroughly blended; you need to make sure all of the air bubbles are encased in batter, otherwise the cake won't rise properly. The batter will set around the air bubbles when the cake bakes in the oven, allowing it to puff properly. In essence, the folding action breaks up the air bubbles into smaller ones and encases each one in batter, like putting mortar in between small tiles to hold them in place. If the “mortar” isn't evenly distributed between the “tiles” and you have some large and small tiles, you'll get an uneven looking “floor” or cake crumb. Some “tiles” or air bubbles will be “loose” or escape from the cake batter and cause large holes in the cake. You'll see a pattern of “tiles” or egg whites grouped together separately from a layer or “mortar” or batter grouped together. Your “floor” or cake will be uneven and won't rise as high in the oven. With foam cakes, it's normal to see some uneven air holes in the cake's crumb (inside), but not large pockets of air holes, egg whites and/or batter. That means that the folding action was not done enough or was done too much where you managed to pop a lot of air bubbles. Folding takes a lot of practice to get right.
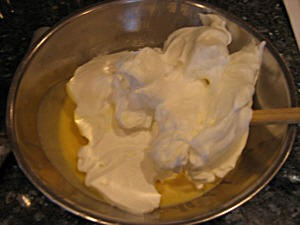
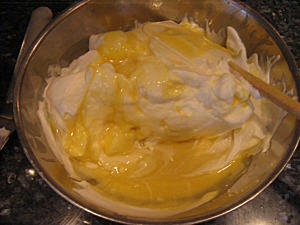
A. To start, use the batter mixture that was previously set aside. Stir it a few times to mix it thoroughly before using.
With a large rubber spatula, gently scrape 1/3 of the beaten egg whites on top of the mixture. Never add the batter to the whipped whites or the heavier mixture on top of the lighter, beaten they'll deflate.
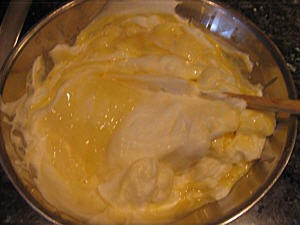
B. With the rubber spatula, in a large circular sweeping motion as if you are turning a crank, lightly combine the egg whites and batter. Do this one or two times. Be sure to scrape the bottom of the bowl.
C. Starting on the top, cut down from the center of the mixture to the bottom of the bowl, then draw the scraper quickly towards yourself against the edge of it, and up to the left and out. You are thus bringing a bit of the mixture at the bottom of the pan up over the egg whites or “folding it over”. Then turn the bowl a quarter turn and repeat until you only see slight streaks of white. You will need to scrape the sides of the bowl a few times to keep the mixture from climbing up the sides.
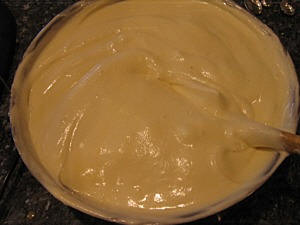
D. Repeat with the last two additions.
E. Continue the folding movement while slowly rotating the bowl, and cutting down, towards yourself, and out to the left, until the egg whites have been folded into the body of the batter. You shouldn't see any streaks of batter and eggs whites in the mixture. The mixture should be smooth. Sometimes you'll see with a few small lumps visible; it just means that you slightly overwhipped the egg whites. Do not continue to fold the mixture because you'll start to remove the air from the batter.
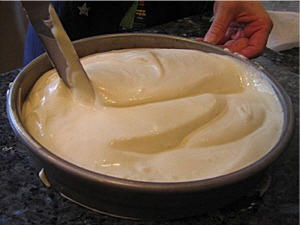
5. Bake the cake layer:
A. Immediately scrape batter into the prepared pan. The batter will fill close to the top of the pan. Run a table knife or thin icing spatula through the batter in an “s” formation so large air pockets will break-up into smaller ones. It will also break up any egg white clumps. The rest will dissolve into the batter. DO NOT bang the pan on the countertop – to me, it is the same as slapping someone on the back with an open hand, leaving them without air; it's a harsh movement — you'll remove too much air from the batter if you do!
Gently smooth the top with a thin icing or a rubber spatula. Clean off the extra batter on the sides of the pan with a wet paper towel.

Immediately place the cake in a well-preheated 350 degree F oven. Place in the center of the oven shelf, so hot air can circulate around the pan to ensure even baking. Bring out the oven shelf only slightly when putting the pan on it. Push the shelf back in the oven and quickly shut the oven door as soon as the pan is placed. You don't want to lose a lot of hot air from the oven.
B. Bake for 30 to 35 minutes or until the cake is a light golden brown all over on top and springs back when touched lightly with the open palm of your hand – avoid poking the cake because you'll create dents. Insert a toothpick in the center and it should come out with no batter attached or perhaps a tiny moist crumb or two. The top will not crack during baking. Do NOT overbake or the cake will start to shrink from the sides of the pan and taste eggy. It will also fall from its pan when inverted.
6. Thoroughly cool the cake layer in its pan while inverted:
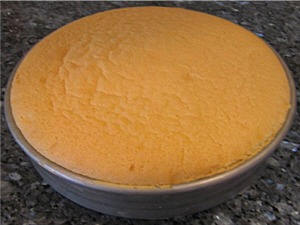
A. Remove the cakes from the oven and immediately turn them in their pans over and hang each layer upside-down, in thier Aluminum Cooling Pans to cool thoroughly, taking up to 1 1/2 hours to complete. The cakes will rise higher in the oven and fall back slightly when you remove them from the oven. Once you invert the cakes to cool, the cake will stretch and set with a domed top, although not as high as it had been in the oven. The cake tops will crack somewhat; it's ok if they do.
SARAH SAYS: If the cake starts to fall out of its pan while inverted or cracks too much while doing so, do not invert. Instead, simply cool the cake layer upright it in its pan on a wire cake rack.
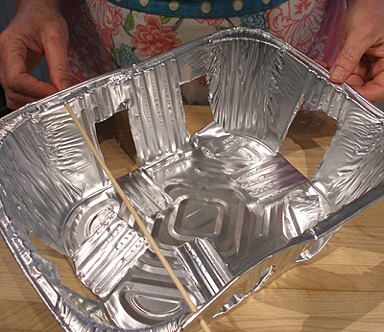
HOW TO PREPARE THE ALUMINUM COOLING PAN:
Proper cooling is just as important as baking. The cakes are inverted in their pans to cool which prevents their structure from shrinking or falling, giving the open texture that's characteristic of chiffons. If placed to cool on a rack, it would deflate much of that hard-earned volume. I invented a way to cool chiffon cakes baked in a cake pan because they wasn't a good way to complete this task in order to preserve the unique texture of this cake; if not inverted, the cake's airy crumb collapses as it cools, destroying all the careful mixing you have done to ensure a light and airy cake.
MY INVENTION: SARAH SAYS: I found that a disposable aluminum casserole pan, cut with air holes so air can circulate around the hot cake to enhance cooling, makes a perfect way support my cake layer as it cools. (Make sure you don't use anything that is plastic otherwise the hot pan will melt it.)
A 9 1/4 diameter x 2 3/4-inch height aluminum disposable casserole pan (purchased from the grocery store) works perfectly with a 9-inch cake pan. You will need one for this recipe!
The cake pan's rim fits exactly and securly on the rim of the disposable pan, and when the cake stretches while it cools, and the cake doesn't touch the sides or bottom of the aluminum pan which would mar the cake if it did. The best part is that the pan is inexpensive and can be purchased from the grocery store. You only need one for this recipe!
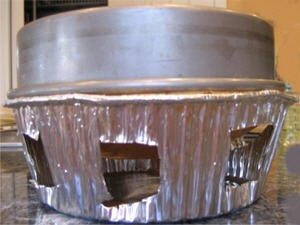
To make: Carefully cut vertical slits or squares with scissors or a small, sharp knife near the rim of the pan in the side to allow for air circulation.
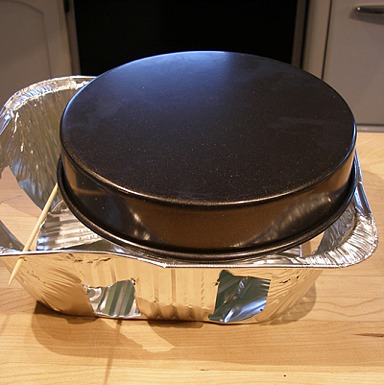
Then, place the disposable pan on top of the cake pan. Be careful because the cut slits become sharp.
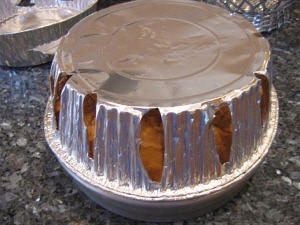
Then, flip the two over together so the pan is on the top on the cake is hanging up-side-down. (Here is another example of the type of air holes you can cut into the disposable aluminum pan).
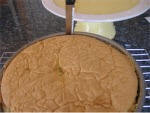
SARAH SAYS: Here's the difference in a cake cooled upside-down and one cooled right-side up.
The cake cooled in its pan on a wire cake rack has a wrinkled top and a denser inside cake crumb. The cake collapsed while cooling. The cake will be drier and have a less vibrant taste as a result.
VERSUS
The cake that cooled while upside-down has a less dense cake crumb and a slightly domed top. It's really important that you cool a foam-type cake upside-down so the cake's structure can set stretched-out, giving a lighter, airy texture and more vibrant flavor.
NOTE: KELLY SAYS: I could not find the pans specified, so I bought aluminum roasting pans, cut the steam holes in the sides and used a wooden skewer to hold up one side of the pan. It worked great!
STEP III: UNMOLD THE CAKE, ASSEMBLE AND SERVE
1. Unmold the cake layer, when the cake is completely cooled.
A. Gently loosen the sides of cake with a thin-bladed, flexible knife, moving the knife firmly in one direction; do not use a sawing motion.
B. Invert onto a wire cake rack. Remove parchment paper and then flip layer right-side-up.
2. Tort the cake layer:
A. Cut the cake in half horizontally into two layers with a serrated knife with small, quick sawing motions.
B. Place top of cake on a wire cake rack set over waxed paper, top side down, so it becomes the bottom layer.
3. Fill the cake with Orange Cream Filling from STEP I:
A. Remove the filling from the refrigerator and stir.
B. Place the filling in the center of the bottom layer. Spread the filling to about 1/4-inch to the edge of the layer. I use a large icing spatula to spread mine.
C. Place the top layer of the cake on the filling. The layer may crack because the cake is delicate. Don't worry. It will be covered in chocolate and the cracks won't show.
4. Prepare the Chocolate Glaze and glaze the cake:
CHOCOLATE GLAZE / Recipe alone
INGREDIENTS
8 ounces (squares) semi-sweet or sweetened chocolate or use a combination of 4 ounces (squares) semi-sweet and 4 ounces (squares) bitter-sweet chocolate or 8 ounces semi-sweet chocolate chips
4 tablespoons unsalted butter, room temperature; cut into tablespoon size pieces
2 tablespoons light corn syrup or dark corn syrup
2 tablespoons water
pinch (1/8 teaspoon) salt
1 teaspoon vanilla extract
INSTRUCTIONS
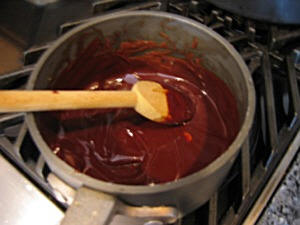
1. Combine the chocolate squares, butter, corn, syrup, water and salt in a medium size, heavy bottomed saucepan. (You can also melt the ingredients in the top part of a double boiler.) Turn on the heat on low and while stirring all the time, until the chocolate is almost melted. Remove from the pan from the heat and continue to stir until the chocolate is fully melted. Let cool a bit and add the vanilla extract and stir. Use immediately.
2. While the chocolate glaze is still fluid, immediately pour the warm glaze over the center of the cake and with a large icing spatula, spread the glaze so it drips over the sides. Work quickly because the glaze will set quickly.
3. Before the chocolate has a chance to set, immediately remove the cake with a large spatula to a flat platter. Chill uncovered in the refrigerator until the chocolate sets, at least an hour.
SARAH SAYS: Once the chocolate sets and you try and move the cake, the chocolate may crack, so it's best to move it to a platter while the chocolate is still pliable. The chocolate covering never hardens like a shell; it stays slightly soft underneath the top.
SERVE
Serve cake by cutting with a sharp serrated knife in a sawing motion or with an electric knife. If you use another type of knife or press straight down, you'll squish the cake.
STORAGE
It will keep for about 3 days at room temperature, and 10 days refrigerated. Refrigerate if filled or frosted with perishable items, such as the Orange Cream Filling used in this recipe, where it will keep for a few days because the filling and frosting only lasts that long. Chiffon cakes can be frozen for two months or so, but suffer somewhat in texture when thawed. It's best to freeze cake before unmolding from the pan. Wrap pan in foil before doing so.
VARIATION
Basic Chiffon Cake
Cake and photo by kake, Premium Member © Sarah Phillips
Cake and photo by kake, Premium Member © Sarah Phillips