
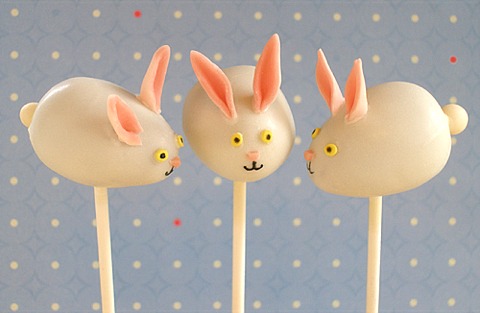
These cute Easter Bunny Cake Pops are made from cake balls made from homemade cake and buttercream frosting, that does not need refrigeration, dipped in candy melts with adorable candy clay accents.
You can use a cake mix and frosting from the grocery store if you are pressed for time, and our other elements to the recipe are simple and easy to make. Our extensive recipe-tutorial shows you how to make successful cake balls, how to secure them to a lollipop stick and how to decorate them to your liking! Happy Spring and Happy Easter!
CAKE RECIPE HELP
See also:
 Cake Pops 101
 Spring Tulip Cake Pops
YOU WILL NEED
Make the night before or a couple of hours before:
Step I:
1 recipe each Easy Candy Clay or Chocolate Plastic from Candy Melts; one recipe pink and one white.
ONE 9-inch layer Red Velvet Layer Cake with Traditional Cream Cheese Frosting or the Gluten-Free Everyday Chocolate Cake or Cupcakes. You may use other butter cake recipes, or even a cake mix, but you may have to use more cake and/or frosting to get the yield and consistency indicated in the tutorial.
IMPORTANT NOTE: The cake used should not be overly moist or wet because it causes the coating on the cake balls to crack when it hardens. The cake also gets misshapen easily and will not hold its shape and fall from its stick. If the cake layer is overly moist, leave it out overnight, unwrapper at room temperature to dry slightly.
3/4 to 1 cup Tami’s or Perfect Buttercream or store-bought tub frosting
NOTE: We selected this buttercream because it does not need refrigeration.
Special Ingredients and Equipment:
3 rimmed baking sheets
parchment or waxed paper cut to size
Step I:
One 1 Tablespoon Cookie Scoop for equal portioning (You may be able to find it less expensive, but remember the cheaper it is it may hurt your hand.)
Step II:
Silpat Nonstick Mat lightly dusted with cornstarch
One Small plastic fondant rolling pin
“Daffodil Petal” Cutter from the Wilton Gum Paste Flowers Kit.
Step III:
40-50 8-inch Paper Lollipop Sticks
Two or three 14-ounce packages White Wilton Candy Melts or Merckens Brand for coating
Small amounts Paramount Crystals or shortening (about 1 teaspoon per pound of candy melts) to thin the Candy Melts, if needed; Paramount Crystals work better
Two large Blocks of Sheet Styrofoam or wood, with lollipop stick sized holes drilled into it, to hold your cake pops while the candy coating hardens.
Step IV:
Small bag Confetti Sprinkles (use 40 – 50 for bunny eyes)
One Black Edible Gourmet Food Writer
One Black Gel Food Color, Americolor
SPECIAL TIP: HOW TO MELT/REHEAT CANDY MELTS
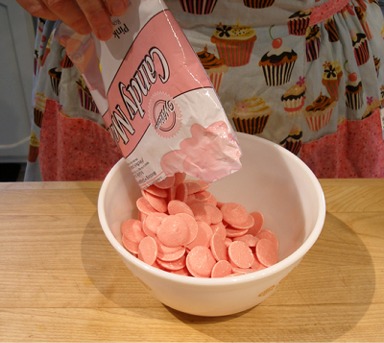
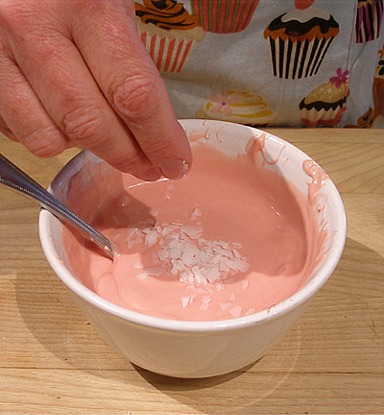
1. Place one 14-ounce package Pink Wilton Candy Melts in a microwave proof bowl.
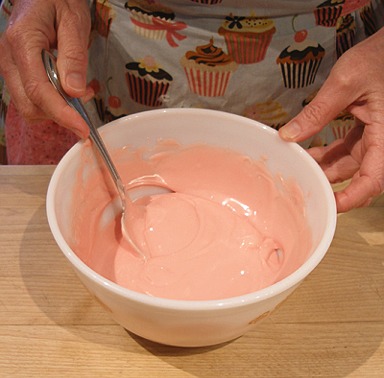
2. Microwave at 40% power or defrost setting for 1 minute. Stir thoroughly. Continue to microwave and stir at 30-second intervals until smooth and completely melted.
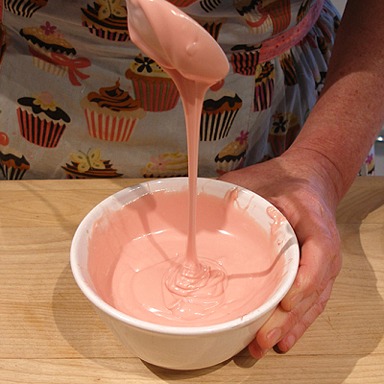
3. Make sure the melted Candy Melts flows easily like honey from a spoon when dipped in it and lifted out.
If the candy coating is too thick, you will have a difficult time dipping the cake pops. If it is too thin, you may see deeply colored cake ball dough through the coating.
NOTE: Or, you can melt Candy Melts in a double boiler: Fill lower pan with water to below level of top pan. Heat water to a simmer, then remove from heat. Put Candy Melts in top pan and set in position on lower pan. Stir constantly, without beating, until smooth and completely melted.
3. If at any time the Candy Melts need reheating, microwave and stir at 40% power for 10 seconds intervals or less.
NOTE: If the JUST melted candy coating is too thick and gummy, add tiny amounts (1/8 teaspoon) at a time of Paramount Crystals or use shortening(about 1 teaspoon per pound of candy melts).
Stir the paramount crystals/shortening into the warm candy melts until it is completely incorporated.
EASTER BUNNY CAKE POPS TUTORIAL
STEP I: MAKE THE CAKE BALL DOUGH. FORM THE 40-50 EGG-SHAPED CAKE BALLS.


Cake pops are made from cake balls. The trick to making cake balls is to start with cake that is not overly damp and gooey and to not mash the frosting.
After forming the cake balls and placing them on sticks, you can freeze them for later use.
Make the cake ball dough:
CAKE BALL DOUGH RECIPE
INSTRUCTIONS
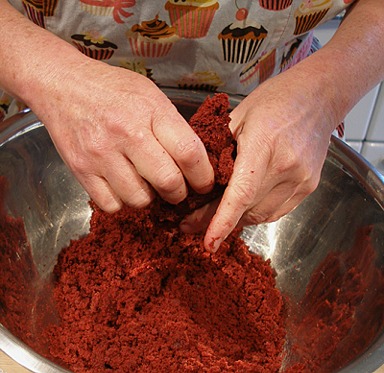
1. With your fingertips, crumble the Red Velvet Layer Cake Layer layer into small cake pieces in a large bowl. There should be NO large pieces visible.
2. Starting with 3/4 cup Tami's or Perfect Buttercream, add it 1/4 cup at a time to the crumbled cake pieces.
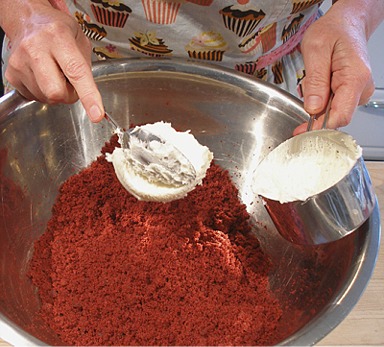
After each 1/4 cup addition, lightly mix the buttercream and cake pieces together with your fingertips.
NOTE: Do not to mash and squish the cake pieces together with the frosting, otherwise the cake balls will get overly damp, slimy and dense.
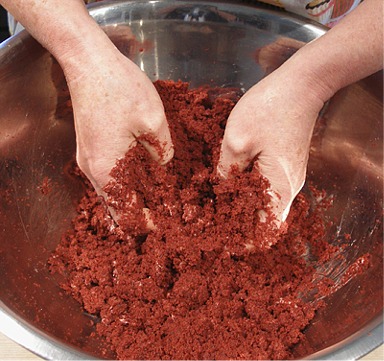
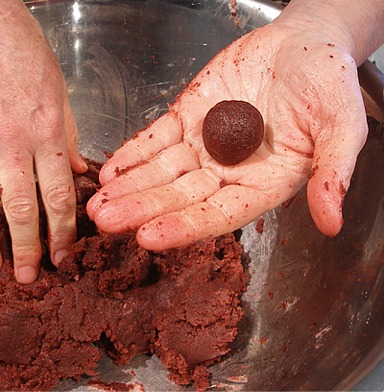
3. Continue mixing the cake crumbs with your hands until it starts to form a cohesive mass. To test, roll a ball of the cake/frosting mixture until it holds together.
If it does, stop mixing.
NOTE: If necessary, add A LITTLE more frosting, a tablespoon at a time, up to 1/4 more, and mix after each addition, until you can roll a cohesive ball of the cake/frosting mixture.
Do not add too much frosting because if your cake/frosting mix is too wet, it may cause the coating to crack when it hardens.
Form 40-50 EGG-SHAPED CAKE BALLS:
1. Line two rimmed baking sheets with parchment or waxed paper.
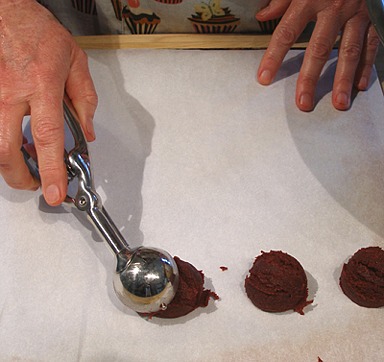
2. Portion 40-50 cake pieces from the CAKE BALL DOUGH using the One Tablespoon Cookie Scoop. Place each one on the prepared baking sheet.
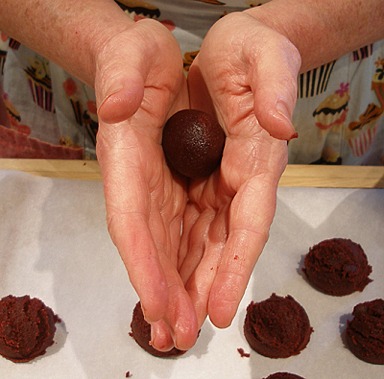
3. Roll each cake portion in your hands to form a neat CAKE BALL.
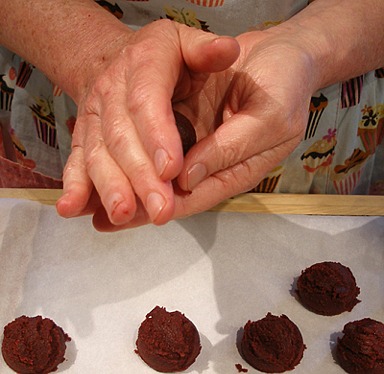
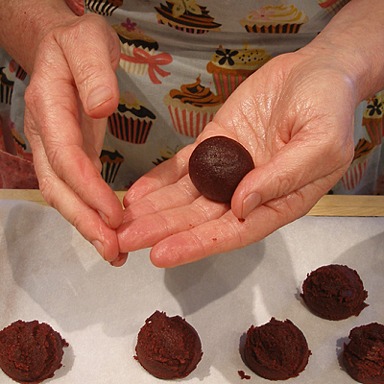
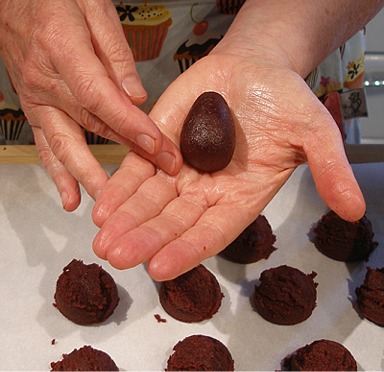
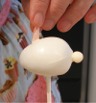
4. To form the Easter Bunnies, roll each CAKE BALL into an EGG-SHAPED CAKE BALL. We think the bunny looks cuter that way!
Do that by rolling one end of the CAKE BALL to elongate its shape.
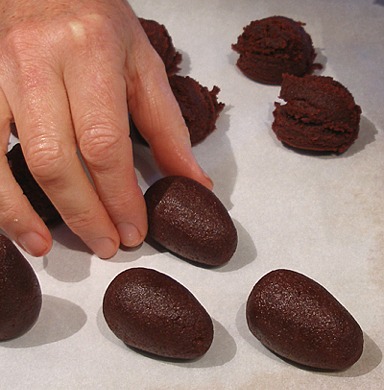
5. After making, place each EGG-SHAPED CAKE BALL on its side on the prepared baking sheet. Cover loosely with a large sheet of plastic wrap.
STORAGE
When completed with 40-50 EGG-SHAPED CAKE BALLS, cover and place them in the refrigerator chill for AT LEAST an hour, or up to 4 hours before attempting to dip them in the WHITE WILTON CANDY MELTS, Step III. They need to firm up before dipping otherwise the coating will crack.
STEP II: MAKE THE EASTER BUNNY CAKE POP EARS, TAILS AND NOSES


While the EGG-SHAPED CAKE BALLS chill, use the PINK AND WHITE CANDY MELTS CLAY to form the EASTER BUNNY CAKE POP EARS and TAILS.
You will need: 40 – 50 pairs of Easter Bunny Cake Pop Ears (white and pink stacked), 40 to 50 Bunny Tails (white) and 40 to 50 Bunny Noses (pink)
SHORTCUT NOTE: You can use Pastel Candy Corn for the ears, instead! You will need 80 – 100 pieces. Use the rounded side of a cookie cutter and cut of the small end of the candy corn so it fits the rounded cake ball. Dip the cut end in a little bit of the melted and cooled white candy melts to adhere it. Hold in place to the top of the bunny head with the large end up until it sets. If your candy coating is cool, this should just take a few seconds.
Before you start: Line a rimmed cookie sheet with parchment or waxed paper. Set aside.
Make the EASTER BUNNY CAKE POP EARS:
Makes 40 – 50 pairs
INGREDIENTS
one recipe PINK EASY CANDY CLAY and one recipe WHITE EASY CANDY CLAY
One Silpat Nonstick Mat or cornstarch
One Small plastic fondant rolling pin
INSTRUCTIONS
Soften the Easy Candy Clay:
NOTE: It will be VERY hard after sitting in storage, but will soon soften up, due to the warmth of your hands, as you knead it.
It is easier to warm and roll out small portions of candy clay at a time.
1. Unwrap the WHITE EASY CANDY CLAY and cut off small portions of it at a time with a paring knife.
2. Work it between your fingers until it becomes soft and pliable.
3. Repeat with the PINK EASY CANDY CLAY.
4. Keep any unused candy clay covered and set aside.
Form the Easter Bunny Ear Pairs:
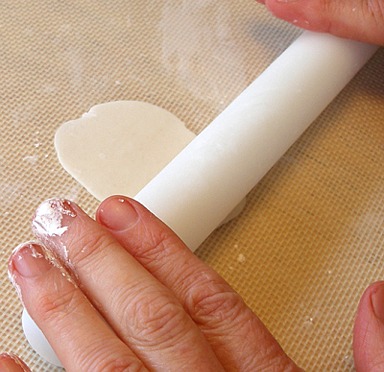
1. When a small amout of the WHITE EASY CANDY CLAY is sufficiently kneaded and pliable, roll it out on a Silpat Nonstick Mat lightly dusted with cornstarch until it is very thin, about 1/16-inch thick.
NOTE: It is easier to roll out small portions of Candy Clay at a time. I like to use a small plastic fondant rolling pin.
2. Repeat with a small amount of the PINK EASY CANDY CLAY.
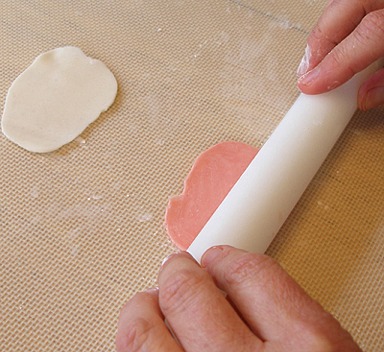
3. Place the ROLLED PINK EASY CANDY CLAY on top of the ROLLED WHITE EASY CANDY CLAY.

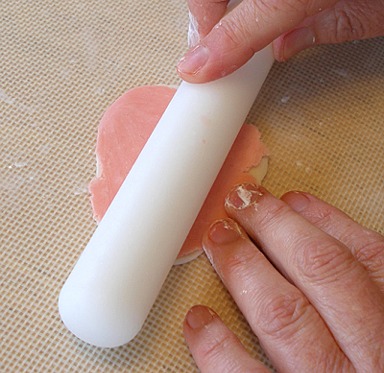
4. Then, roll the STACKED PINK & WHITE EASY CANDY CLAY together on a Silpat Nonstick Mat lightly dusted with cornstarch until the combined thickness is a little more than 1/16-inch.
As you roll , the two colors will stick to each other.
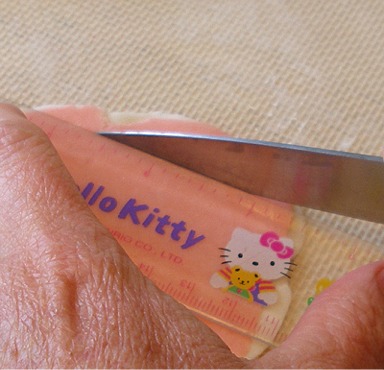
5. Cut a straight edge on one side of the STACKED PINK & WHITE EASY CANDY CLAY to trim it.
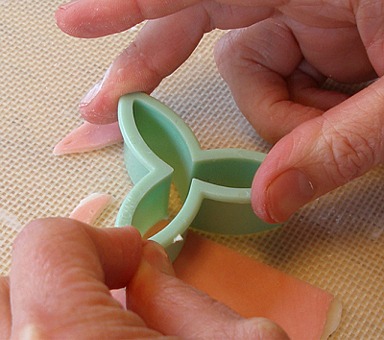
6. Then, cut bunny ears out, using the “Daffodil Petal” Cutter from the Wilton Gum Paste Flowers Kit.
7. Make PAIRS of EASTER BUNNY CAKE POP EARS, then trim them to the same size with a paring knife.
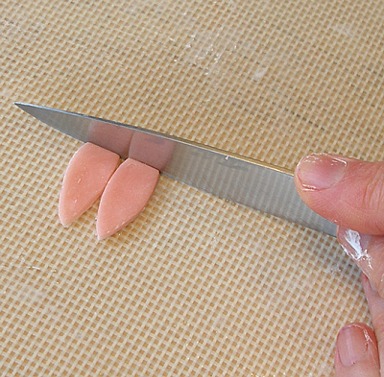
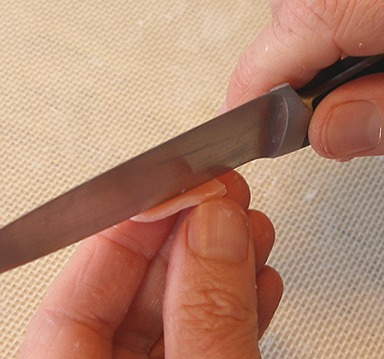
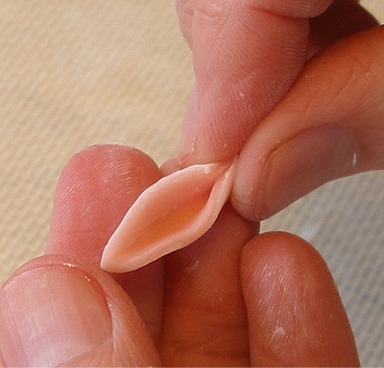
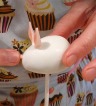
8. Use the dull side of the knife and crease the ears in the middle, then press the bottom of the ears together.
9. Set the ear pairs on the prepared baking sheet until ready to use. Keep the pan loosely covered with plastic wrap.
10. Repeat the above instructions until you have 40 to 50 pairs of EASTER BUNNY CAKE POP EARS.
Make 40 to 50 EASTER BUNNY CAKE POP TAILS:
INGREDIENTS
WHITE EASY CANDY CLAY
INSTRUCTIONS
1. Soften the Easy Candy Clay.
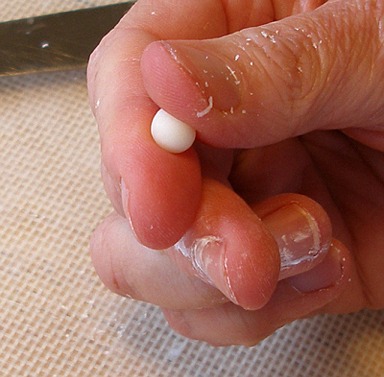
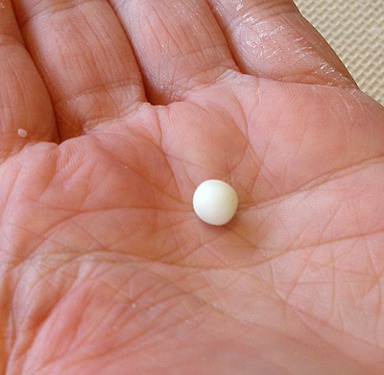
2. Pinch off a small piece. Roll it in between your fingertips, into small balls, about the size of a pea.
3. Set the EASTER BUNNY CAKE POP TAIL on the prepared baking sheet. Keep the pan loosely covered with plastic wrap.
4. Repeat the above instructions until you have 40 to 50.
Make 40 to 50 Easter Bunny Cake Pop Noses:
INGREDIENTS
PINK EASY CANDY CLAY
INSTRUCTIONS
1. Soften the candy clay.
2. Pinch off a small piece. Roll a VERY small ball to form the bunny's nose.
3. Set the EASTER BUNNY CAKE NOSE on the prepared baking sheet.
Keep the pan loosely covered with plastic wrap.
4. Repeat the above instructions until you have 40 to 50.
STORAGE
Keep the pan loosely covered with plastic wrap. Set aside at the cool side of room temperature until the EASTER BUNNY CAKE POP EARS, TAILS AND NOSES are needed in the recipe, STEP IV.
STEP III: INSERT THE LOLLIPOP STICKS INTO THE EGG-SHAPED CAKE BALLS. COAT THEM WITH CANDY MELTS.


INGREDIENTS
40-50 Chilled EGG-SHAPED CAKE BALLS, from Step I; Keep in refrigerator until needed in the recipe
40-50 8-inch Paper Lollipop Sticks
Two or three 14-ounce packages White Wilton Candy Melts or Merckens Brand for coating
Tiny amounts (1/8 teaspoon) at a time Paramount Crystals or shortening(about 1 teaspoon per pound of candy melts) to thin the Candy Melts, if needed; Paramount Crystals work better
Two large Blocks of Sheet Styrofoam or wood, with lollipop stick sized holes drilled into it, to hold your cake pops while the candy coating hardens.
INSTRUCTIONS
Insert the Lollipop Sticks:
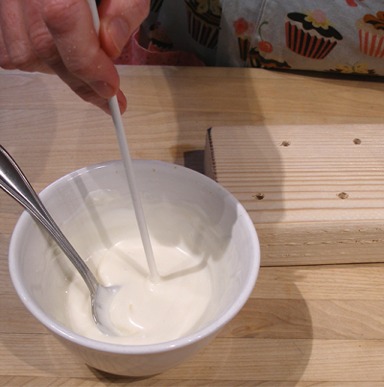
1. Place 3/4 cup WHITE WILTON CANDY MELTS in a deep microwave-proof bowl. Microwave at 40% power or defrost setting for 30 seconds. Stir thoroughly.
Continue to microwave and stir at 30-second intervals until smooth and completely melted. (See also SPECIAL TIP: HOW TO MELT/REHEAT CANDY MELTS at the beginning of this tutorial.)
2. Remove a few EGG-SHAPED CAKE BALLS from the refrigerator at a time, to insert the sticks.
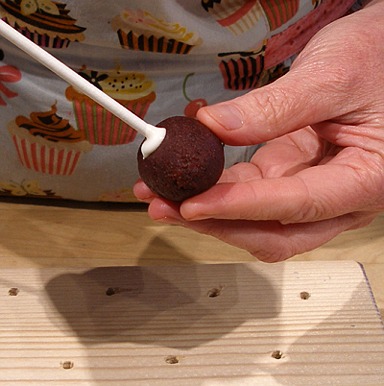
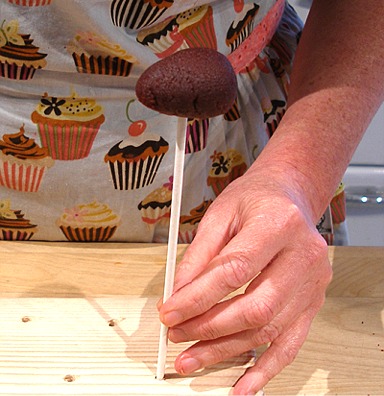
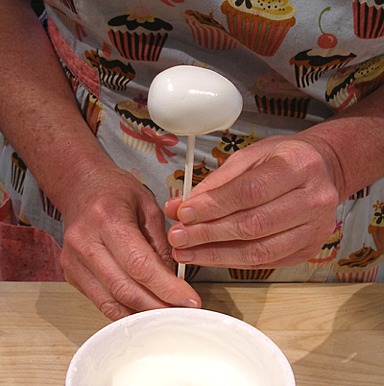
Stick the end of the 8-inch Paper Lollipop Stick 1/2-inch into the MELTED CANDY MELTS.
3. Push the coated end of the 8-inch Paper Lollipop Stick into the center of the FLAT SIDE(the side that was resting on the baking sheet) of the EGG-SHAPED CAKE BALL.
Make sure to only push the stick half-way into the cake ball. If there is excess candy melt coating where the stick was inserted, wipe it away with your fingertip.
4. Place the other end of the stick into the Block of Sheet Styrofoam.
5. Repeat Step#s 1 – 4, above, with the remaining EGG-SHAPED CAKE BALLS.
STORAGE
Place the EGG-SHAPED CAKE BALLS ON STICKS in the refrigerator for 30 minutes to an hour prior to coating them.
Coat the Chilled Egg-Shaped Cake Balls on Sticks with White Wilton Candy Melts:
1. Place one 14-ounce package of the WHITE WILTON CANDY MELTS AT A TIME, in a small deep bowl. Melt according to the SPECIAL TIP: HOW TO MELT/REHEAT CANDY MELTS at the beginning of this tutorial.)
Let it cool slightly so it still flows easily like honey from a spoon when dipped in the candy melts and is lifted from it.
Melt more WHITE WILTON CANDY MELTS as needed.
2. Remove the EGG-SHAPED CAKE BALLS ON STICKS from the refrigerator.
3. Dip one chilled EGG-SHAPED CAKE BALL ON STICK at a time into the melted WHITE WILTON CANDY MELTS until it is completely submerged up to where the Lollipop Stick is inserted. Make sure you cover all of the cake.
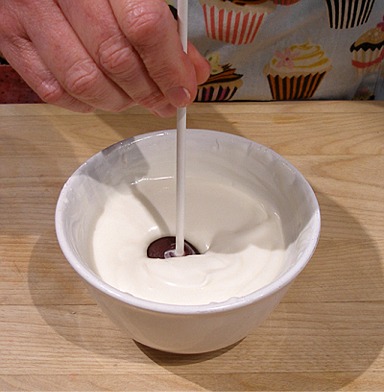
4. Then, lift the COATED CAKE POP straight out.
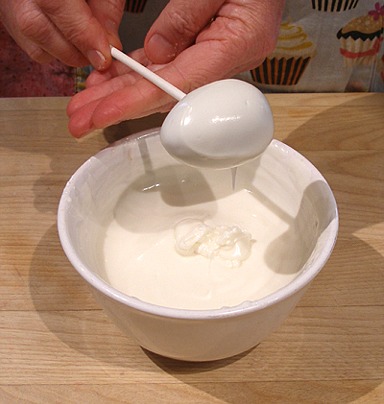
5. Let the excess WHITE WILTON CANDY MELTS drip off, back into the bowl.
It is helpful to pat the wrist of your hand to help the excess coating drip off. BE CAREFUL, if you tap too hard, you can dislodge the cake pop and it will fall right off the stick.
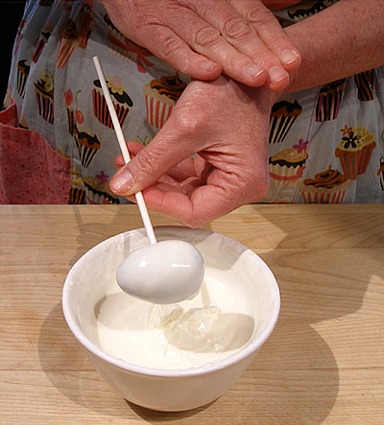
6. Place the COATED CAKE POP back into the Block of Sheet Styrofoam.
7. Repeat Step#s 3 – 5, until all of the EGG-SHAPED CAKE BALL ON STICK become COATED CAKE POPS. .
Save any remaining WHITE WILTON CANDY MELTS for use in STEP IV.
STORAGE
Let the COATED CAKE POPS set at room temperature for about an hour before proceeding to STEP IV. Optionally place them in the refrigerator for about 15 to 30 minutes to help firm up the coating faster. Do NOT cover them.
Do NOT store them in the refrigerator.
STEP IV: COMPLETE THE PROJECT – ADD THE EASTER BUNNY CAKE POP EARS, TAILS, NOSES TO THE COATED CAKE POPS. ADD THE EYES AND “PAINT” THE MOUTHES.

When the coating on the COATED CAKE POPS has hardened, remelt the candy melts that are left in the bowl. We will use this to “glue” the bunny parts on the cake pops.
INGREDIENTS
40 – 50 Chilled COATED CAKE POPS, from STEP IV
40 – 50 EASTER BUNNY CAKE POP TAILS, from STEP II
40 – 50 EASTER BUNNY CAKE POP EAR PAIRS, from STEP II
40 – 50 EASTER BUNNY CAKE POP NOSES, from STEP II
Remaining WHITE WILTON CANDY MELTS from STEP III, and any extra, if needed, melted and slightly cooled
Small bag Confetti Sprinkles (use 40 – 50 for bunny eyes)
One Black Edible Gourmet Food Writer
One Black Gel Food Color, Americolor
INSTRUCTIONS
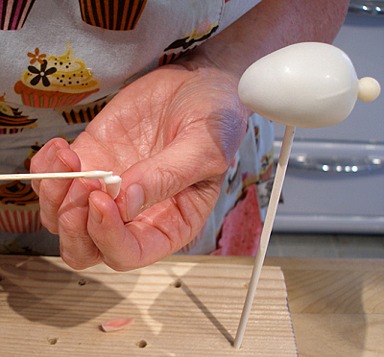
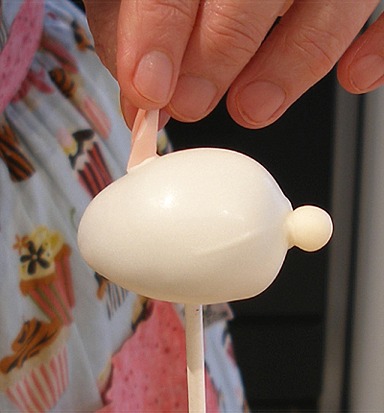
Place the tails:
1. Starting with one at a time, using a toothpick, place a small amount of WHITE WILTON CANDY MELTS in the middle of the wide end of the COATED CAKE POP.
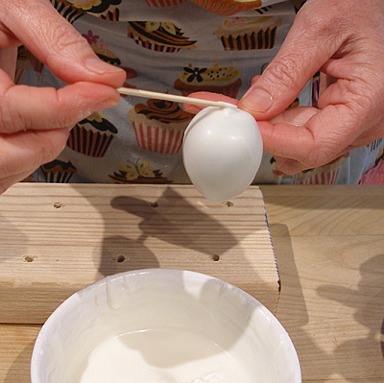
2. Quickly place one EASTER BUNNY CAKE POP TAIL on the Candy Melt and hold it in place a few seconds, to adhere.
Then, place the COATED CAKE POP back in the Block of Sheet Styrofoam.
3. Repeat with the remainder.
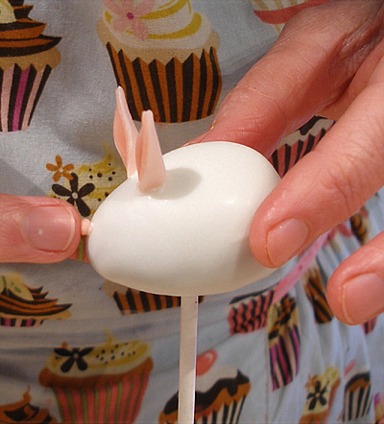
Place the ears:
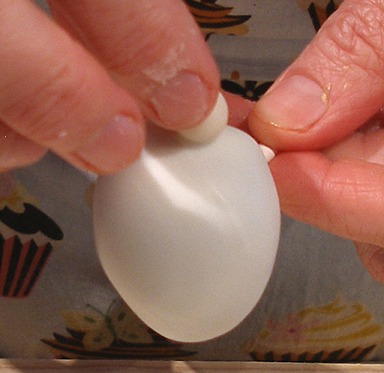
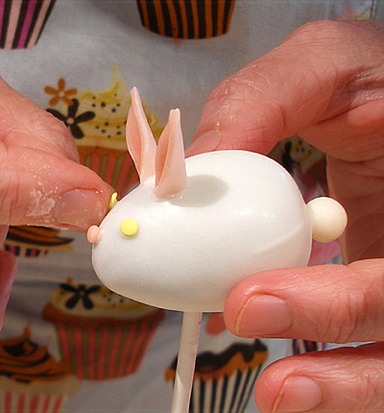
1. Choose one EASTER BUNNY CAKE POP EAR PAIR, and a COATED CAKE POP with an EASTER BUNNY CAKE POP TAIL on it.
2. Then, place a little of the melted coating on the bottom of one ear and set it in place, on the small end of the cake pop. Repeat with the other ear.
NOTE: When placing the ears, make sure you leave enough space for the eyes, nose and mouth on the front of the bunny pop.
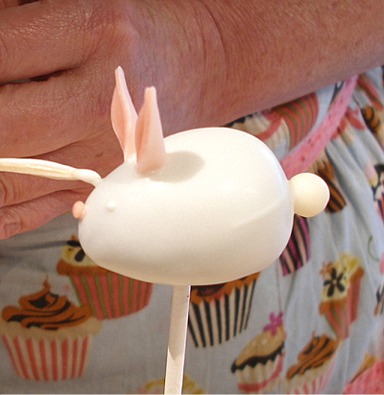
Place the noses:
1. With each completed COATED CAKE POP, “glue” a EASTER BUNNY CAKE POP NOSE in place with melted WHITE WILTON CANDY MELTS.
NOTE: If you like, you can use a small pairing knife to trim the nose into a triangle shape. This is not necessary, unless you are a perfectionist, like I am.
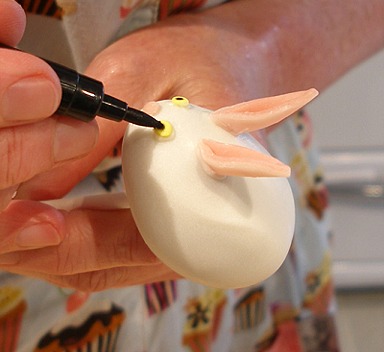
Place the eyes:
1. On each completed COATED CAKE POP, “glue” two yellow (or any matching color) Confetti Sprinkles, using melted WHITE WILTON CANDY MELTS.
2. When in place, use a Black Edible Gourmet Food Writer, or a bit of Black Gel Food Color, Americolor on the end of a toothpick to paint on the pupils.
Paint” the mouths:
1. On each completed COATED CAKE POP, use a bit of Black Gel Food Color, Americolor on the end of a toothpick.
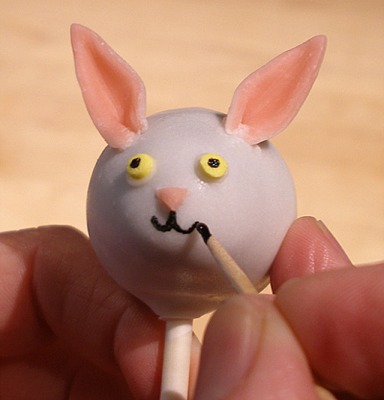
NOTE: I found that the Black Edible Gourmet Food Writer was not fine enough to do the job.
2. Let the completed EASTER BUNNY CAKE POPS set/dry at room temperature for about 10 to 20 minutes before serving!
STORAGE
These EASTER BUNNY CAKE POPS do not need to be refrigerated, and can be left, covered, at the cool side of room temperature, for a few days.
Store them in the refrigerator, in an airtight container, ONLY if it is warm and humid.