VARIATIONS: Chocolate Cannoli or Cannoli alla Siciliana; Chocolate Pumpkin Spice Latte Dessert Tacos
Cannoli probably developed from an Arab pastry, as the case with so many other Sicilian desserts and dishes. Usually made and fried in lard, they were originally a Carnival food, but are so popular today, they can be found year round in pastry shops.
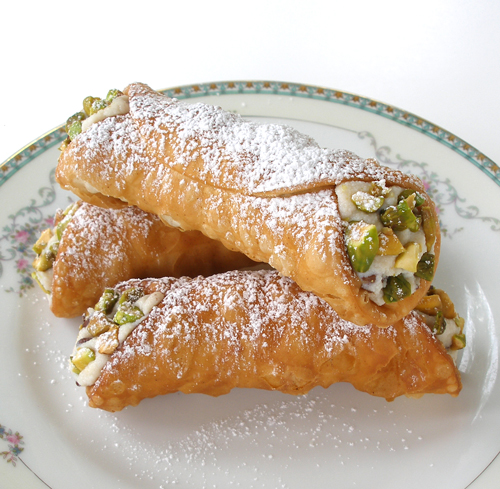
In the United States, pastry shops use a type of ricotta filling called ricotta impastata. It is very smooth and dry-textured, perfect for filling cannolis with. Instead, we show you how to make your own from drained fresh ricotta, so it can have the same proper firm consistency. If using fresh and drained ricotta, let the finished filling recipe firm in the refrigerator overnight before filling the fried cannoli shells. The filling is traditionally flavored with cinnamon oil, but we flavor ours ground cinnamon, orange peel, and chopped chocolate, however you can flavor yours anyway you want. We use our special technique to insure that ours are flaky and have a nice crunch when fried.
PASTRY RECIPE HELP
INGREDIENTS
Dough:
3 cups unbleached all-purpose flour; spoon into measuring cup and level to rim
3 tablespoons sugar
1 teaspoon ground cinnamon
1 teaspoon salt
3 tablespoons unsalted butter or lard, cubed and chilled
1 large egg
1 large egg yolk
1/2 cup dry white wine or dry vermouth
1 egg white, lightly beaten
Canola oil, for frying
Filling:
3 pounds whole milk ricotta, drained overnight in a cheesecloth-lined strainer, also known as ricotta impastata
1 1/2 cups powdered sugar, sifted; measure and then sift
2 teaspoons vanilla extract
1/2 teaspoon ground cinnamon or 1 tiny drop cinnamon oil
1 teaspoon orange zest
3 ounces semisweet chocolate, cut into 1/4-inch pieces and sifted in a strainer to remove any dusty particles or mini-chocolate chips
1 cup (about 4 ounces) salted green pistachios, skinned, dried out (but not toasted) in the oven, and chopped medium fine
Powdered sugar, sifted for dusting
Equipment:
8 – 12 cannoli tubes for frying the pastry shells; they are 1-inch in diameter and about 5 to 6-inch long. If you are using for the first time, fry them briefly in oil heated to 375-degrees F measured with a Deep-Fry Thermometer to season them. Let cool and wipe with paper towels before using.
2 jelly roll pans lined with paper towels for draining the fried shells
Pasta Maker
4-inch round cookie cutter
Deep-Fat Fry Thermometer
INSTRUCTIONS
STEP I: MAKE THE DOUGH
NOTE: Dough can be made 1 day before frying shells and chilled. Let dough stand at room temperature 1 hour before rolling.
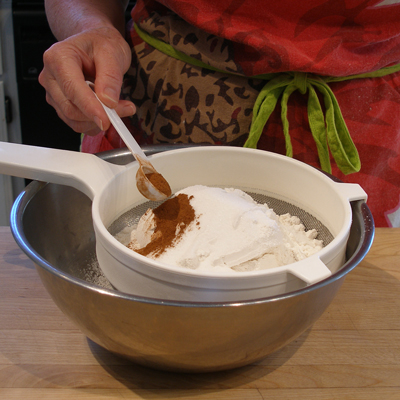
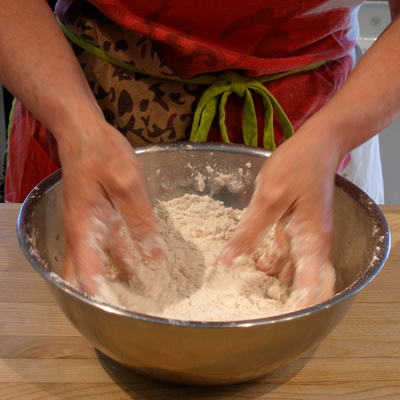
1. In a large mixing bowl, sift together the measured flour, sugar, cinnamon, and salt. Whisk to combine.
2. Add the butter.
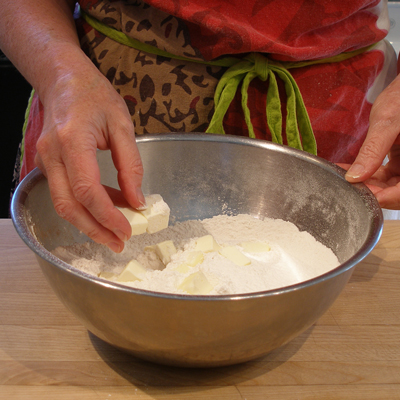
3. Rub it into flour mixture with fingertips until mixture resembles bread crumbs.
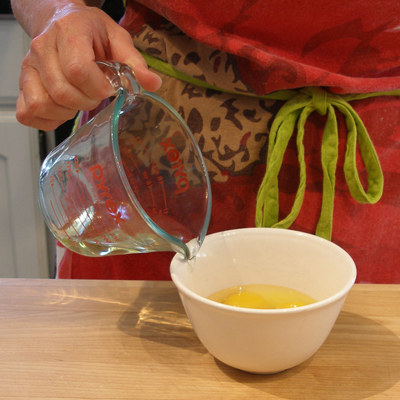
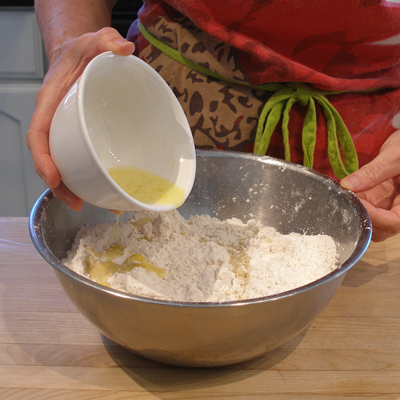
4. Whisk the egg, egg yolk, and wine together, and add to the flour mixture. Use a large rubber spatula and mix until dough forms.
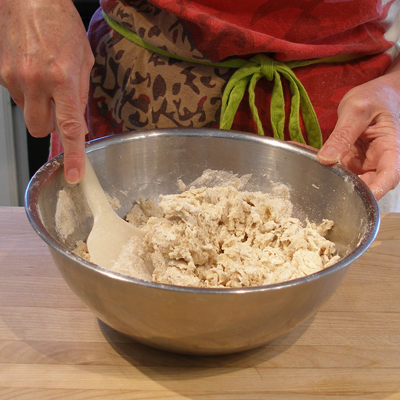
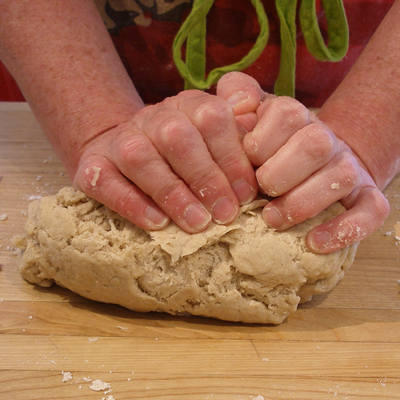
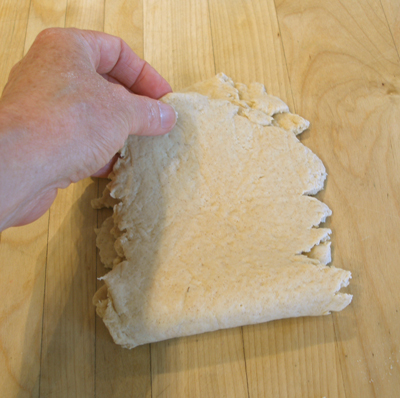
5. Transfer dough to floured work surface and knead briefly by folding it over on itself repeatedly until it becomes too firm to knead further.
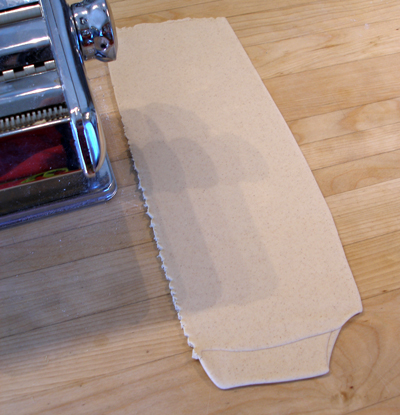
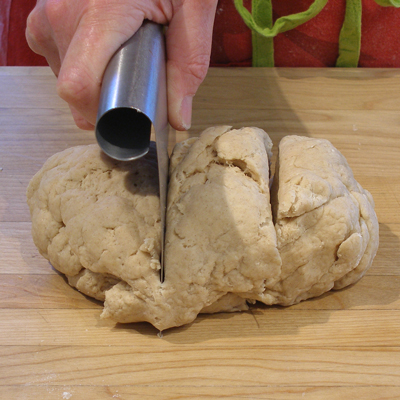
6. Use a bench scraper to divide the dough into thirds.
7. Then, pass one-third of the dough, at a time, through widest setting on the pasta roller. Set the other 2 pieces aside, lightly covered with plastic wrap until needed.
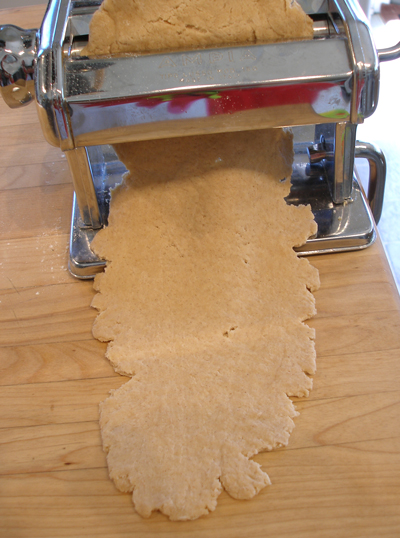
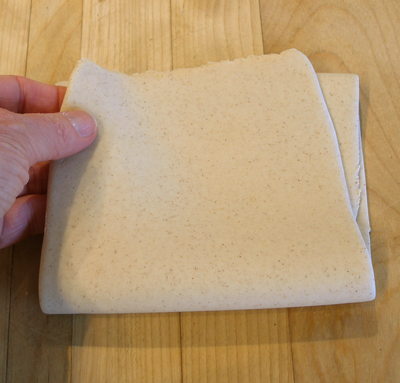
8. Fold the rolled dough in thirds and pass it through again from the open side.
NOTE: Fold the dough as you would a letter!
9. Repeat until the dough is smooth and elastic and no longer shreds as you are putting it through the machine.
NOTE: You may think that the dough will never come together, but keep on putting it through the machine and it will eventually become smooth and silky.
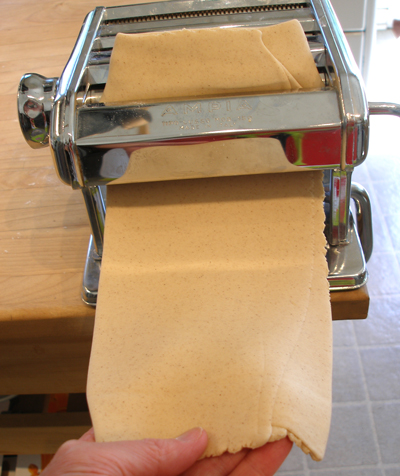
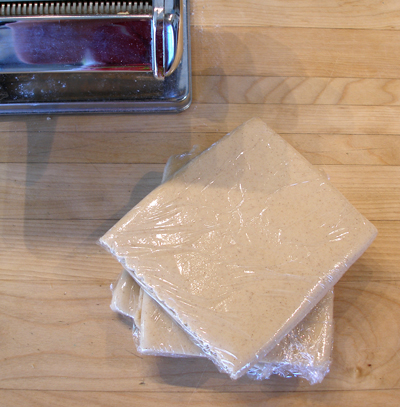
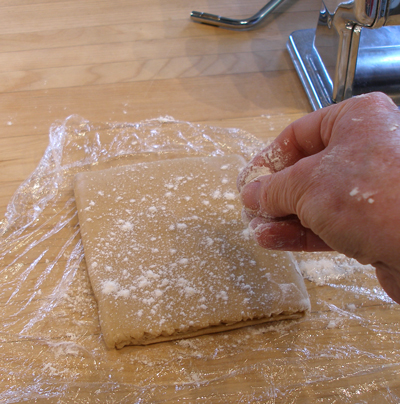
9. Fold dough in thirds again, wrap it in plastic wrap, and repeat with the remaining pieces of dough.
8. After all of the pieces of dough have been processed, refrigerate for an hour, or as long as overnight before continuing.
STEP II: MAKE THE CANNOLI SHELLS
1. Remove one piece of dough at a time from the refrigerator. Unwrap and flour the piece.
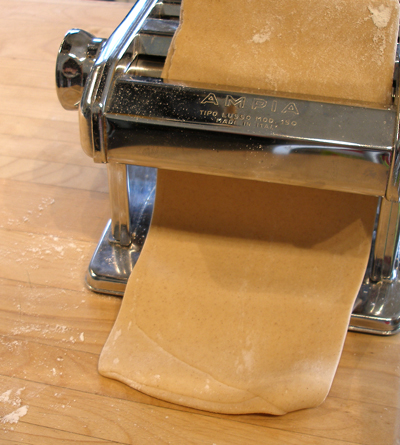
2. Pass it through the open end of the pasta machine.
3. Decrease the size of the opening by 2 notches and pass through again, flouring the dough as necessary so it won't stick.
NOTE: Not all pasta machines are alike. For example, my pasta machine has #1-#6. I used the #1 setting for the first roll, #3 the second time, and ended with #5.
4. Pass the dough through every other setting ending with the next-to-last one on the pasta machine, until 1/16-inch thick.
Place the strip of dough on a lightly floured work surface and cover it loosely with plastic wrap.
5. Repeat with the remaining 2 pieces of dough.
6. Using a 4-inch round cutter, cut out dough and transfer rounds to baking sheet and keep covered with plastic wrap. Roll out remaining dough and cut rounds in same manner.
NOTE: Make sure you cut straight down through the dough without twisting the cutter as you do. If you twist the cutter, this will seal the edges of the dough together and cause the dough to puff up too much as it cooks.
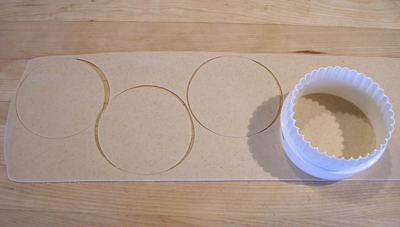
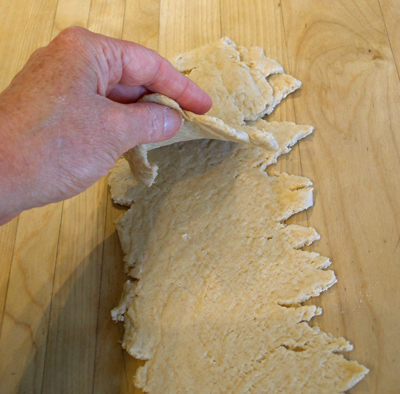
As you cut, gather the scraps, stack them, and let stand 10 minutes. Roll out scraps and cut in same manner.
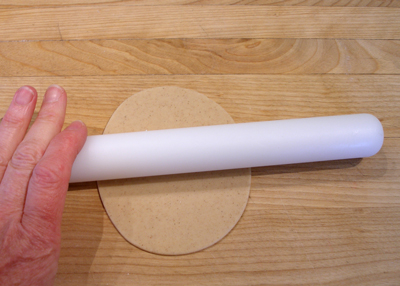
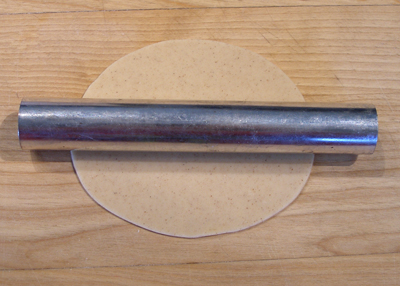
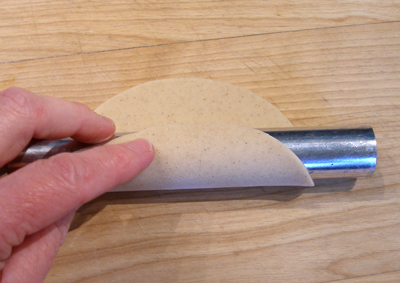
7. Working with one dough circle at a time, gently stretch dough to make it slightly oval, taking care to avoid touching the edges of the dough.
8. Lightly oil the cannoli tubes.
Position 1 cannoli tube lengthwise on the oval and draw 1 side of it up to the top.
Using a small brush, moisten about 1/2-inch of the top edge with egg white, taking care not to get any on the metal tube, otherwise the fried pastry will stick.
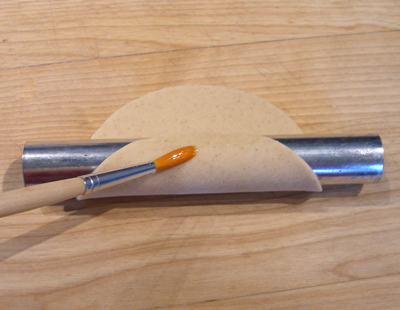
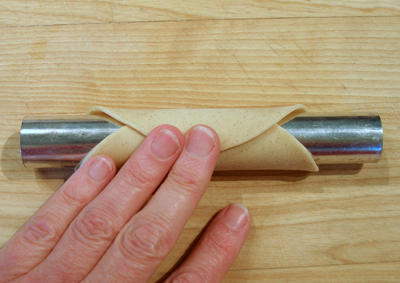
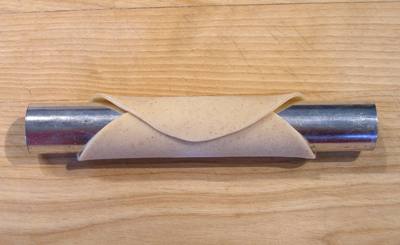
9. Draw the outer edge of the dough disk up to meet the first one and overlap them slightly, and press the dough firmly together with your fingertips.
Repeat with as many disks of dough as you have remaining cannoli tubes; set aside and cover loosely with plastic wrap.
NOTE: Make sure you press down firmly on the seal, or the shell may pop open during frying.
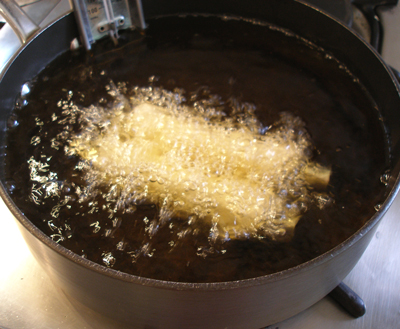
10. Pour oil into a 6-quart pot to a depth of 2-inches and heat over medium-high heat until a Deep-Fat Fry Thermometer reads 375-degrees F.
Working with 3 or 4 cannoli at a time, fry until deep golden brown color and crisp, taking about 1–2 minutes.
NOTE: Alternatively, you can use a 3-quart pot and fry two shells at a time.
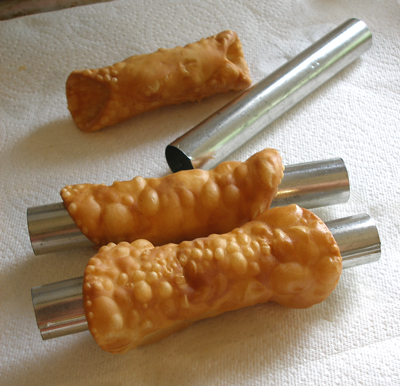
11. Using tongs, transfer the cannoli to paper towels to drain; while hot, carefully remove cannoli shell from the tube and set aside on paper towels or on a wire cake rack to cool. (If you allow shell to cool on the cannoli tube, it will stick to it and shatter when you try to remove it.) You may need to gently twist the shell off the tube.
NOTE: When you remove the cannoli shells from the hot oil, make sure to remember to tip the tube to allow the oil in the tube to drain back into the pan.
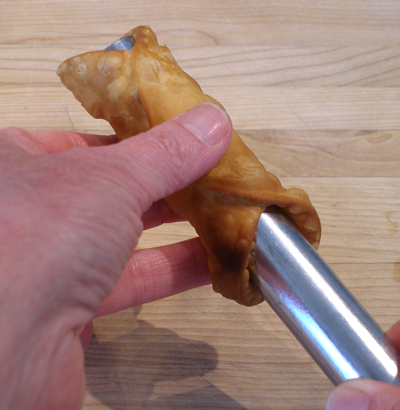
If necessary, use an oven mitt to grasp the end of the tube and use a towel or several thicknesses of paper towel in the other hand to gently twist the shell off the tube.
Make sure to let the tube cool thoroughly before wrapping more dough around it.
STORAGE
The fried and unfilled cannoli shells will keep for 1 to 2 days at room temperature, loosely covered with plastic wrap.
STEP III: MAKE THE FILLING AND FILL. SERVE.
NOTE: While the shells are cooling, make the filling. It can also be made the night before and refrigerated.
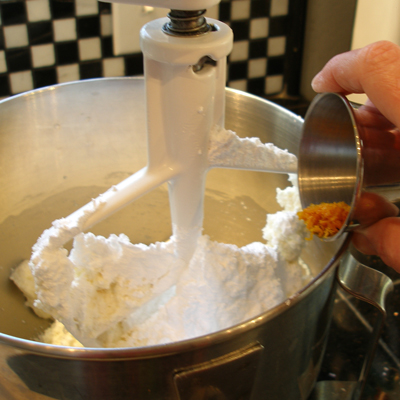
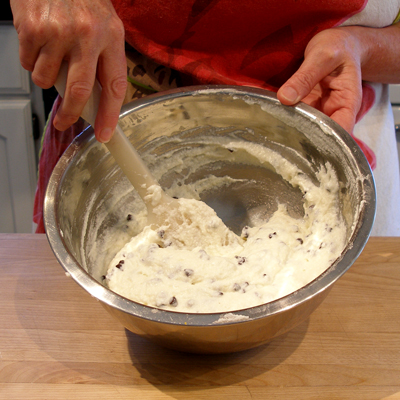
1. Place the drained ricotta in the bowl of a stand mixer fitted with a paddle attachment. Beat on lowest speed for 30 seconds.
2. Add in powdered sugar, cinnamon and orange zest and mix on low until combined.

3. Unclamp the bowl from the mixer and with a large rubber spatula, fold in the chocolate.

The filling is perishable and must be kept refrigerated.
SERVE
Fill shells only a few hours before serving and refrigerate; they will become soften soggy if filled sooner.
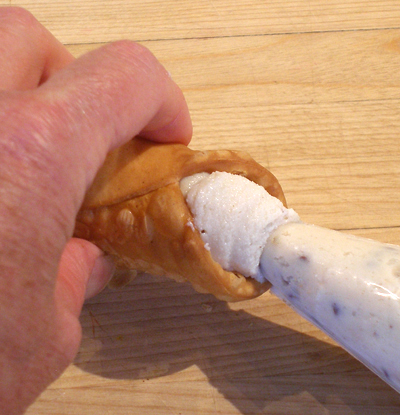
1. Transfer filling to a piping bag that has a one-inch opening(no tube).
2. Pipe the ricotta mixture into cannoli shells to fill: Squeeze filling into the shell, starting at one end of a cannoli shell, filling shell halfway, then pipe into the other end.
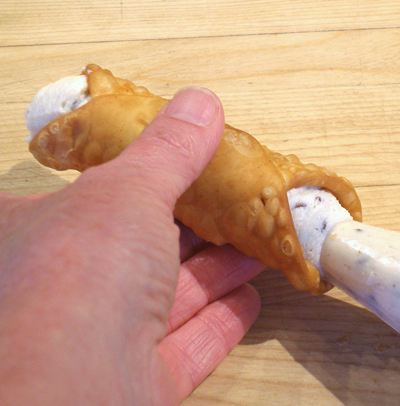
3. Repeat filling with as many shells as desired.
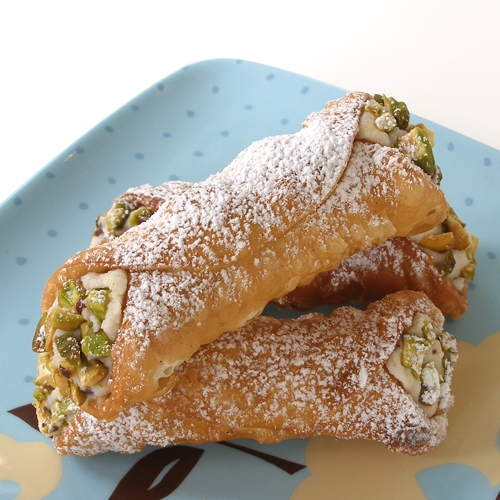
4. Garnish each end by sprinkling chopped pistachios on the filling at the ends of the shells.
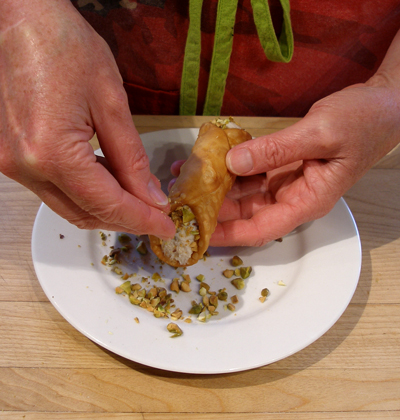
5. Dust with powdered sugar before serving. Serve immediately or refrigerate only a few hours.