
Variation: Chocolate Cream Cheese Pound Cake; Cream Cheese Pound Cake and Variations
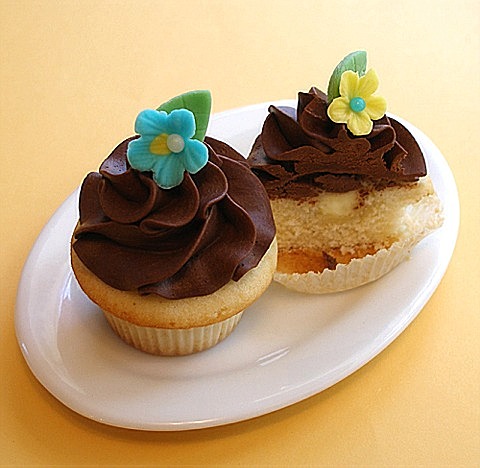
We have Boston Cream Pie and Boston Cream Pie Filled Doughnuts, so we decided to make Boston Cream Pie Cupcakes. Why not? I always wanted to capture them in a recipe for all of you since they sounded so good and looked spectacular! We show you how to fill them using the cone method. They're so cute topped with our Fondant Flower Toppers.
CAKE RECIPE HELP
STEP I: MAKE THE PASTRY CREAM TUTORIAL
PASTRY CREAM TUTORIAL / Recipe alone
Makes about 2 cups
INGREDIENTS
1/4 cup cornstarch
3/4 cup sugar
2 cups whole or 2% milk
4 large egg yolks, lightly beaten
1/4 teaspoon salt
2 teaspoons vanilla extract or any flavored extract or 1/4 teaspoon flavored oil or 2 teaspoons citrus peel
2 tablespoons unsalted butter
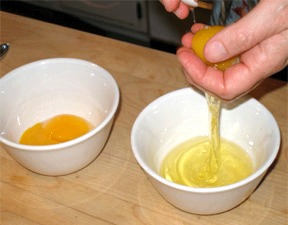
KELLY SAYS: When I separate the whites from yolks, I find it easier just to do this with clean hands.
INSTRUCTIONS
1. Prepare an ice-water bath by filling a roasting pan or large mixing bowl half full with water and ice; reserve for later use.
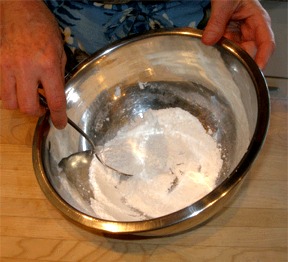
2. In a large size bowl, combine the cornstarch with 1/4 cup of the sugar in a mixing bowl.
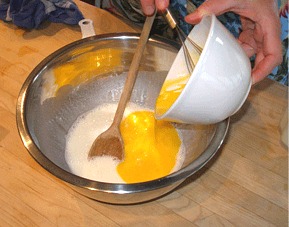
3. Stir in 1/2 cup of the milk. With a wire whisk, blend the yolks into the cornstarch mixture, until smooth.
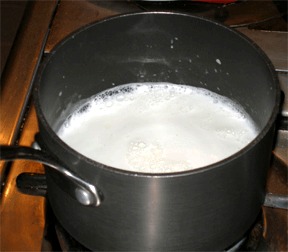
4. In a medium size heavy-bottomed saucepan, combine the remaining 1 1/2 cups milk with the remaining 1/2 cup sugar and the salt. Cook over medium heat and bring to a boil while stirring to prevent the mixture from burning. Remove pan from heat and let it cool slightly.
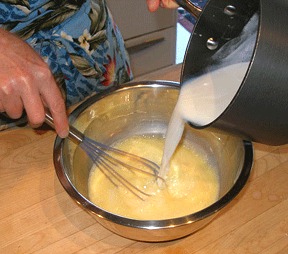
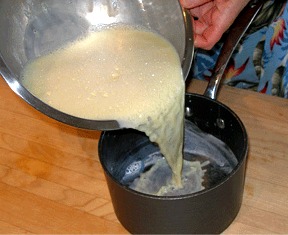
5. Temper the egg mixture so it won't curdle: add about 1/3 of the hot milk mixture to the egg mixture in the mixing bowl, whisking constantly.
Add the remaining milk mixture to the eggs, whisking constantly.
Return the mixture to the saucepan.
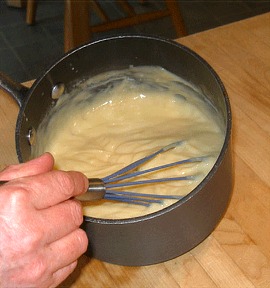
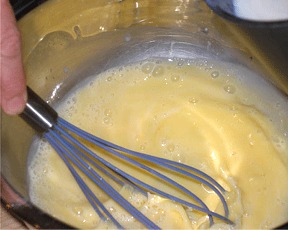
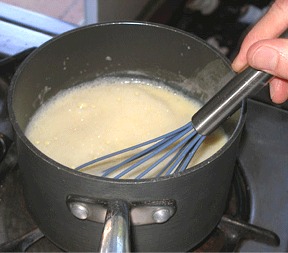
6. Turn on the heat to medium and continue cooking, vigorously stirring with a whisk, until the mixture comes to a boil and the whisk leaves a trail in the pastry cream, taking about 5 to 7 minutes.
7. Remove from heat and strain through a fine mesh strainer.
Then, stir in vanilla extract and butter.
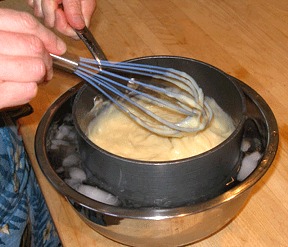
Transfer the pan to the ice water bath, stirring occasionally, until the pastry cream is cool, about 30 minutes. Between stirring, cover surface of pastry cream with plastic wrap, to keep a skin from forming.
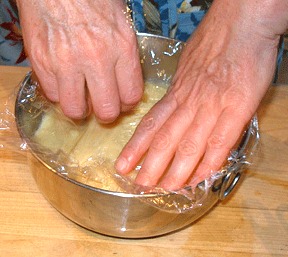
8. When cool, transfer pastry cream to a bowl and place plastic wrap directly on the surface, to prevent a skin from forming. Refrigerate for 2 to 4 hours before using.
STORAGE
Transfer the pastry cream to a covered storage container and refrigerate for up to 3 days. Pour off excess liquid that forms on top and then stir before using. Does not freeze.
STEP II: MAKE THE CREAM CHEESE POUND CAKE CUPCAKES
Typically, Boston Cream Pies are made with sponge cakes. You could use the Classic Sponge Cupcake Recipe, if desired.
CREAM CHEESE POUND CAKE CUPCAKES / Recipe alone
INGREDIENTS
2 cups unbleached or bleached all-purpose flour; spoon into measuring cup and level to rim
1 teaspoon baking powder
1/2 teaspoon salt
2 sticks (1/2 pound) unsalted butter; can be cold from the refrigerator
One 8-ounce package cream cheese; I prefer Philadelphia Brand
2 cups sugar
2 teaspoons vanilla extract
6 large eggs; can be cold from the refrigerator
INSTRUCTIONS
1. Position an oven rack in the lower third of the oven and preheat oven to 325 degrees F. Line a standard-size cupcake pan with cupcake liners.
Do NOT grease the liners.
2. In a medium size bowl, combine the flour, baking powder and salt. Set aside.
3. In the bowl of a stand mixer fitted with a paddle attachment, beat the butter until softened and add the sugar at the side of the bowl. Beat until light and fluffy on medium speed for about 2 minutes. Add in the cream cheese and beat until light and fluffy about 3 minutes more. Make sure you stop the mixer and scrape the sides and bottom of the bowl often with a large rubber spatula.
4. With the mixer on low, beat in the vanilla, and then, four eggs, one at a time, beating for 20 seconds after each addition or until well incorporated and the batter is smooth.
5. With the mixer on low, beat in one-third of the flour mixture, and when absorbed, add in the fifth egg, and beat until smooth. Repeat with one-third of the flour and the sixth egg. Beat in the last one-third of the flour and mix until absorbed.
6. Stop the mixer and give the batter one or two turns with a large rubber spatula. Divide the batter in the prepared cupcake liners and fill no more than 2/3rds full.
7. Bake for 18 – 20 minutes or until the cupcakes are lightly browned on top, and a long thin wooden skewer inserted in the middle emerges with a few moist crumbs attached but not batter.
8. Cool the cupcakes in the pan for about 5 minutes on a wire cake rack, and then unmold to cool completely.
STORAGE
Pound cakes keep well for a few days, well-wrapped at room temperature. They also freeze well for a month or more.
STEP III: FILL THE CUPCAKES
INGREDIENTS
Cream Cheese Pound Cake Cupcakes
Pastry Cream
INSTRUCTIONS
1. The “Cone Method” of filling cupcakes allows you to add a generous amount of filling.
In my world, more filling is more better. Here is the “how to”…. / tutorial alone: Cupcakes – Fill Using the Cone Method
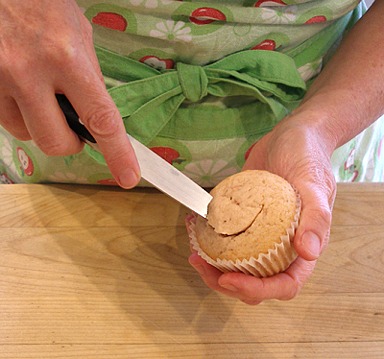
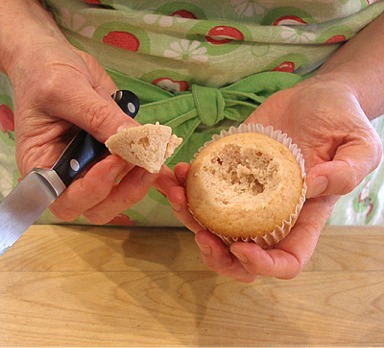
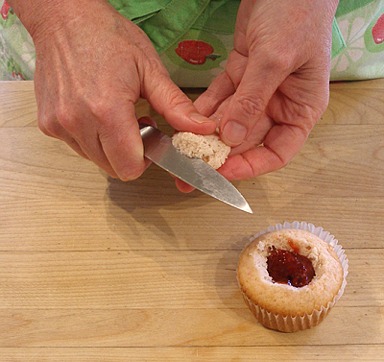
1. Hold a baked and cooled cupcake in one hand and insert a small paring knife, at an angle, about half way down into the cupcake. Cut out a cone shaped piece out of the center of each cupcake.
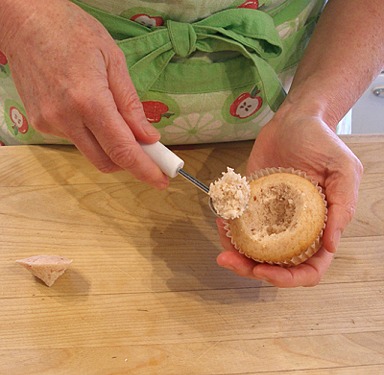
2. If you are using a moist cake, like this, you can use a melon baler to make even more room for your filling.
Do this gently, so you don't destroy your little cupcake! Set aside scraps, to eat later.
This technique does not work well on delicate cupcakes.
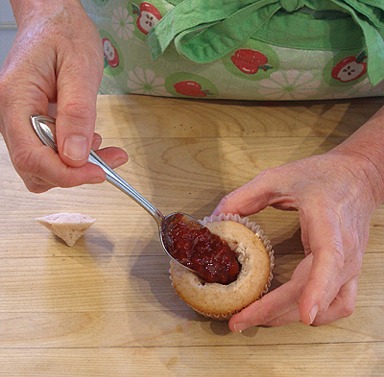
3. Fill your cupcake, using a teaspoon, until the filling is almost to the top of the hollowed out section.
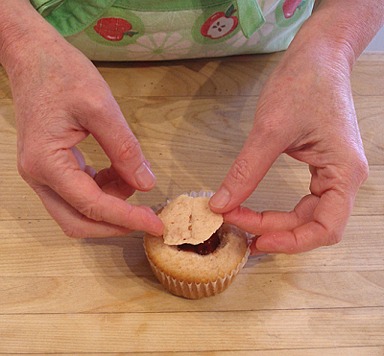
4. Pick up the cone of cake, that you removed from the cupcake, and gently slice off the point. Place plug back on the cupcake. It is best to try to match up the plug, to the opening, so you can barely tell that it was ever cut. Just think Jack-o-Lantern lid.
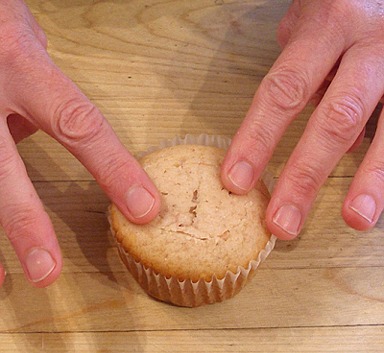
5. Refrigerate cupcakes for about 30 minutes so the filling can set.
STORAGE
Keep cupcakes refrigerated because the Pastry Cream filling is perishable.
STEP IV: MAKE THE CHOCOLATE GANACHE ICING. FROST THE CUPCAKES.
Make the Chocolate Ganache Icing:
CHOCOLATE GANACHE ICING, STEP-BY-STEP / Recipe alone
Makes about 3 cups
INGREDIENTS
12 ounces bittersweet or semisweet chocolate
2 cups heavy whipping cream
1/4 teaspoon raspberry candy oil, optional; or your choice of 2 tablespoons liqueur, or 1 to 2 teaspoons extracts
INSTRUCTIONS
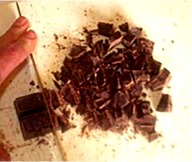
1. Using a serrated knife, finely chop the chocolate into 1/4-inch pieces.
SARAH SAYS: You want evenly sized pieces so all of the chocolate melts at the same time.
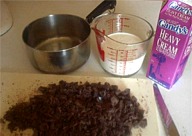
2. Assemble all ingredients. Place chopped chocolate in a medium size heat-proof mixing bowl or in the bowl of a stand mixer.
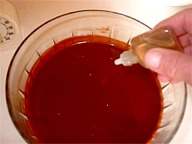
3. Bring the cream to a boil over low heat while stirring constantly. Boiling means the cream will actually rise up in the pan and threaten to boil over. Make sure there is still steam rising from the pot. While the cream boils, it measures 212 degrees F.
4. Let the cream mixture cool. When the temperature of the cream has decreased to about 110 F, measured with an Instant Read Thermometer – insert tip in the middle of the hot cream after stirring – begin slowly pouring the cream (its temperature will have decreased, but if it goes below 90 degrees F, briefly reheat it) into the chopped chocolate.
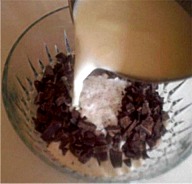
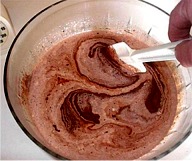
Tap the bowl on the counter to settle the chocolate into the cream mixture, making certain that the chocolate is thoroughly dispersed throughout the cream. Then, let it sit for 1 minute. Using a rubber spatula, slowly stir in a circular motion, starting from the center of the bowl and working out to the sides. Be careful not to add too much air to the ganache. Stir until all the chocolate is melted, about 2 minutes. It may look done after 1 minute of stirring, but keep going to be sure it's emulsified.
SARAH SAYS: To emulsify the chocolate and cream, the cream is first heated which reduces its water content. The hot cream is poured over the chocolate and it melts after sitting for a few minutes. They are slowly mixed together. The waiting time also serves to bring down its temperature down because emulsions form better at 90 degrees to 110 degrees F. The emulsification takes place by the combination of work or stirring, which breaks down the fat in both the cream and chocolate into microscopic droplets, small enough to be suspended within the water – and the use of an emulsifier to stabilize the system, or fatty acids present in the cream.
5. Optionally, flavor chocolate mixture with the raspberry candy oil.
6. Refrigerate ganache until the mixture has reached 90 degrees.
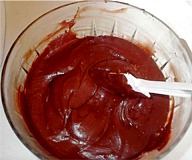
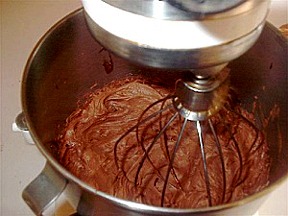
7. Transfer the ganache to the mixing bowl of a stand mixer. (You can prepare the ganache in the mixing bowl of a stand mixer.) Whip at medium speed with the stand mixer fitted with a whisk attachment, until it has the consistency of soft butter and it lightens in color.
SARAH SAYS: Do not overbeat otherwise the ganache will become grainy.
STORAGE
Place a piece of plastic wrap on the surface of the ganache and set aside until needed in the recipe, for about a day at the cool side of room temperature, and then it must be refrigerated. It will keep for a few days refrigerated. Beating ganache causes its shelf life will be decreased because you are introducing air into the mixture. Rebeat with a large wire whisk once it reaches room temperature, if necessary.
SARAH SAYS: Do not overbeat otherwise the ganache will become grainy.
HOW TO MAKE A PREFECT ICING SWIRL
Kelly made an online tutorial for you: CLICK HERE TO VIEW
STORAGE
Keep cupcakes refrigerated because the pastry cream is perishable. They will keep for about 3 days because that is how long the pastry cream stores.