Peach Melba Mini Skillet Pies
Recipe by Sarah Phillips and Kelly Hong; Food styling and photos by Kelly Hong © 2-23-2013 Sarah Phillips CraftyBaking.com
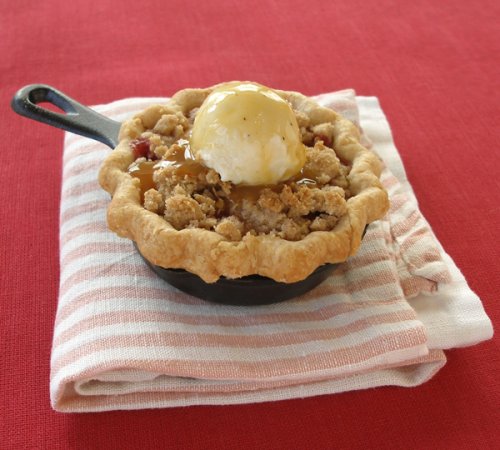

KELLY SAYS: "Sometimes in late winter, when the weather is especially dreary, I start dreaming of spring. Where I live in California, we may not get snow, but it can be grey and rainy for days on end. But the past few days have been absolutely gorgeous, and the flower buds on the fruit trees have started to swell, making me so hungry for spring! Suddenly, I remembered the peaches I tucked away in my freezer...peaches from my friend's backyard tree. So I thought: PIE! Peaches, raspberries, flaky crust, all tucked into the cute little cast iron skillets Sarah and I have fallen in love with. Pie for one. Fruity, sweet and delicious. Kind of makes one forget about winter, at least for a little while."
PIE RECIPE HELP
Secrets
Brushing the mini cast iron pans with oil ensures that your tiny pies won't stick to the pan. Do not use butter because it can burn and cause your pie to stick. Make sure your skillets are well-seasoned before you use them for baking.
INGREDIENTS
You will need:
Six 3 1/2-inch Lodge Logic LMS3 Miniature Skillets
Vegetable oil, for brushing the skillets with
1/2 recipe streusel oat topping from this recipe; NOTE: You will not need all the topping, but it stores well in the freezer, and you can use it the next time you make pie.
1 recipe Kelly’s Perfect Food Processor Pie Dough, double crust, chilled NOTE: You will have some dough left over.
1 recipe Peach Melba filling, recipe follows
PEACH MELBA FILLING
INGREDIENTS
3 1/2 cups blanched and peeled peaches, fresh or frozen, cut in a medium rough dice; plums are delicious or peeled and cored apples, such as Honey Crisp or Golden Delicious
1 cup raspberries, fresh or frozen
1/2 cup sugar; adjust to taste
1/2 teaspoon cinnamon
1/4 teaspoon almond extract
2 tablespoons flour
INSTRUCTIONS
STEP I: PREPARE THE MINI SKILLETS ABD ROLL OUT THE PIE DOUGH
1. With a pastry brush, brush the mini skillets with vegetable oil, including the edge. Place them on a silpat mat or foil-lined rimmed baking sheet. Set aside.
2. Remove one disk of dough from the refrigerator and roll it out, on a lightly floured surface, to a long rectangle about 18- x 8-inches, a little less than 1/4-inch thick.

3. You will need to cut out six 5-inch rounds of dough.
Find a plate or bowl about 5-inches in diameter and use it as a guide to cut out the dough.
NOTE: If you have a 5-inch round cookie cutter, use that.
To start, cut out three 5-inch circles from the first dough disk, using a sharp paring knife.
Stack the dough scraps, wrap and save in the refrigerator to bake later for treats.

4. Carefully fit a dough circle into each of the prepared pans, easing it down, without stretching the dough.

5. Fold the excess dough under, then flute the edge.

6. Repeat these steps with the two other dough circles, then roll out the second disk of dough and do the same.
You should have all 6 of the skillets lined with pie dough.
7. Place the mini skillets on the prepared baking sheet, cover loosely with plastic wrap, and then place in the refrigerator, while you make the pie filling.
STEP II: MAKE THE PEACH MELBA PIE FILLING
1. Cut the peaches into a medium sized rough dice, then place them in a large bowl.

2. Add the sugar, then gently toss to combine.

3. Add the cinnamon, almond extract and flour and toss to combine.


4. Then add the raspberries. Toss the mixture gently, so you don't break up the berries.


STEP III: PREHEAT THE OVEN. FILL THE SKILLETS AND TOP WITH STREUSEL. BAKE THE PIES.
1. Position an oven shelf in the middle of the oven. Preheat the oven to 375 degrees F.
2. Add a scant 1/2 cup of Peach Melba filling to each skillet. If there is any filling left, distribute it evenly among the pans.

3. Top the filling with a generous amount of streusel topping.

Place the filled pies back onto the prepared baking sheet.

NOTE: I keep and old and ugly silpat for uses like this. Fruit pies almost always bubble over, and if you do not line your baking sheet, your pans will be a mess.
If you have a silpat that has seen better days, it is perfect for jobs like this!
4. Bake the for 30-35 minutes, or until the crust is golden, and the filling is bubbling.

5. Remove skillets from the baking sheet and let the pies cool on a sturdy cooling rack, as the combines weight of the pans is quite heavy.

SERVE
Serve pie warm, or at room temperature, and eat right from its pan.
STORAGE
Keeps for about 2 to 3 days at room temperature or refrigerate if the room is warm. Can be frozen for a month or more.
Serve warm and top with vanilla bean ice cream and a drizzle of dulce de leche syrup if you really want to treat yourself to something out of this world!
Other Recipes

Pumpkin Buns
8568 views| 6 comments
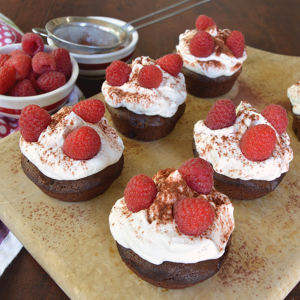
Moist Chocolate Mini Cakes with Whipped Cream and Berries
18301 views| 0 comments

Fresh Raspberry Sorbet
7509 views| 1 comments
My Recipe Tools
Explore How-Tos

Nuts - Blanch
Go to How to Blanch - Nuts Read More

How to Make Tiered Cakes
Once you have frosted all your cakes with icing, insert heavy duty bar straws or even better, bubble... Read More

Citrus - Candied Techniques
Orange, lemon, lime, or grapefruit peel can be candied to make a deliciously fresh, zesty treat.... Read More

Sugar - Apply or Applying for Decorating
Dry granulated sugar can be applied to baking recipe before or after baking. It is great to... Read More
Newest Recipes View All

Priscilla’s Fudge Sauce
INGREDIENTS 4 tablespoons unsalted butter 4 ounces bittersweet chocolate, chopped 1 cup sugar 1/2... Read More

Candied Spiced Pink Grapefruit Peels
INGREDIENTS 2 large pink or red grapefruits, preferably organic 1 cup granulated sugar, plus... Read More

Vanilla scented biscuit roulade
About Us

Hi, I'm Sarah Phillips Sarah Phillips, CEO and founder of craftybaking.com, has over 25 years of extensive professional real time baking experience. READ MORE

Hi, I'm Kelly Hong Contributing Editor, Food Stylist and photographer, since 2007. I have been working as a professional ceramic artist for over 25 years. READ MORE