Fruit Pie Minis - Apple, Blueberry and Pear
Recipe by Sarah Phillips and Kelly Hong; Food styling and photos by Kelly Hong © 2009 Sarah Phillips CraftyBaking.com
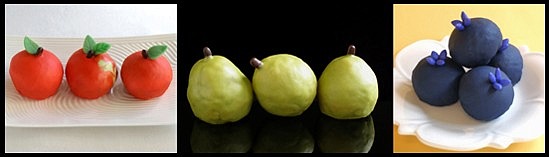
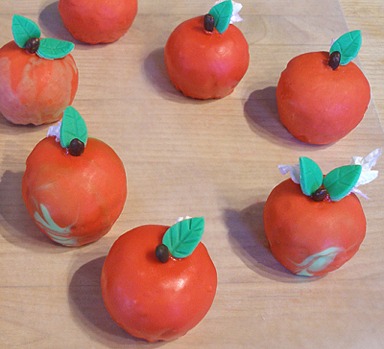
With a homemade fool-proof flaky pie dough, filled with fruity goodness and enrobed in a sweet and tasty glaze, these delightful two bite-size creations are a new and fun way to eat pie.
Make either an Apple, Blueberry or Pear Pie Mini Project. Or, try all three! They are the size of mini-muffins. Find out how we made these fun pie treats!
PIE RECIPE HELP
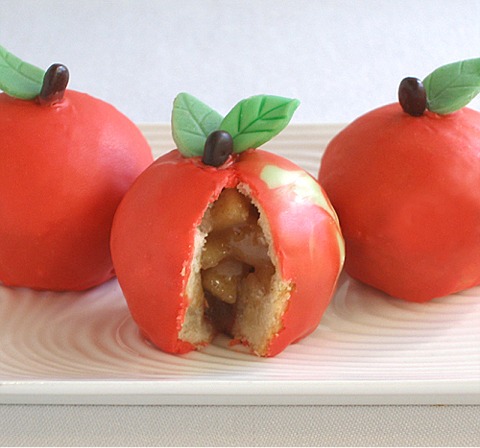
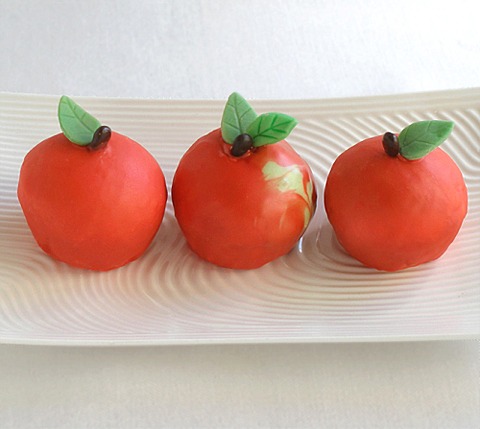
Apple Pie Minis
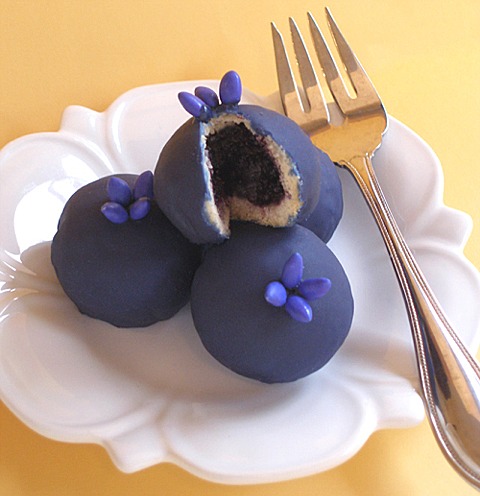
Blueberry Pie Minis

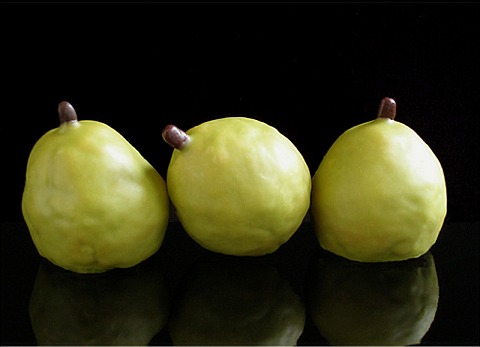
Pear Pie Minis
Secrets
We have created a simple filling recipe for each mini pie. Pick one! Apple for the apple; Blueberry for the blueberry; and Pear for the pear pies. All fillings can be made a few days in advance and refrigerated well covered.
IMPORTANT NOTE: Not every filling works with this recipe-project – The fruit has to be cut into small pieces so it won’t stick out through the pie crust. The final filling has to be pre-cooked, thick and low in moisture. Do not use jam or jelly or pumpkin pie filling. Cook down any canned fruit fillings before using and chop fruit into small pieces.
STEP I: MAKE THE MASTER PROJECT RECIPES
3 recipes Kelly's Perfect Food Processor Pie Dough - Double Crust; Make the night before and chill. One recipe makes 20 - 22 mini fruit pies, the size of mini muffins. Make one recipe each for each project - apple, blueberry or pear mini-pies
APPLE PIE FILLING
Make 1 recipe. Fills 20-22 mini apple pies
INGREDIENTS
4 medium size (3 cups) apples, peeled and cored, cut into small dice or pieces. Apple suggestions: Fuiji, Pink Lady, Honey Crisp, Gravenstein, Braeburn, Granny Smith
1/3 cup sugar or to taste
1/2 cup plus 2 tablespoons apple juice, unsweetened or sweetened
1/2 teaspoon ground cinnamon
Dash of ground ginger
Pinch salt
2 teaspoons cornstarch
INSTRUCTIONS
1. Place apples, sugar, 1/2 cup apple juice, cinnamon, ginger and salt in a medium size saucepan.
2. Cook mixture for 15 minutes, on medium-low heat, stirring occasionally, or until apples have softened and most of the apple juice has reduced.
3. In a small bowl, place the cornstarch and mix 2 tablespoons apple juice with it. Stir it into the cooked apple mixture.
Cook for one minute, or until the juices have thickened.
4. Remove pan from heat and spoon filling into a bowl or a 9 x 13-inch baking pan so it cools quickly.
Place a piece of plastic wrap on its surface and refrigerate a few hours until cold.
BLUEBERRY PIE FILLING
Make 1 recipe. Fills 20-22 mini blueberry pies
INGREDIENTS
3 cups blueberries, fresh or frozen
1/3 cup sugar or to taste
1/4 teaspoon grated lemon zest
1 tablespoon cornstarch
2 tablespoons cold water
INSTRUCTIONS
1. Place blueberries, sugar, and lemon zest in a medium size saucepan.
2. Cook mixture for 12 minutes, on medium-low heat, stirring occasionally, or until berries have softened and most of the juice has reduced.
3. In a small bowl, place the cornstarch and mix cold water with it. Stir it into the cooked blueberry mixture.
Cook for one minute, or until the juices have thickened.
4. Remove pan from heat and spoon filling into a bowl or a 9 x 13-inch baking pan so it cools quickly.
Place a piece of plastic wrap on its surface and refrigerate a few hours until cold.
STORAGE
Filling can be made a few days in advance and refrigerated well covered.
PEAR PIE FILLING
Make 1 recipe. Fills 20-22 mini pear pies
INGREDIENTS
4 medium size (3 cups) pears, peeled and cored, cut into small dice or pieces. Pear suggestions: Anjou pears, but Bosc are also good, or firm Bartletts.
1/3 cup sugar or to taste
1/3 cup plus 2 tablespoons apple or pear juice, unsweetened or sweetened
1/2 teaspoon ground cinnamon
pinch fresh nutmeg
pinch of salt
2 teaspoons cornstarch
1/4 teaspoon vanilla extract
INSTRUCTIONS
1. Place diced pears, sugar, 1/3 cup apple or pear juice, cinnamon, nutmeg and salt in a medium size saucepan.
2. Cook mixture for 15 minutes, on medium-low heat, stirring occasionally, or until pears have softened and most of the juice has reduced.
3. In a small bowl, place the cornstarch and mix 2 tablespoons apple or pear juice with it. Stir it into the cooked pear mixture.
Cook for one minute, or until the juices have thickened. Stir in vanilla extract.
5. Remove pan from heat and spoon filling into a bowl or a 9 x 13-inch baking pan so it cools quickly. Place a piece of plastic wrap on its surface and refrigerate a few hours until cold.
GLAZE RECIPE
Make 3 recipes and tint one apple red; the second one blueberry blue; and the third, pear green.
Each recipe glazes 20 - 22 pie minis. Each baked one is finished with a tinted glaze for a colorful, flavorful and authentic touch.
INGREDIENTS
2 cups powdered sugar, sifted; measure and then, sift
3 tablespoons whole or 2% milk
2 tablespoons light corn syrup
1/2 teaspoon vanilla extract
Gel food colors
INSTRUCTIONS
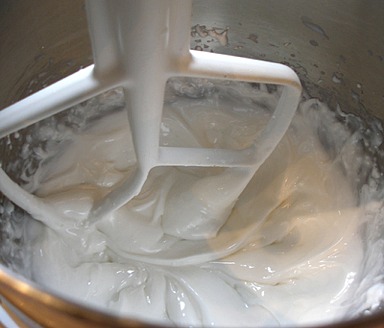
1. Add the powdered sugar and milk, to the bowl of a stand mixer fitted with a paddle attachment. Mix on low until a smooth, thick paste is formed.
2. Add in the corn syrup and vanilla, and mix on low until well combined, smooth and glossy.
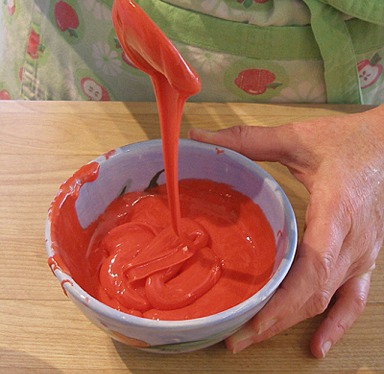
The icing should flow like honey when poured from a spoon. If too thick, mix in a few drops corn syrup at a time. If too liquid, mix in a teaspoon of sifted powdered sugar at a time.
TINT EACH RECIPE AFTER MIXING
Mix color in completely! Colors darken overnight. We used Gel Food Coloring: Americolor or Wilton brands
APPLE RED: Stir in a few drops of red gel food coloring at a time.
For green accents, remove 1/4 cup of white icing from the main bowl, and dye it with green gel food coloring. Drizzle on the apple first. Then, coat with red.
BLUEBERRY BLUE: Add about 1/8 teaspoon of Wilton's “Delphinium Blue” or blue gel food coloring at a time.
PEAR GREEN: Blend in a few drops of yellow and green gel food coloring at a time. If color is too harsh, add a little brown, to make it more natural looking.
STORAGE
After making, immediately press a piece of plastic wrap on its surface. Store at room temperature. Stir really well before using.
STEP II: ROLL AND CUT-OUT THE FOOLPROOF PIE DOUGH – Apple, Blueberry or Pear Fruit Pie Minis
One Foolproof Pie Dough Recipe Yields 20 - 22 3-inch circles of pie dough
INSTRUCTIONS
1. Line 2 - 4 cookie sheets with parchment paper and set aside.
2. Remove one chilled pie dough disk from the refrigerator at a time, and let it sit on the counter for about 10 minutes only, so it will roll out easily.
It is important that the pie dough is well chilled when you make the fruit pie minis, but rolling it out when it is too cold makes it too hard to roll.
3. LIGHTLY flour your rolling pin and work surface or only enough to keep the dough from sticking.
It is important to add as little flour to the work surface during the rolling process because it toughens the pie crust dough. We like to use a silpat nonstick mat because it minimizes the use of flour.
4. Begin in the center of the dough and roll outward.
Stop the rolling pin as it nears 1/4 inch from the edge of the dough; don't roll over the edges as they crack or become too thin.
5. Lift and rotate the dough by a quarter turn before resuming again, tossing a light dusting of flour beneath, only if necessary.
This is to ensure that it is not sticking to your rolling surface and that is being evenly rolled. If your dough is cold enough, it should not stick.
If your dough sticks, loosen it with a long offset icing spatula, dusting underneath with a small amount of flour.
6. Roll dough to a little less than 1/4-inch thick
7. Cut out ten to eleven 3-inch circles of dough, with your 3-inch round cookie cutter, as closely together as possible. Stack scraps on top of one another. Reroll.
8. Set cut-out pieces on the prepared cookie sheet and cover tightly with plastic wrap.
Refrigerate for ½ hour or until needed, up to a day..
9. Repeat Steps 1 – 8 with the second chilled dough disk.
STORAGE
For longer storage, refrigerate dough disks overnight or freeze for up to a month or more. Thaw in its wrappers in the refrigerator before use.
STEP III: FILL AND FORM THE PIE MINIS
APPLE AND BLUEBERRY - The Apple and Blueberry Pie Minis are filled and formed in the same manner. The Pear Pie Minis are filled and shaped slightly differently.
INSTRUCTIONS
1. Prepare you work surface with a nonstick mat or a piece of parchment paper. Have a small cup of cool tap water handy.
Spray a 24 cup mini-muffin pan with non-stick spray.
NOTE: Mini-muffin pans come in many sizes. We used a mini-pan size: each muffin cup holds 1/8-cup water.
2. Take one dough circle at a time from the refrigerator.
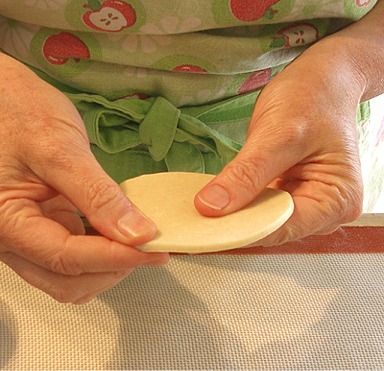
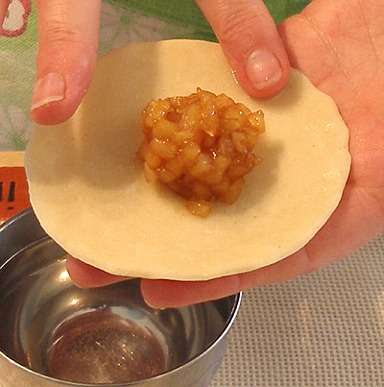
Gently pinch around the perimeter of the circle, about 1/4-inch wide, all the way around, so it becomes about 1/8-inch thick.
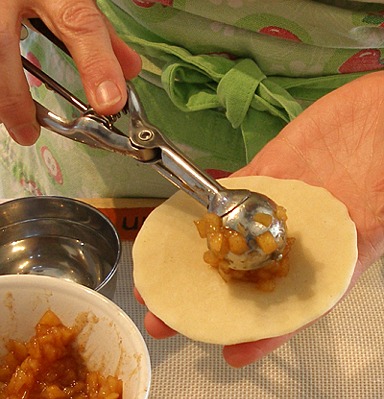
The rest of the circle will be about 1/4-inch thick.
3. Using a 1 tablespoon measuring spoon or scoop, place the cold apple or blueberry filling in the center of the dough circle.
4. Dip your finger into the water and moisten the edge of the dough circle.
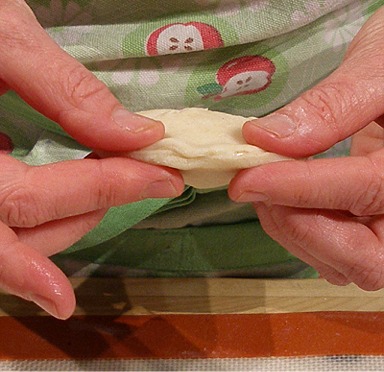
5. Fold circle over and press to seal, starting at one end, all the way around the edge to the other end.
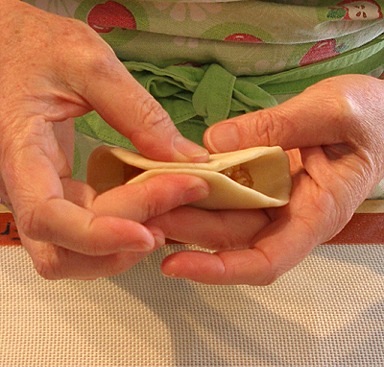

6. Fold one corner toward the center, pressing to seal. Fold same corner in again, and then repeat with the other side.
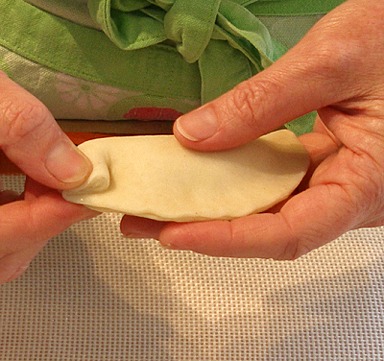
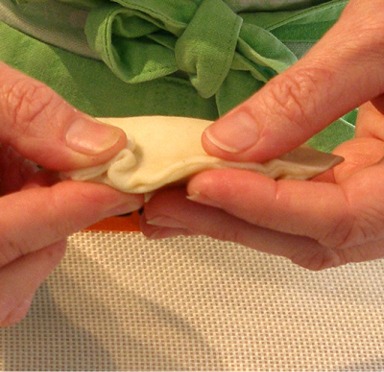
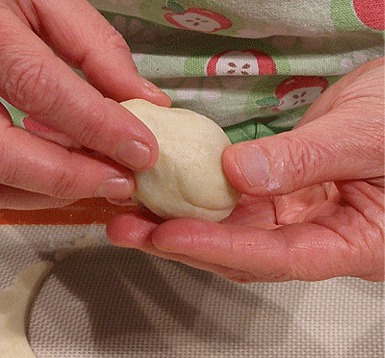
7. Continue to pinch the ends toward the center, until you have a rounded shape.

8. Gently paddle the shape with a flat wooden spatula, to help define the shape and remove folds.

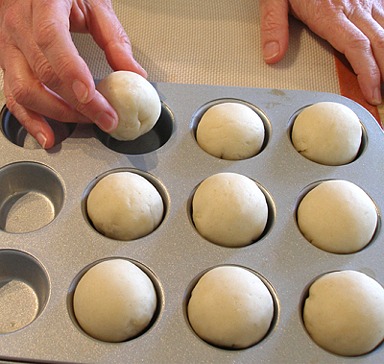
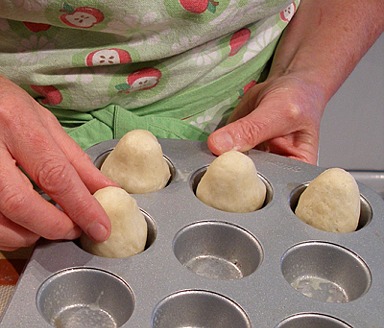
9. Place the formed pie mini seam side down in the prepared pan.
As you work, keep mini-pies covered under plastic wrap so the dough will not dry out and crack. Also, keep pan in a cool place or in the refrigerator to keep cold.
You will fill and form 20 - 22 mini pies, so you will not completely fill the pan. When done, cover and refrigerate.
PEAR PIES - The Pear Pie Minis are filled and shaped slightly differently because of their unique shape.
INSTRUCTIONS
1. Prepare you work surface with a nonstick mat or a piece of parchment paper. Have a small cup of cool tap water handy.
Spray a 24 cup mini-muffin pan with non-stick spray.
NOTE: Mini-muffin pans come in many sizes. Use the deeper mini-muffin pan size.
2. Take one dough circle at a time from the refrigerator.
Gently pinch around the perimeter of the circle, about 1/4-inch wide, so it becomes about 1/8-inch thick. The rest of the circle will be about 1/4-inch thick.
3. Place a clean small marble in the center of the dough round and form the dough around it so you have a rounded cup indentation in the center of the dough.
The depression made by the marble is only there to help you form the top of the pear shape.
When you fill the pie, some, but not all, of the filling will go down into the depression
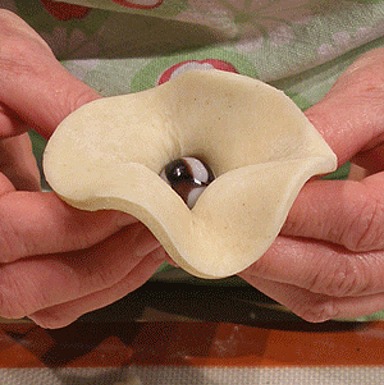
NOTE: Don't forget to remove the marble!

4. Gently hold the dough circle between your fingertips. The indentation will be in the center of the dough.
Using a 1 tablespoon measuring spoon or scoop place the cold pear filling in the center of the dough circle. Do not press down.
Some of the filling will go down into the indentation by itself. Do not force it.

5. Dip your finger into the water and moisten the edge of the dough circle.

6. Fold the circle over and press to seal, starting at one end, all the way around the edge to the other end.
Be careful not to flatten the rounded center pocket that was created with the marble
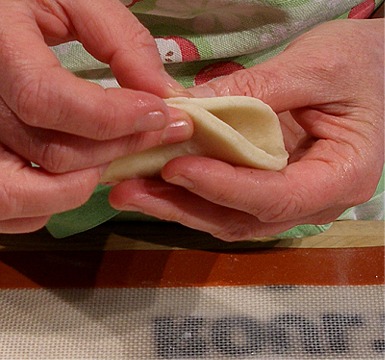
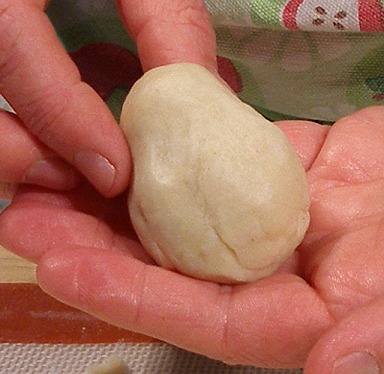
7. Continue to pinch the ends toward the center, until you have a rounded shape at the bottom.

8. Gently pinch around the small top of the pear, to exaggerate its shape.
The top has a tendency to get less pronounced after baking, so try to make it a little higher than normal.
9. Place the formed pie mini seam side down in the prepared pan.
As you work, keep the mini-pies covered under plastic wrap so the dough will not dry out and crack. Also, keep pan in a cool place or in the refrigerator to keep cold.
You will fill and form 20 - 22 mini pies, so you will not completely fill the pan. When done, cover and refrigerate.
STORAGE
Refrigerate filled mini pie shapes overnight or freeze for up to a month or more. Bake directly from a frozen state; do not thaw.
STEP III: BAKE THE PIES
INSTRUCTIONS
1. Position an oven shelf in the middle of the oven.
Preheat the oven to 375 degrees F for 20 – 30 minutes.
2. Remove the mini-pies from the refrigerator.
Place 2 tablespoons water in each of the empty cups in the mini muffin pan, so they won’t smoke during baking.
3. Bake for 16-18 minutes, or until they are light golden brown in color.
If frozen, add 2 - 5 minutes baking time.
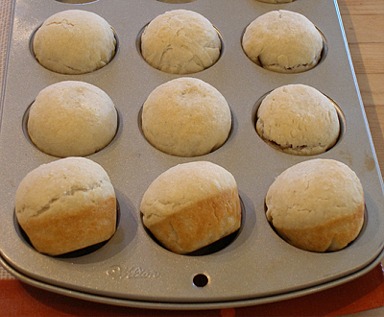
4. Let pies cool in their pan for ten minutes, then remove to a wire rack, to cool completely.
STEP IV: GLAZE THE PIE MINIS AND ADD THE STEMS. OPTIONALLY ADD LEAVES.
INSTRUCTIONS:
1. Place a cake rack over a baking sheet. Spread waxed paper on your work surface and place a large wire cake rack over it.
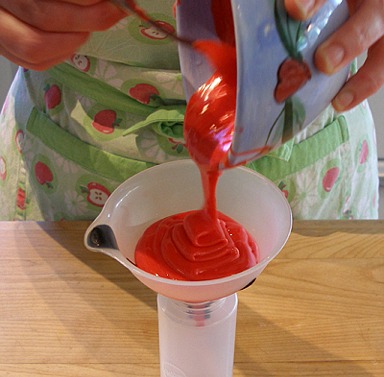
2. Stir and optionally pour THE GLAZE RECIPE, from Step III, into a squeeze bottle. If you do not have one, you can spoon the glaze over the pies with a ladle.
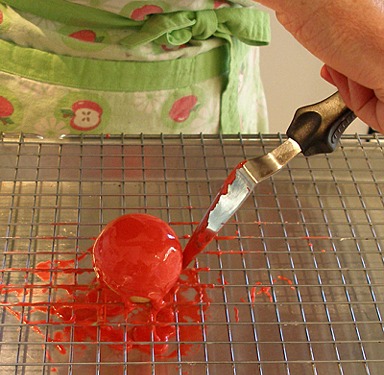
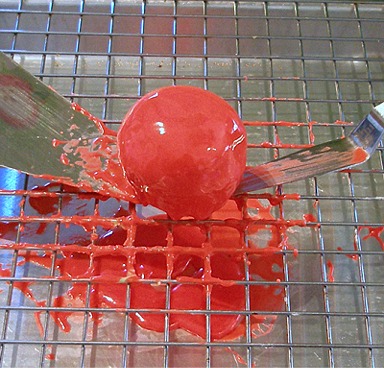
3. Place one pie on the wire cake rack at a time.
Squeeze or spoon a generous amount of glaze over the pie, making sure to cover the whole pie.
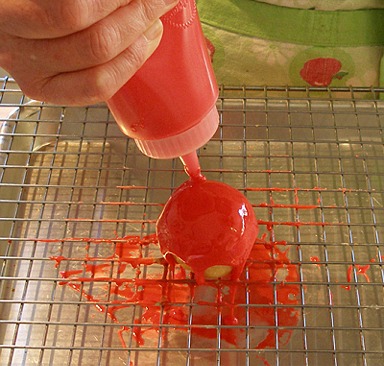
4. Gently tap the rack so the excess glaze falls into the pan below it.
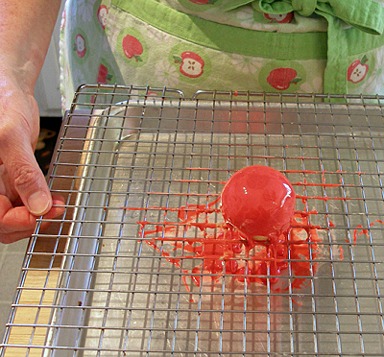
Quickly, before the glaze sets, touch up any bare spots with a small spatula, and then tap rack again to settle the glaze.
4. Carefully remove the glazed pie to the clean rack, using two small spatulas.
Let pies dry, undisturbed, for 20-30 minutes. They make take longer.
Meanwhile, line your worksurface with waxed paper.
5. When pies are completely dry, pick them up and gently smooth the glaze at the bottom of the pies with your finger.
Place the dry pies on the clean waxed paper.
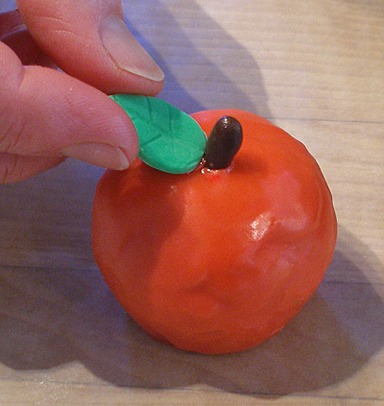
STEMS
Chocolate covered sunflower seeds are perfect for stems or blossom ends. We found brown for apples and pears, purple for blueberries.
The sunflower seeds are available all over, and online. They even have them at crafts stores. You can even buy them in packages with only one color.
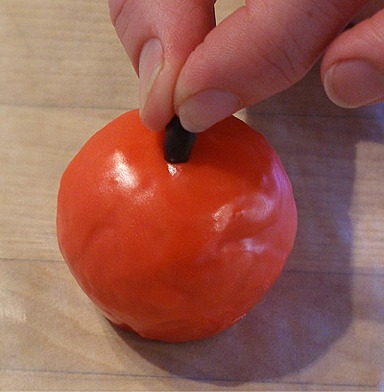
For each Apple or Pear Pie Mini: - You will need about 20 - 22 for each apple and pear pie mini project.
Dip the pointy end of a brown chocolate coated sunflower seed into the glaze and press it on top of the fruit. Hold it for a few moments so the glaze can set.
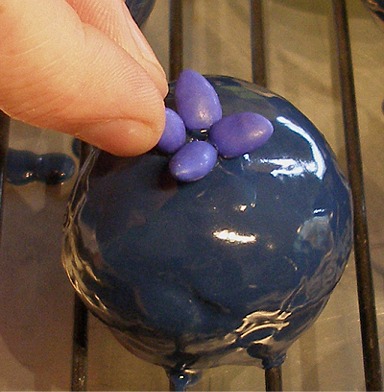
For each Blueberry Pie Mini: - You will need about 80 to 88 for each blueberry pie mini project.
Dip the rounded end of 4 purple chocolate covered sunflower seeds into the blue glaze and set in place on the top of the pie.
OPTIONAL APPLE OR PEAR MINI PIE LEAVES
We added one or two Marshmallow Fondant (MMF) green tinted leaves to each of our Apple and Pear Pie Minis. Use store-bought rolled fondant! Even pre-made royal icing leaves work.
Here’s how we made them:
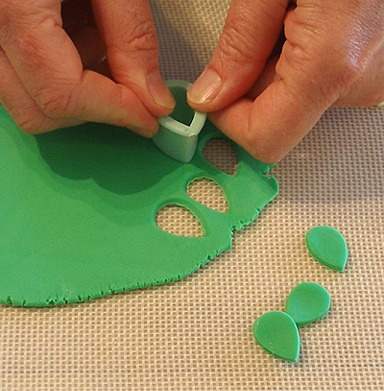
1. On a silpat, non stick mat, roll 1/8 – 1/4 cup MMF to a little thicker than 1/8-inch thick. Cut leaves with a small leaf cutter.
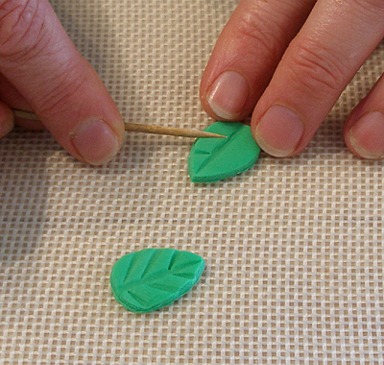
2. Texture leaf with a leaf veiner, or use a toothpick to create indentations.
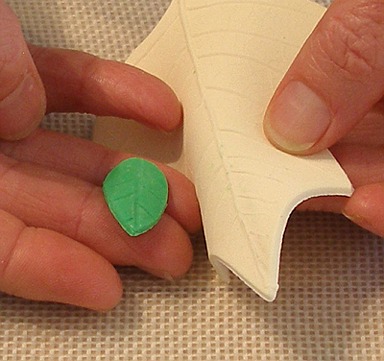
3. To make the leaves have a more life-like look, curve them over chopsticks or a pencil to dry.
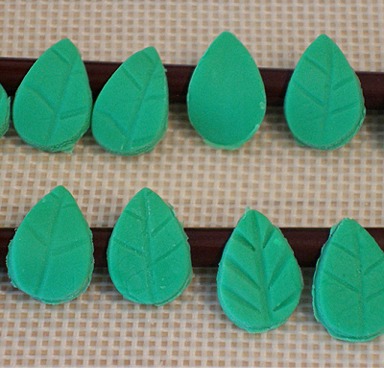
4. Dip the bottom of the dry MMF leaf in the THE GLAZE RECIPE, from Step III and set it in place on the apple or pear.
It is helpful to make small balls of paper towels, to help support the leaves as the glaze dries.
When the glaze “glue” has completely dried, remove the paper towel supports and SERVE!
STORAGE
The fruit pie minis keep at room temperature for a few days.
Apple Pie Minis
Blueberry Pie Minis
Pear Pie Minis
Food styling and photos by Kelly CA © Sarah PhillipsCraftyBaking.com
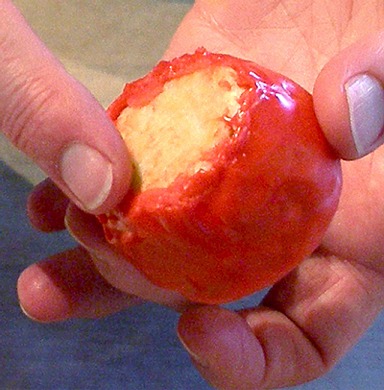
Here's a little funny for the Twilight fans:

Food styling and photos by Kelly CA © Sarah PhillipsCraftyBaking.com
Other Recipes

Crab Mac n’ Cheese
7231 views| 2 comments

Coconut Vegan Whipped Cream
7874 views| 0 comments

My Recipe Tools
Explore How-Tos

How to Make Chocolate Curls and Shavings
Chocolate Curls and Shavings Chocolate curls are an easy way to decorate any dessert, and can be... Read More

How to Fry, Saute and Deep Fry
Any food cooked in hot fat is known as fried food. The method is the same whether there's just a... Read More

How to Make Tiered Cakes
Once you have frosted all your cakes with icing, insert heavy duty bar straws or even better, bubble... Read More

Pastries - Decorating
Go to How to Decorate Pastries Read More
Newest Recipes View All

Priscilla’s Fudge Sauce
INGREDIENTS 4 tablespoons unsalted butter 4 ounces bittersweet chocolate, chopped 1 cup sugar 1/2... Read More

Candied Spiced Pink Grapefruit Peels
INGREDIENTS 2 large pink or red grapefruits, preferably organic 1 cup granulated sugar, plus... Read More
Vanilla scented biscuit roulade
About Us

Hi, I'm Sarah Phillips Sarah Phillips, CEO and founder of craftybaking.com, has over 25 years of extensive professional real time baking experience. READ MORE

Hi, I'm Kelly Hong Contributing Editor, Food Stylist and photographer, since 2007. I have been working as a professional ceramic artist for over 25 years. READ MORE