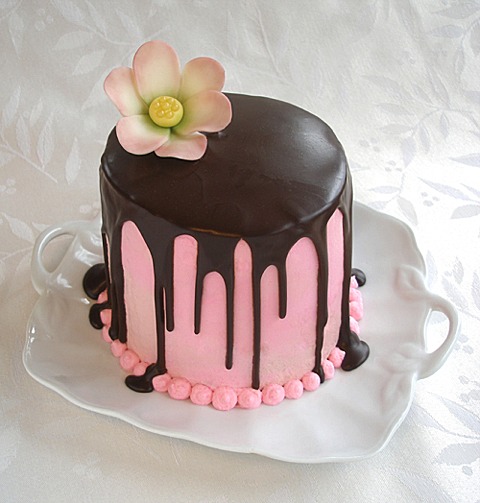
Cherry Pink Tuxedo Mini-Cake and Cupcakes
Recipe by Sarah Phillips; Food styling and photos by Kelly Hong © 2010 Sarah Phillips CraftyBaking.com
Variation: Blue "Velvet" Chiffon Layer Cake

I wanted to create a cherry version of my Blue "Velvet" Chiffon Layer Cake, using a minimal amount of food coloring. This resulting cake uses only 4 drops of food coloring with a natural way to color a beautiful pink cake. This recipe makes one 5- x 2-inch 4 layer cake and 10 - 11 cupcakes. After baking the cupcakes, instructions below, continue with the Cherry Pink Chiffon Cupcake Decorating Tutorial
Kelly and I thought it would be fun to cover the cake with a Chocolate Cake Glaze. I called Kelly and suggested that we make a cherry cake tutorial for Valentine's Day, filled with cherries and then, topped with the chocolate glaze! We knew the combo would be incredible. We worked on the recipes needed, including a Pink Almond Whipped Cream Filling and Frosting, topped with a beautiful Fondant Fantasy Flower! We show you how to fill, frost, and glaze the cake, as well.
CAKE RECIPE HELP
INGREDIENTS
Cherry Pink Tuxedo Cake & Cupcakes, Step I; Tutorial makes two 5-x 2-inch layers plus 10-11 cupcakes (proceed to the Cherry Pink Chiffon Cupcake Decorating Tutorial); or, will make one, 9 x 2-inch cake; double the recipe for two, 9 x 2-inch layers (See Tutorial on how to COOL 9-inch chiffon cake layers)
Whipped Cream Frosting and Whipped Cream Cherry Filling, Step II
Chocolate Cake Glaze, Step IV; use for the mini-cake and save remainder for Cherry Pink Chiffon Cupcake Decorating Tutorial
1 Dramatic fondant flower, such as our Fondant Fantasy Flower, or the decoration of your choice
STEP I: MAKE THE CHERRY PINK TUXEDO CAKE AND CUPCAKES
CHERRY PINK TUXEDO CAKE AND CUPCAKES
INGREDIENTS
6 large eggs; separated; you'll need 6 egg whites and 6 egg yolks for the recipe
3/4 plus 2 tablespoons cups bleached cake flour (not self-rising); spoon into dry measuring cup and level to top; DO NOT use a cake flour substitute.
1/2 cup plus 2 tablespoons sugar or superfine sugar; divided into 1/4 cup and 1/4 cup plus 2 tablespoons
1 teaspoons baking powder
1/8 teaspoon baking soda
1/4 teaspoons salt
1/4 cup vegetable oil
1/4 cup Montmorency Tart Cherry Juice Concentrate, cold*
2 tablespoons cold water
1 teaspoons vanilla extract
1/4 teaspoon almond extract
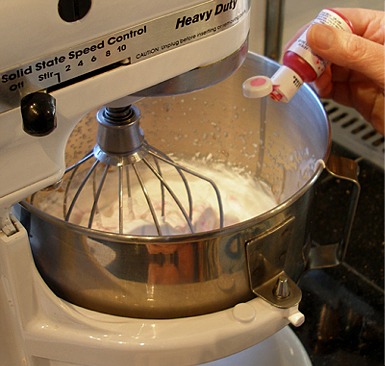
4 drops deep pink gel food coloring, Americolor
1/4 teaspoon cream of tartar
NOTES:
We used Montmorency Tart Cherry Juice Concentrate, found in the health food store. Make sure it is used COLD from the refrigerator.

If you cannot find cherry juice CONCENTRATE, add in 1/4 cup plus 2 tablespoon CHERRY JUICE, INSTEAD OF
1/4 cup Montmorency Tart Cherry Juice Concentrate, cold PLUS 2 tablespoons cold water to the recipe.
Add in a drop or two more deep pink gel food coloring, Americolor.
INSTRUCTIONS
1. Preheat the oven and prepare the baking pans:
A. Position the oven rack in the middle of the oven and preheat the oven to 350 degrees F. (Bake the cakes for 25-30 minutes, cupcakes for 18-20 minutes)
NOTE: Reduce the oven heat by 25 degrees F if using a dark or glass, ovenproof pan.
SARAH SAYS: In my oven, the center rack is the third rung up. When you have an even number of racks, and have to choose as to whether the third or fourth rack up is the middle, as I do in my oven, when in doubt, go to the lower rack of the two.
B. Prepare the baking pans: This recipe makes two 5-x 2-inch layers plus 10-11 cupcakes.
SARAH SAYS: DO NOT use a non stick pan. The cake needs to be inverted to cool. You don't want the cake to fall out of the pan which it will with a non-stick one. For light-colored cake sides, use a light, heavy aluminum pan (pictured below), not a dark-colored one.
For the two 5-x 2-inch pans:
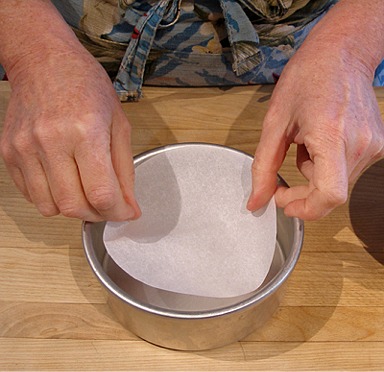
Place one 5-inch pan on top of a piece of parchment paper and trace around it with a pencil. The lead is nontoxic. Cut out the round of parchment paper following the pencil marks as a guide. Repeat with the second pan.

With melted butter or vegetable oil, lightly grease the bottom of the pan ONLY. Use a pastry brush. Do NOT grease the side of the pan. Repeat with the second pan.

SARAH SAYS: The reason for greasing the bottom of the pan, and not the sides, is chiffon cakes need to cling to the side of the pan while rising.
Line both pans with parchment paper, and lightly grease the parchment paper ONLY. Do NOT grease the side of the pan. Repeat with the second pan. Set the pans aside until needed in the recipe.

For the cupcakes:
Place 10 - 11 cupcake wrappers in a 12-standard size cupcake pan. Set aside until needed in the recipe.
3. Combine the dry ingredients:
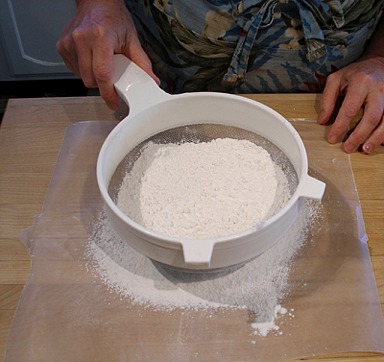
Over a large piece of waxed paper, sift together the flour, baking powder, baking soda and salt.


Repeat two more times with the help of a large mixing bowl. If you don’t have a sifter, use a fine mesh strainer.


Add in 1/4 cup sugar. Whisk together to blend.
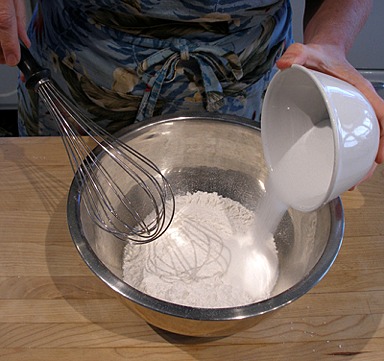
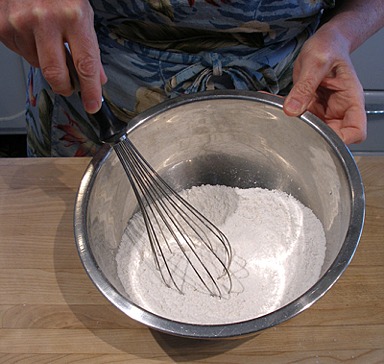
Make a well in the center of the flour mixture.

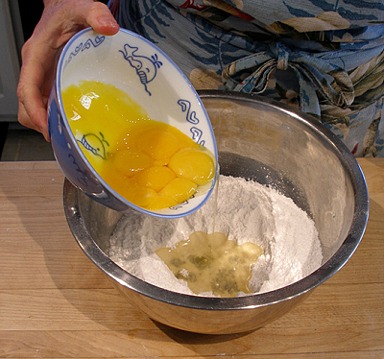
4. Prepare the batter mixture:
SARAH SAYS: In the well of the flour mixture, add the following, in order WITHOUT mixing:
A. Add the oil
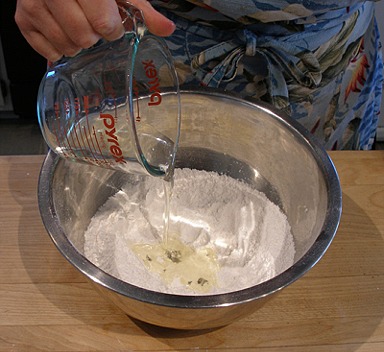
B. Add the egg yolks;
C. And, finally, the cold cherry juice concentrate, cold water, vanilla and almond extracts.


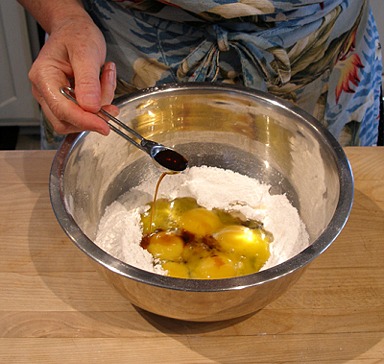
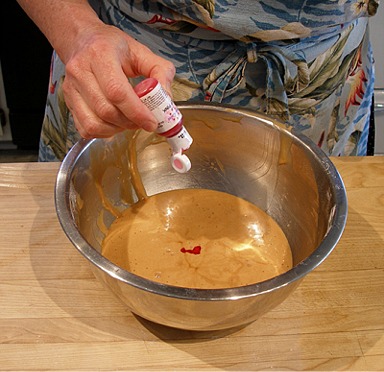
5. With a wire whisk, mix together the ingredients until smooth. Strain

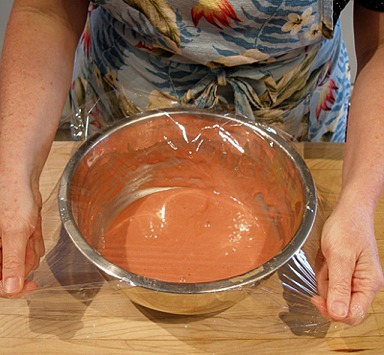
6. Add the pink gel food coloring. Cover the batter with plastic wrap and set aside.

7. Beat the egg whites until they are stiff and glossy: Use a stand mixer when you have a large amount of whites to beat, such as this recipe.
A. Place egg whites in a clean, dry grease-free mixer bowl of a stand mixer. Make sure there are no egg shells in the mixture.
B. With a stand mixer fitted with a whisk attachment, beat egg whites on low until foamy.

C. With the mixer running, immediately add the cream of tartar at the side of the bowl.
The bubbles in the egg white foam will become smaller and more even in size. When it reaches this stage, increase the mixer speed to medium-high.

D. Then, add the rest of the sugar slowly in a steady stream at the side of the bowl. After the sugar has been added, increase the mixer speed to high..

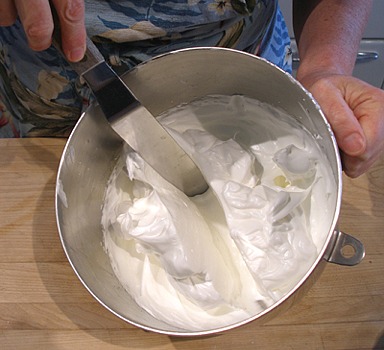
E. Beat until the egg whites are white, fluffy, very stiff and still very glossy.
To test if properly beaten to the stiffly beaten stage, take the mixer bowl from the mixer or lift the beaters. You can gently cut a table or icing knife through the middle of the beaten egg whites; it creates a narrow grove with stiff walls. If not, continue beating for a few seconds more and perform the test, again.
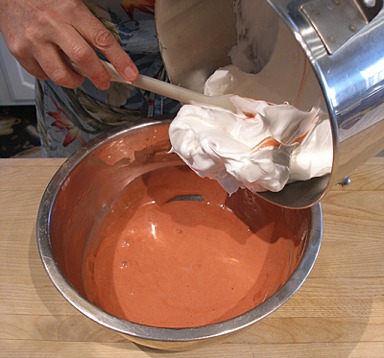
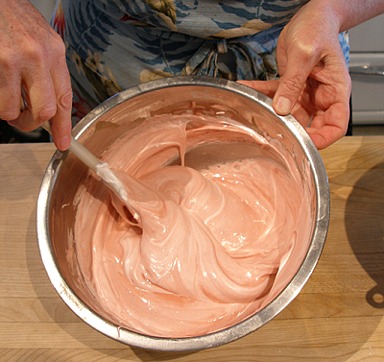
8. Fold the egg whites and the batter mixture until thoroughly blended:
A. To start, use the batter mixture that was previously set aside. Stir it a few times to mix it thoroughly before using.
With a large rubber spatula, gently scrape 1/3 of the beaten egg whites on top of the mixture. Never add the batter to the whipped whites or the heavier mixture on top of the lighter, beaten they'll deflate.
B. With the rubber spatula, in a large circular sweeping motion as if you are turning a crank, lightly combine the egg whites and batter. Do this one or two times. Be sure to scrape the bottom of the bowl.
C. Starting on the top, cut down from the center of the mixture to the bottom of the bowl, then draw the scraper quickly toward you against the edge of it, and up to the left and out. You are thus bringing a bit of the mixture at the bottom of the pan up over the egg whites or "folding it over". Then turn the bowl a quarter turn and repeat until you only see slight streaks of white. You will need to scrape the sides of the bowl a few times to keep the mixture from climbing up the sides.
D. Repeat with the last two additions.

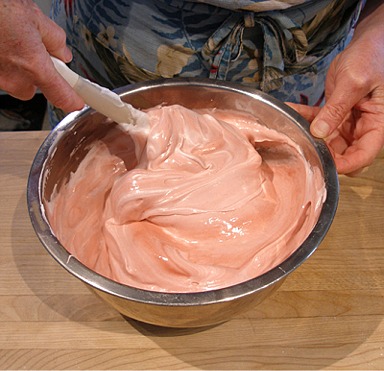
E. Fold the last of the egg whites and the batter mixture until almost completely combined. You'll still see a few streaks of eggs whites. The batter and egg mixture will become smoother.

F. Continue the folding movement while slowly rotating the bowl, and cutting down, towards you, and out to the left, until the egg whites have been folded into the body of the batter.

9. Bake the cake layers:
A. Immediately divide the batter evenly into the prepared pans. Run a table knife or thin icing spatula through the batters in an "s" formation so large air pockets will break-up into smaller ones. It will also break up any egg white clumps. The rest will dissolve into the batter. DO NOT bang the pans on the countertop because this eliminates air from the batter, which you don't want to do!
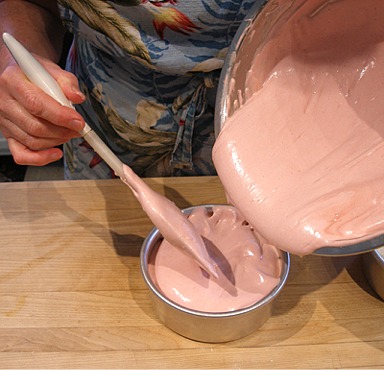

Gently smooth the tops with a rubber spatula. Clean off the extra batter on the sides of the pans with a wet paper towel.
Immediately place them in the middle shelf in a well-preheated 350 degree F oven.


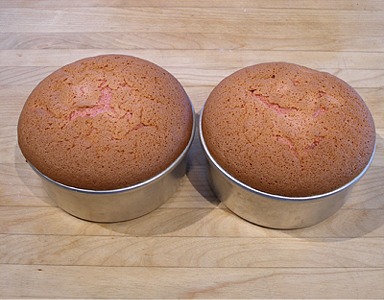
B. Bake the cakes for 25 to 30 minutes or until the cakes are a deep golden brown on top and spring back when touched lightly with the open palm of your hand.
NOTE: The cakes will rise up above the tops of the pan and settle down a little as the cakes cool.
Bake the cupcakes:
1. Fill the prepared cupcake pan with the rest of the batter. You should have enough left for 10-11 cupcakes. Fill the cups 3/4 full.
Place the filled cupcake tins in the refrigerator and bake as soon as the cakes come from the oven.

2. If you have any unfilled sections of the pan, place 2 tablespoons of water in them, so the pan doesn't warp.
Place the filled cupcake tins in the oven. Bake the cupcakes for 15-18 minutes.

3. Remove pan from the oven and let sit on a wire cake rack for 10 minutes. Remove cupcakes to cool on the wire cake rack.
4.
 Continue with the Cherry Pink Chiffon Cupcake Decorating Tutorial
STEP II: PREPARE THE PINK ALMOND WHIPPED CREAM FROSTING
While the cakes and cupcakes are cooling, make the stabilized whipped cream frosting and filling.
PINK ALMOND WHIPPED CREAM FROSTING / recipe alone
Makes about 4 cups - enough for filling and frosting two 5-x 2-inch layers
INGREDIENTS
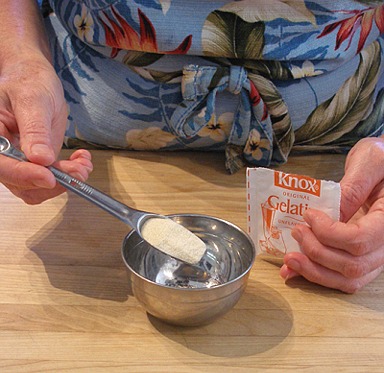
Gelatin:
3 tablespoons cold water.
1 1/2 teaspoon unflavored gelatin
Whipped Cream:
2 cups (1 pint) chilled whipping cream
1 1/2 teaspoon vanilla extract
1/4 teaspoon almond extract
3 to 4 drops deep pink gel food coloring, Americolor
4 tablespoons sugar
Filling:
1/4 cup whole fruit cherry preserves, warmed in the microwave, then cooled to room temperature
INSTRUCTIONS
1. Prepare the gelatin:
A. Place the dry gelatin in a small bowl. Pour cold water over it. Let soak for 5 minutes.

B. Dissolve by placing it in a container over a small pot of simmering water. Set aside to let cool.
NOTE: Alternatively, you may dissolve the gelatin by heating it for 20 seconds in the microwave, under low power. Do not let it overheat. Let cool.
2. Prepare the whipped cream:
A. Place the empty bowl in the freezer to quickly chill.
Using an electric mixer, fitted with a whisk attachment, beat cream on high speed in its pre-chilled mixer bowl.

B. Just before it becomes soft and billowy, slowly add the sugar and vanilla and almond extracts to the whipped cream at the sides of the bowl.
Continue to whip on high as you do.


C. Whip the cream until it barely starts to stiffen. Stop the mixer.
D. Add melted and cooled gelatin to the cream mixture.
KELLY SAYS: I find there is less tendency for the cooled gelatin to for blobs in the finished whipped cream using my method:
1. First, take about 2 tablespoons of the cream from the mixer bowl.
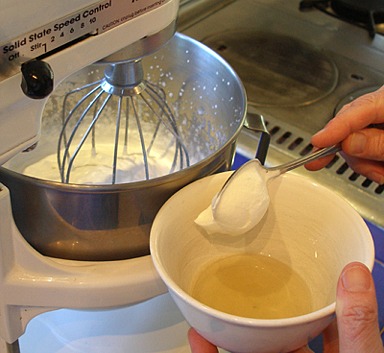
2. Stir it into the cooled gelatin.
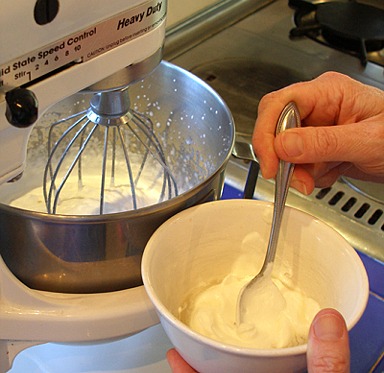
3. Return the cream/ gelatin mixture back into the main mixing bowl:
Turn the mixer on to high. with the rest of the semi-whipped cream.
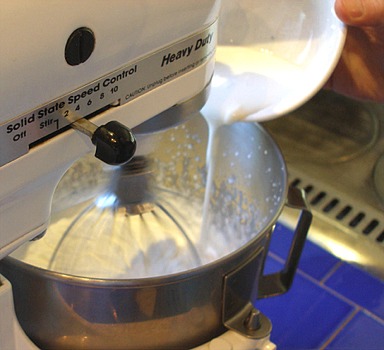
E. Then add pink food coloring. First, stop the mixer. You can add as little, or as much as you like, but pastels work best.
F. Continue to whip the cream on high until soft peaks form. Stop the mixer.
3. Prepare the Whipped Cream Cherry Filling and the Whipped Cream Frosting:
A. Whipped Cream Cherry Filling: Remove 1/4 of the whipped cream and add 1/4 cup cooled cherry preserves. Fold to combine.

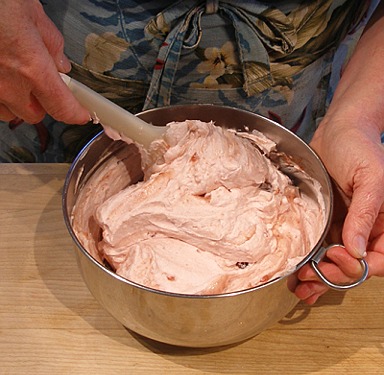
B. The remaining 3/4 whipped cream will be used as the cake's Whipped Cream Frosting.
C. Cover and refrigerate both while you make the chocolate drizzle for the cake.
STEP III: ASSEMBLE THE CAKE
Fill and frost the cake:
1. To assemble torte each each cake layer into two even layers.


2. Place strips of waxed paper around the ege of your serving plate and place one layer, cut side down, in the center of the plate.
Place about 1 cup of stabilized whipped cream in a pastry bag with a large open tip and pipe a dam around the edge of the layer.

3. Spoon about 1/3 of a cup of the filling in the center of the layer and spread it to the dam with a small off-set spatula.

4. Add the second layer and continue with the same pattern, pipe a dam and fill the center with the cherry filling.


5. When you are finished stacking the layers, measure a wooden skewer and cut it to about 1/4-inch smaller than the height of the cake.
Push skewer through the cake to help stabilize the layers as you ice the outside of the cake.


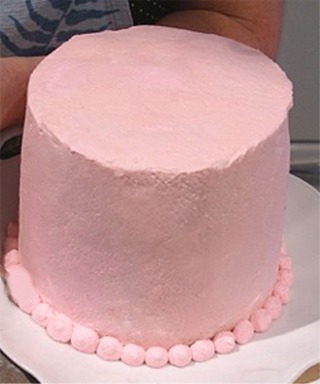
6. Ice the cake, trying to smooth the whipped cream as well as you can. Using a turntable and a large offset spatula will be a tremendous help.

7. When the icing is smooth, place some of the whipped cream in a pastry bag with a small round tip. Pipe a pearl border around the bottom of the cake.

8. Place cake in the refrigerator for one hour to chill. Do not cover until storing for long term. While the cake chills, make the chocolate glaze.
STORAGE
The frosted and filled cake can be stored in the refrigerator for 1 to 2 days before glazing. The whipped cream does not freeze well.
STEP IV: MAKE THE CHOCOLATE CAKE GLAZE
Makes enough for two 5-x 2-inch layers plus 10-11 cupcakes
Use for the mini-cake and save remainder for Cherry Pink Chiffon Cupcake Decorating Tutorial
CHOCOLATE CAKE GLAZE / Recipe alone
Makes 12 to 14 servings
INGREDIENTS
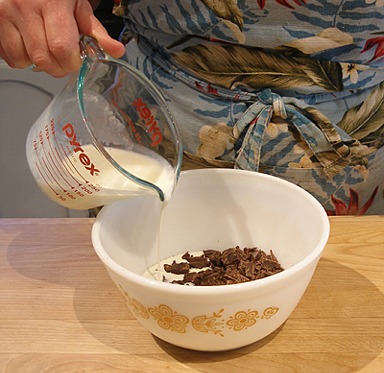
4 ounces high quality semi sweet chocolate, chopped into evenly sized 1/4-inch pieces
1/2 cup heavy whipping cream, heat until just boiling
1/4 cup Lyle's Golden Syrup*
2 teaspoons vanilla extract
SARAH SAYS: *Lyle’s Golden Syrup, made by Tate & Lyle, is pure cane sugar syrup with a mild caramel flavor. It is widely available in grocery stores. Substitute
with light corn syrup if you cannot locate.
INSTRUCTIONS
1. Pour steaming hot (not boiling) cream over chopped chocolate and stir until melted.
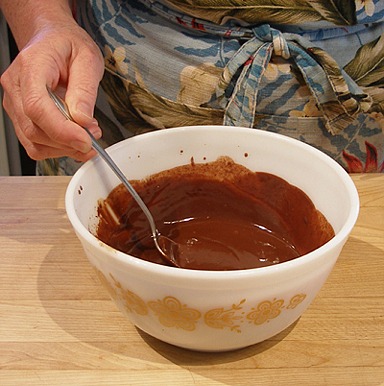
2. Add the syrup and vanilla. Then, combine.


3. Pour into measuring cup with pouring spout. Press a piece of plastic wrap on its surface.
4. Set aside and let cool for about 20 minutes. This also allows it to thicken to a pouring consistency.
STORAGE
Store in refrigerator for a week.
STEP V: GLAZE CHILLED CAKE AND SERVE
1. Before glazing the frosted cake, after the Chocolate Glaze has had a chance to cool for 20 minutes, give it another stir.
Test the glaze by lifting the spoon slowly from the glaze. It should drizzle from the spoon like slightly thickened honey. If it runs too quickly, it may need 5 to 10 more minutes cooling time.
NOTE: If the glaze doesn’t flow easily, add an extra tablespoon or two of Lyle’s Golden Syrup and combine completely, stirring in one direction with a large spoon. Take care not to add air bubbles.
2. When the Chocolate Glaze has cooled to a perfect flowing consistency, remove the chilled frosted cake from the refrigerator.
NOTE: To pour the glaze on the cake, the secret to success is to the cake should actually be cooler than the chocolate because it helps keep the
chocolate from running down the sides too quickly.
4. Start in the center of the cake and pour the glaze SLOWLY.
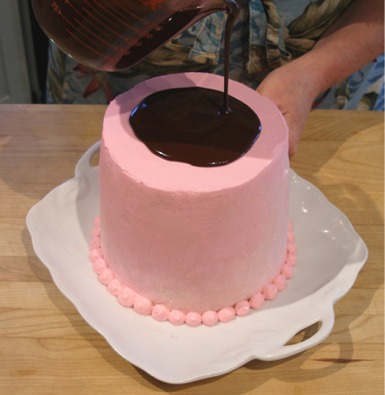
The glaze will move towards the edges of the cake and start to drip over and down the sides.
Stop pouring when it does.
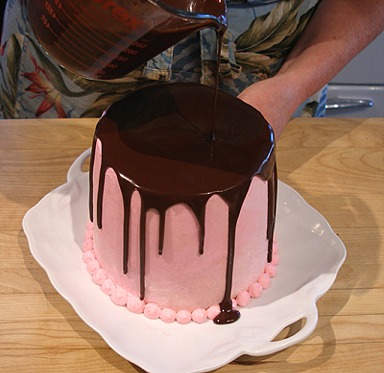
If you see an area of the cake with no drizzle, pour a little more on the top of the cake near that side.
Do not pour too much, or you will have a mess on your hands.
5. Place the uncovered cake back into the refrigerator to allow the chocolate glaze to set. It takes about 10 - 30 minutes or so, depending how thick the glaze has been poured.
SERVE
Just before serving, add a dramatic fondant flower, such as our Fondant Fantasy Flower, or the decoration of your choice.
To serve, slice with a thin, sharp knife, wiping the blade clean between slices.
STORAGE
The cake's whipped cream frosting and filling are perishable and must remain refrigerated. The cake will keep for about 2 to 3 days.
Other Recipes

Healthy Oven Do It Your Own Way Muffins
17943 views| 68 comments

Cherry Bonbon Cookies
8405 views| 2 comments

Pumpkin Pie for a Crowd
28427 views| 6 comments
My Recipe Tools
Explore How-Tos

How to Proof Yeast
Active dry or fresh yeast can be proofed for use in bread recipes. This is not to be confused... Read More

Cakes - Decorate with Fruit Heart Topper
Fruit is so beautiful and is used to decorate cakes with. We show you how to create a fruit heart... Read More

Vanilla Bean - Extract Seeds Technique
The deepest vanilla flavor is found in the thousands of tiny "caviar" seeds, scraped from the dark,... Read More

How to Use a Piping Bag or Pastry Bag
What is a Piping Bag? A pastry bag (or piping bag) is an often cone- or triangular-shaped,... Read More
Newest Recipes View All

Priscilla’s Fudge Sauce
INGREDIENTS 4 tablespoons unsalted butter 4 ounces bittersweet chocolate, chopped 1 cup sugar 1/2... Read More

Candied Spiced Pink Grapefruit Peels
INGREDIENTS 2 large pink or red grapefruits, preferably organic 1 cup granulated sugar, plus... Read More

Vanilla scented biscuit roulade
About Us

Hi, I'm Sarah Phillips Sarah Phillips, CEO and founder of craftybaking.com, has over 25 years of extensive professional real time baking experience. READ MORE

Hi, I'm Kelly Hong Contributing Editor, Food Stylist and photographer, since 2007. I have been working as a professional ceramic artist for over 25 years. READ MORE